Toybox Redoux
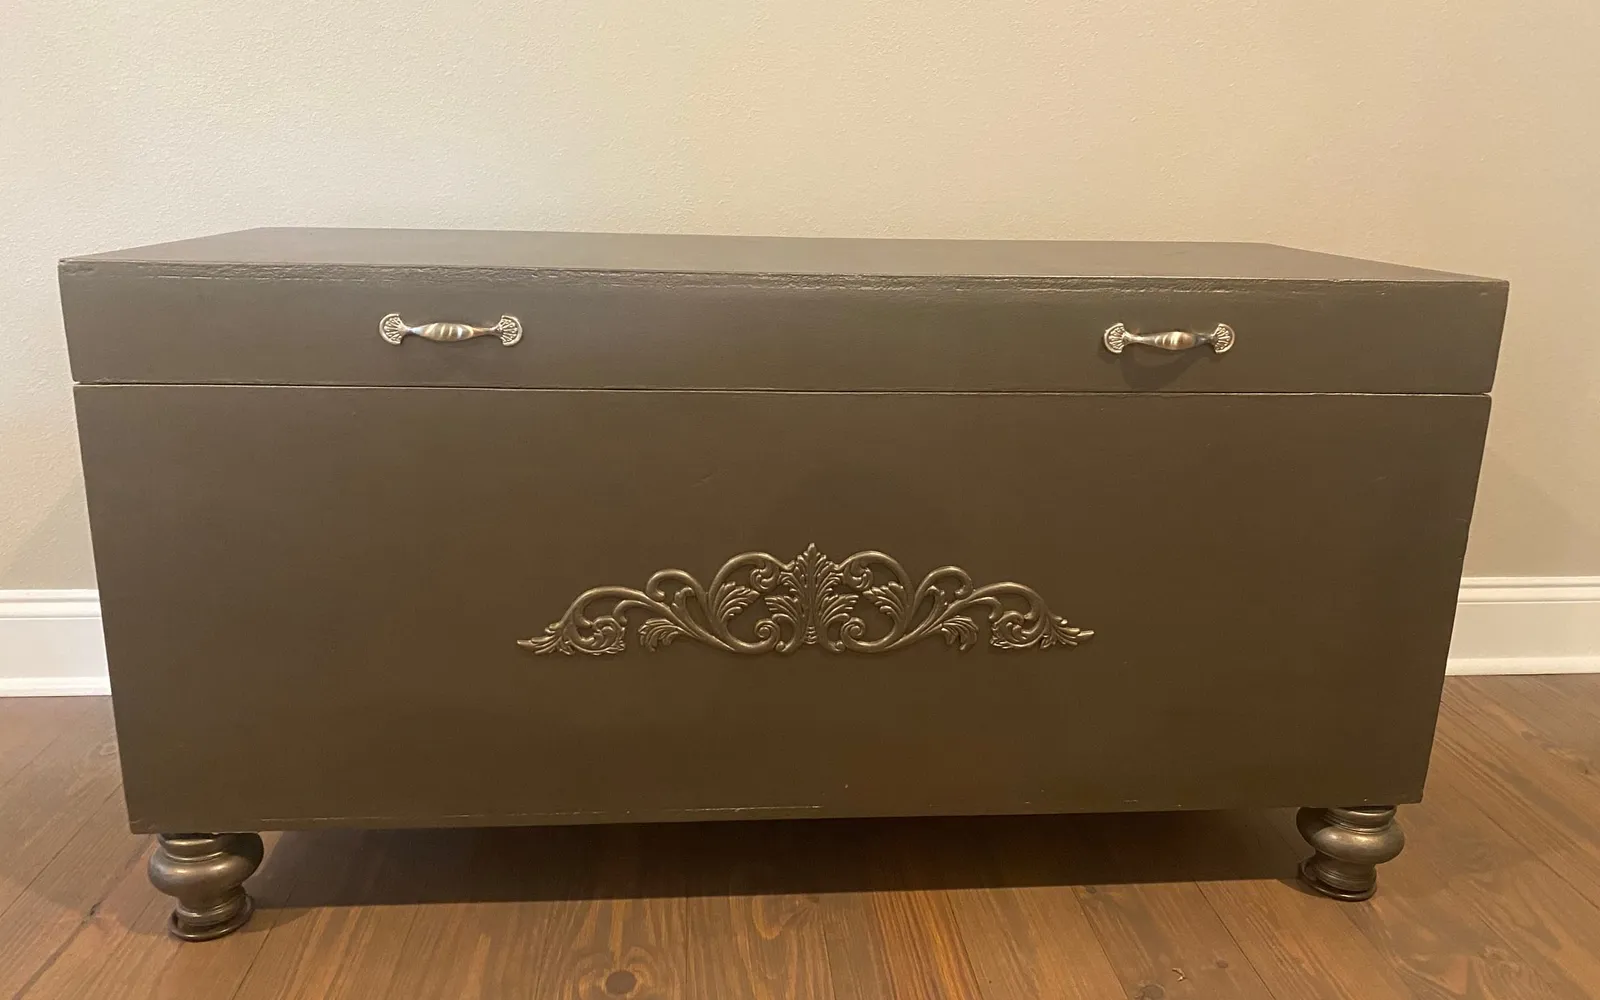
The toybox my dad built when I was five becomes an elevated metallic bench with turned legs, an applique, and fan-shaped pulls. Every step, product, and lesson learned.
I love furniture in general and find it hard to part with anything, especially if it’s real wood. I also enjoy refinishing furniture, bringing it to a new life or possibly a new purpose. While I have done several different projects over the years, this particular one is near and dear to my heart. It started as my childhood toybox, but that’s not the part that makes it so special. My dad built it for me and I remember him working on it in our garage. I would have been about 5 years old. When I was young, the completed toybox seemed enormous, but as an adult it is a good size, not overly bulky or too big for a lot of spaces.
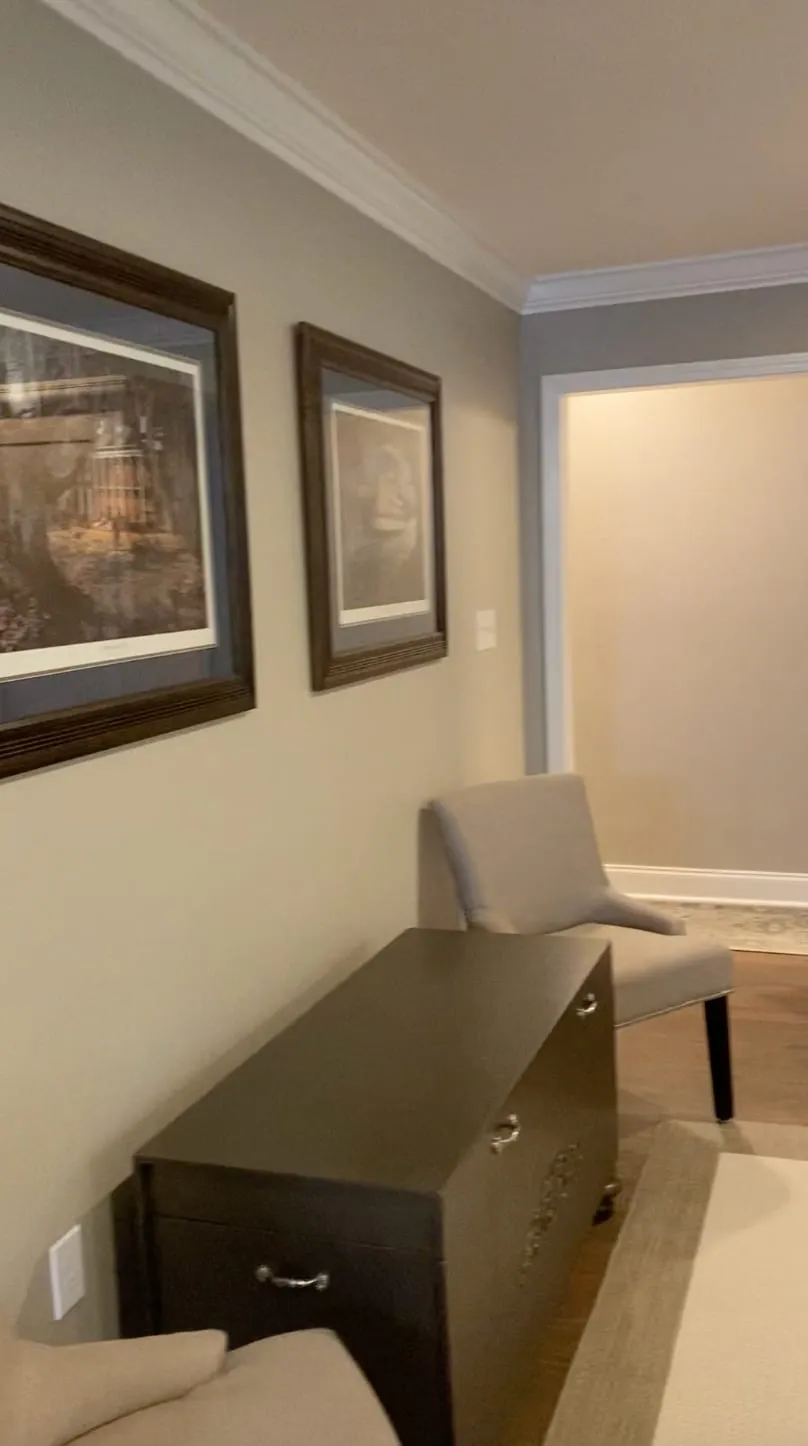
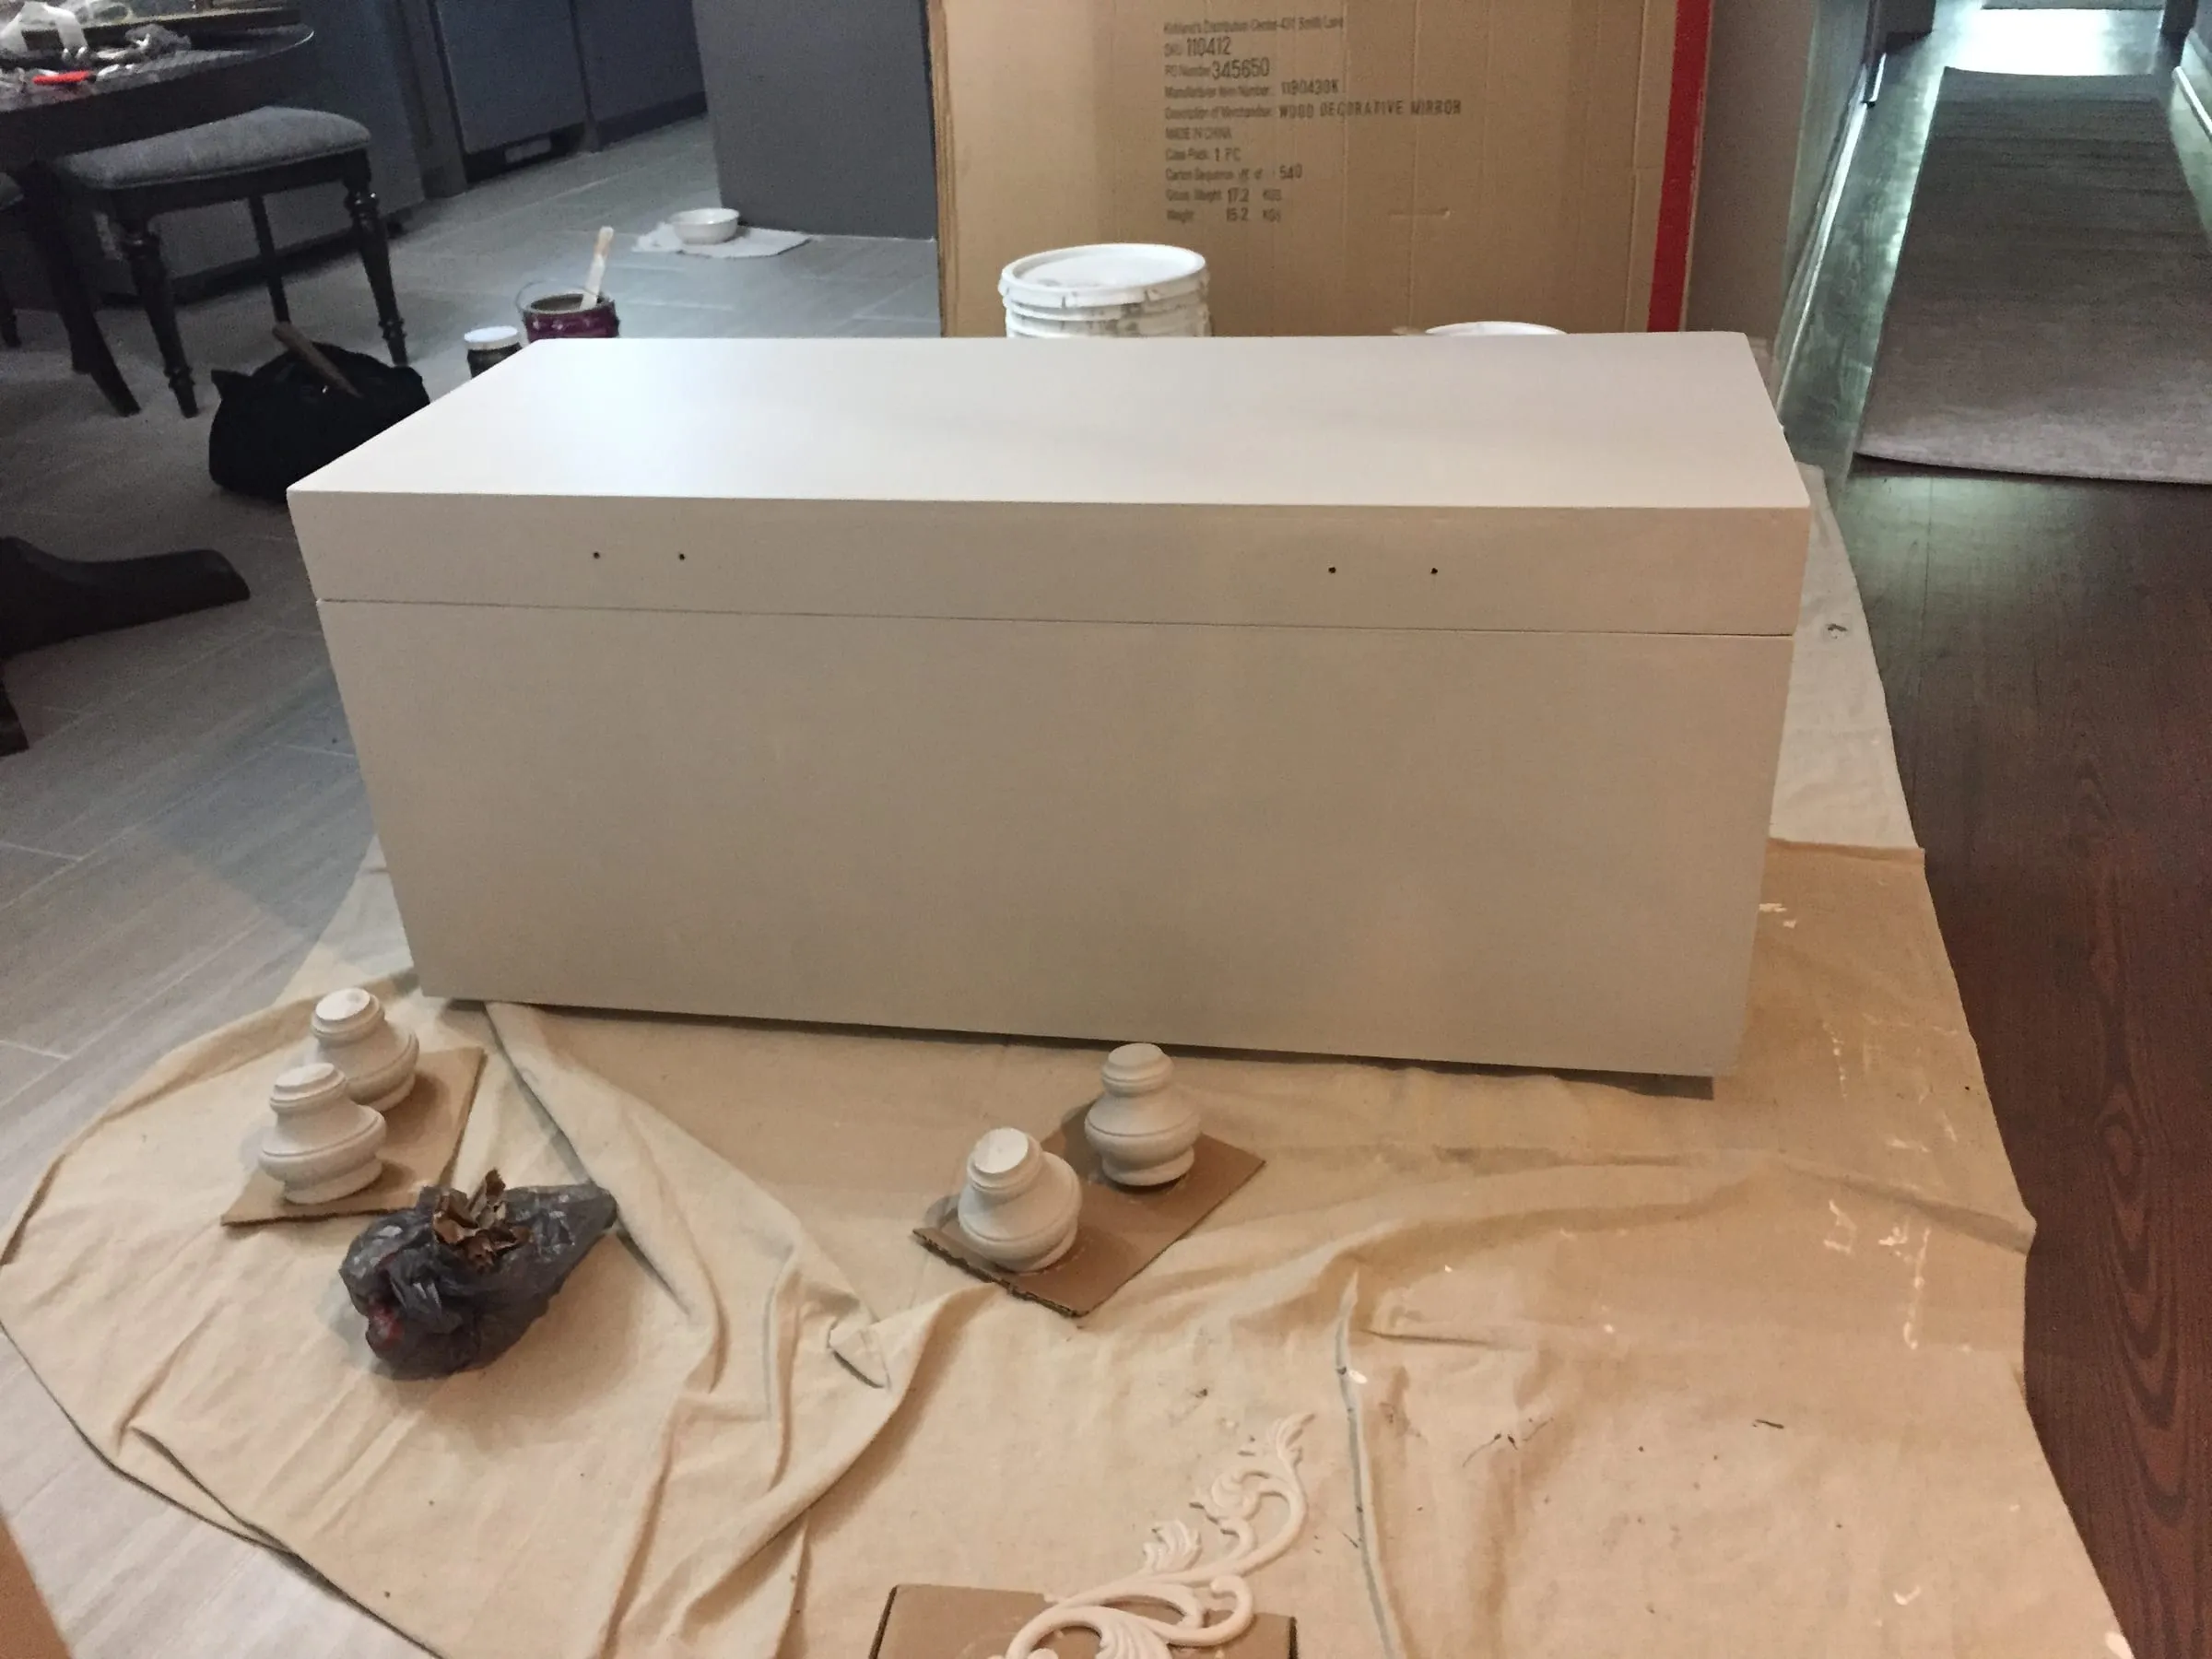
When I finally had a home of my own, I brought almost all the pieces I’d collected over the years. The toybox was basically a white box and had one major imperfection. There was a thick cut on part of the top. I’m not sure what my dad was cutting but at some point, he used the top as a work bench and gouged a long cut along the top of the lid. The paint was beat up from years of use and I had a couple of Hello Kitty stamps on it as well. It definitely needed some work to be a showpiece. Initially, I didn’t have a specific spot for it picked out but as the house began to come together, I decided to place it in the back of my living room against the stair wall. This area was currently empty and needed something to fill the space. The toybox by itself was not enough to complete the look, so to balance it I chose to place two country French chairs on either side.
The Design Revelation
I settled on a complete makeover, starting with elevating it off the ground by adding turned legs. As my idea began to take shape, an applique in the center of the front added some interest. The piece was heavy and hard to move since it was just a big rectangular box. Opening the top was also difficult to maneuver as it had no handles and no stopping point. To make it easier to move around, I decided to attach two handles, one to each side of the base. To solve the problem with the top and improve its functionality, two additional handles would be installed on the front at opposite ends.
The Process
To start my project, I cleaned the entire toybox with a damp cloth to get any dirt and grime that had collected over the years. Fixing the long gouge was relatively easy using M&H Ready Patch, which is one of my favorite products when repairing gouges or even larger defects. Using a putty knife I filled the gouge completely, scraping the top to smooth it as much as possible and let it dry completely, which took longer than the normal due to the depth of the gouge. Patience is key!
Once it was dry, I used an orbital sander to lightly sand the interior and exterior of the entire toybox. The M&H Ready Patch smoothed out beautifully. My mouse sander allowed me get into the interior corners of the box and lid, but you could hand sand these if you don’t have a mouse or palm sander. Since I planned on painting this piece, I did not have to sand down to bare wood. Roughing up the surface just enough to give the new coats of paint something to adhere to was all that was required.
For most of my projects, I have help from my fiancé and best friend, who happens to be great with tools and design projects. Using the handles as a template, Jason marked the sides and front of the toybox where he would drill the holes. For the lid, the handles looked best I chose about 1/3 of the way off center. For the handles on the base of the box, we attached them just below the top of the base, centered from left to right. We also attached the corner brackets
Before applying a coat of primer, I used a shop vac to thoroughly clean up the dust, using care to get into all the grooves. I also wiped the entire piece again with a clean damp cloth, but you could use tack cloth as well. Using Zinser Bullseye primer, I applied one good coat over the entire piece with foam roller and paint brush. It could be possible to skip this step, but M&H ready patch needs a primer to prevent flashing. Alternatively, you could spray the entire piece if you have a paint sprayer.
The turned legs have a screw in the top of them. Using a paint brush, I painted the top of the leg as well. It may seem like this is not necessary, but a small part of it may be visible on the finished piece depending on how the bracket is mounted. I let this area dry for a short time.
Then I moved onto to paint the applique. I held the applique in one hand so that I could rotate it as needed to get in all the grooves. Once I was almost finished, I laid it down by straddling it on top of two quart sized cans of paint and completed the last part of it.
Turning my attention back to the turned legs, I turned them upside down and pushed the protruding part of the screw into a piece of cardboard, not letting the already painted area touch the cardboard. This kept the turned leg straight, making it easier to paint and allowed met to paint the bottom as well.
For this piece, I decided to use a metallic paint by Modern Masters in Smoke. I had used this color before when I refinished my mom’s bathroom cabinet and barn door. I had saved a picture from Houzz of a butler’s panty that was my original inspiration. I wanted to replicate that finish and since using metallic paint was new to me, I consulted with the salesman at Helm Paint. He helped me to settle on the color Smoke with a light grey base, which resulted in cool tone. You can see that project and details here. But, for the toybox I wanted to maintain the warmth of the metallic paint color.
I painted the toybox an eggshell basecoat of one of my favorite colors, Behr Perfect Taupe but 50% lighter. This happened to be same color of the walls of the living room where I planned to use the finished piece. Once that was dry, I began applying the Modern Masters Metallic Smoke paint with a foam roller. When I had used this paint in the past, it was on cabinet doors and I applied it in a strie method. I struggled applying the paint without lap marks and was not pleased with how it was turning out. I tried a different type of roller and was again not pleased. The paint dried very quickly and could not be touched up…any attempts made matters worse. Admitting defeat, I decided to pause the project until I could get some help from the pros at Helm. They suggested that I purchase Modern Masters Extender and recommended their brand of roller as well. I purchased both, anxious to complete my project.
I ended up not liking the Modern Masters roller on this project, where I wanted the finish to be smooth. For future projects, the roller is perfect for a textured or Venetian plaster effect. The Modern Masters Extender, which mixes into the paint, made a huge difference and allowed me to cover large areas before it dried, minimizing lap marks. Each Modern Masters metallic paint has a different opacity, which is displayed on the container. Some require two coats and others need three. The toybox required two coats to reach the opacity I wanted to achieve.
Once dry, I began my first application of the Modern Masters Clearcoat, again using a foam roller and paint brush in the corners. Dry time is 1-2 hours between coats. My standard when applying any kind of clear coat is three coats.
I allowed several extra days for the finish coats to dry before applying the corner brackets to attach the legs. We flipped the toybox on it’s back, resting it on a blanket to protect the finish. The bracket has 3 screws and attached easily to the base of the toybox. Then the turned legs simply screw into the bracket. Rotate the toybox to sit on the turned legs. We needed two of us to do this. If the leg height is uneven, you could adjust the legs slightly by turning them.
Jason hand nailed the applique with finish nails to reduce risk of damaging it. He says if your applique is wood, you could use an electric finish nailer, but ours required just a few nails so hand nailing wasn’t an issue.
All that was left was to install the hardware, which was the simplest of steps since the holes were already drilled. My mom had found a nice set of drawer pulls that were silver with a fan design. I screwed them in using a screwdriver.
The Result
Standing back to admire my work, I thought “What a transformation!” From a simple white toybox with all clean lines to an elevated bench with accents and a beautiful metallic finish. The piece was used for a few years in that home against the stair wall, just like I planned. It fit the space perfectly and provided a pretty backdrop for an area that would have sat empty.
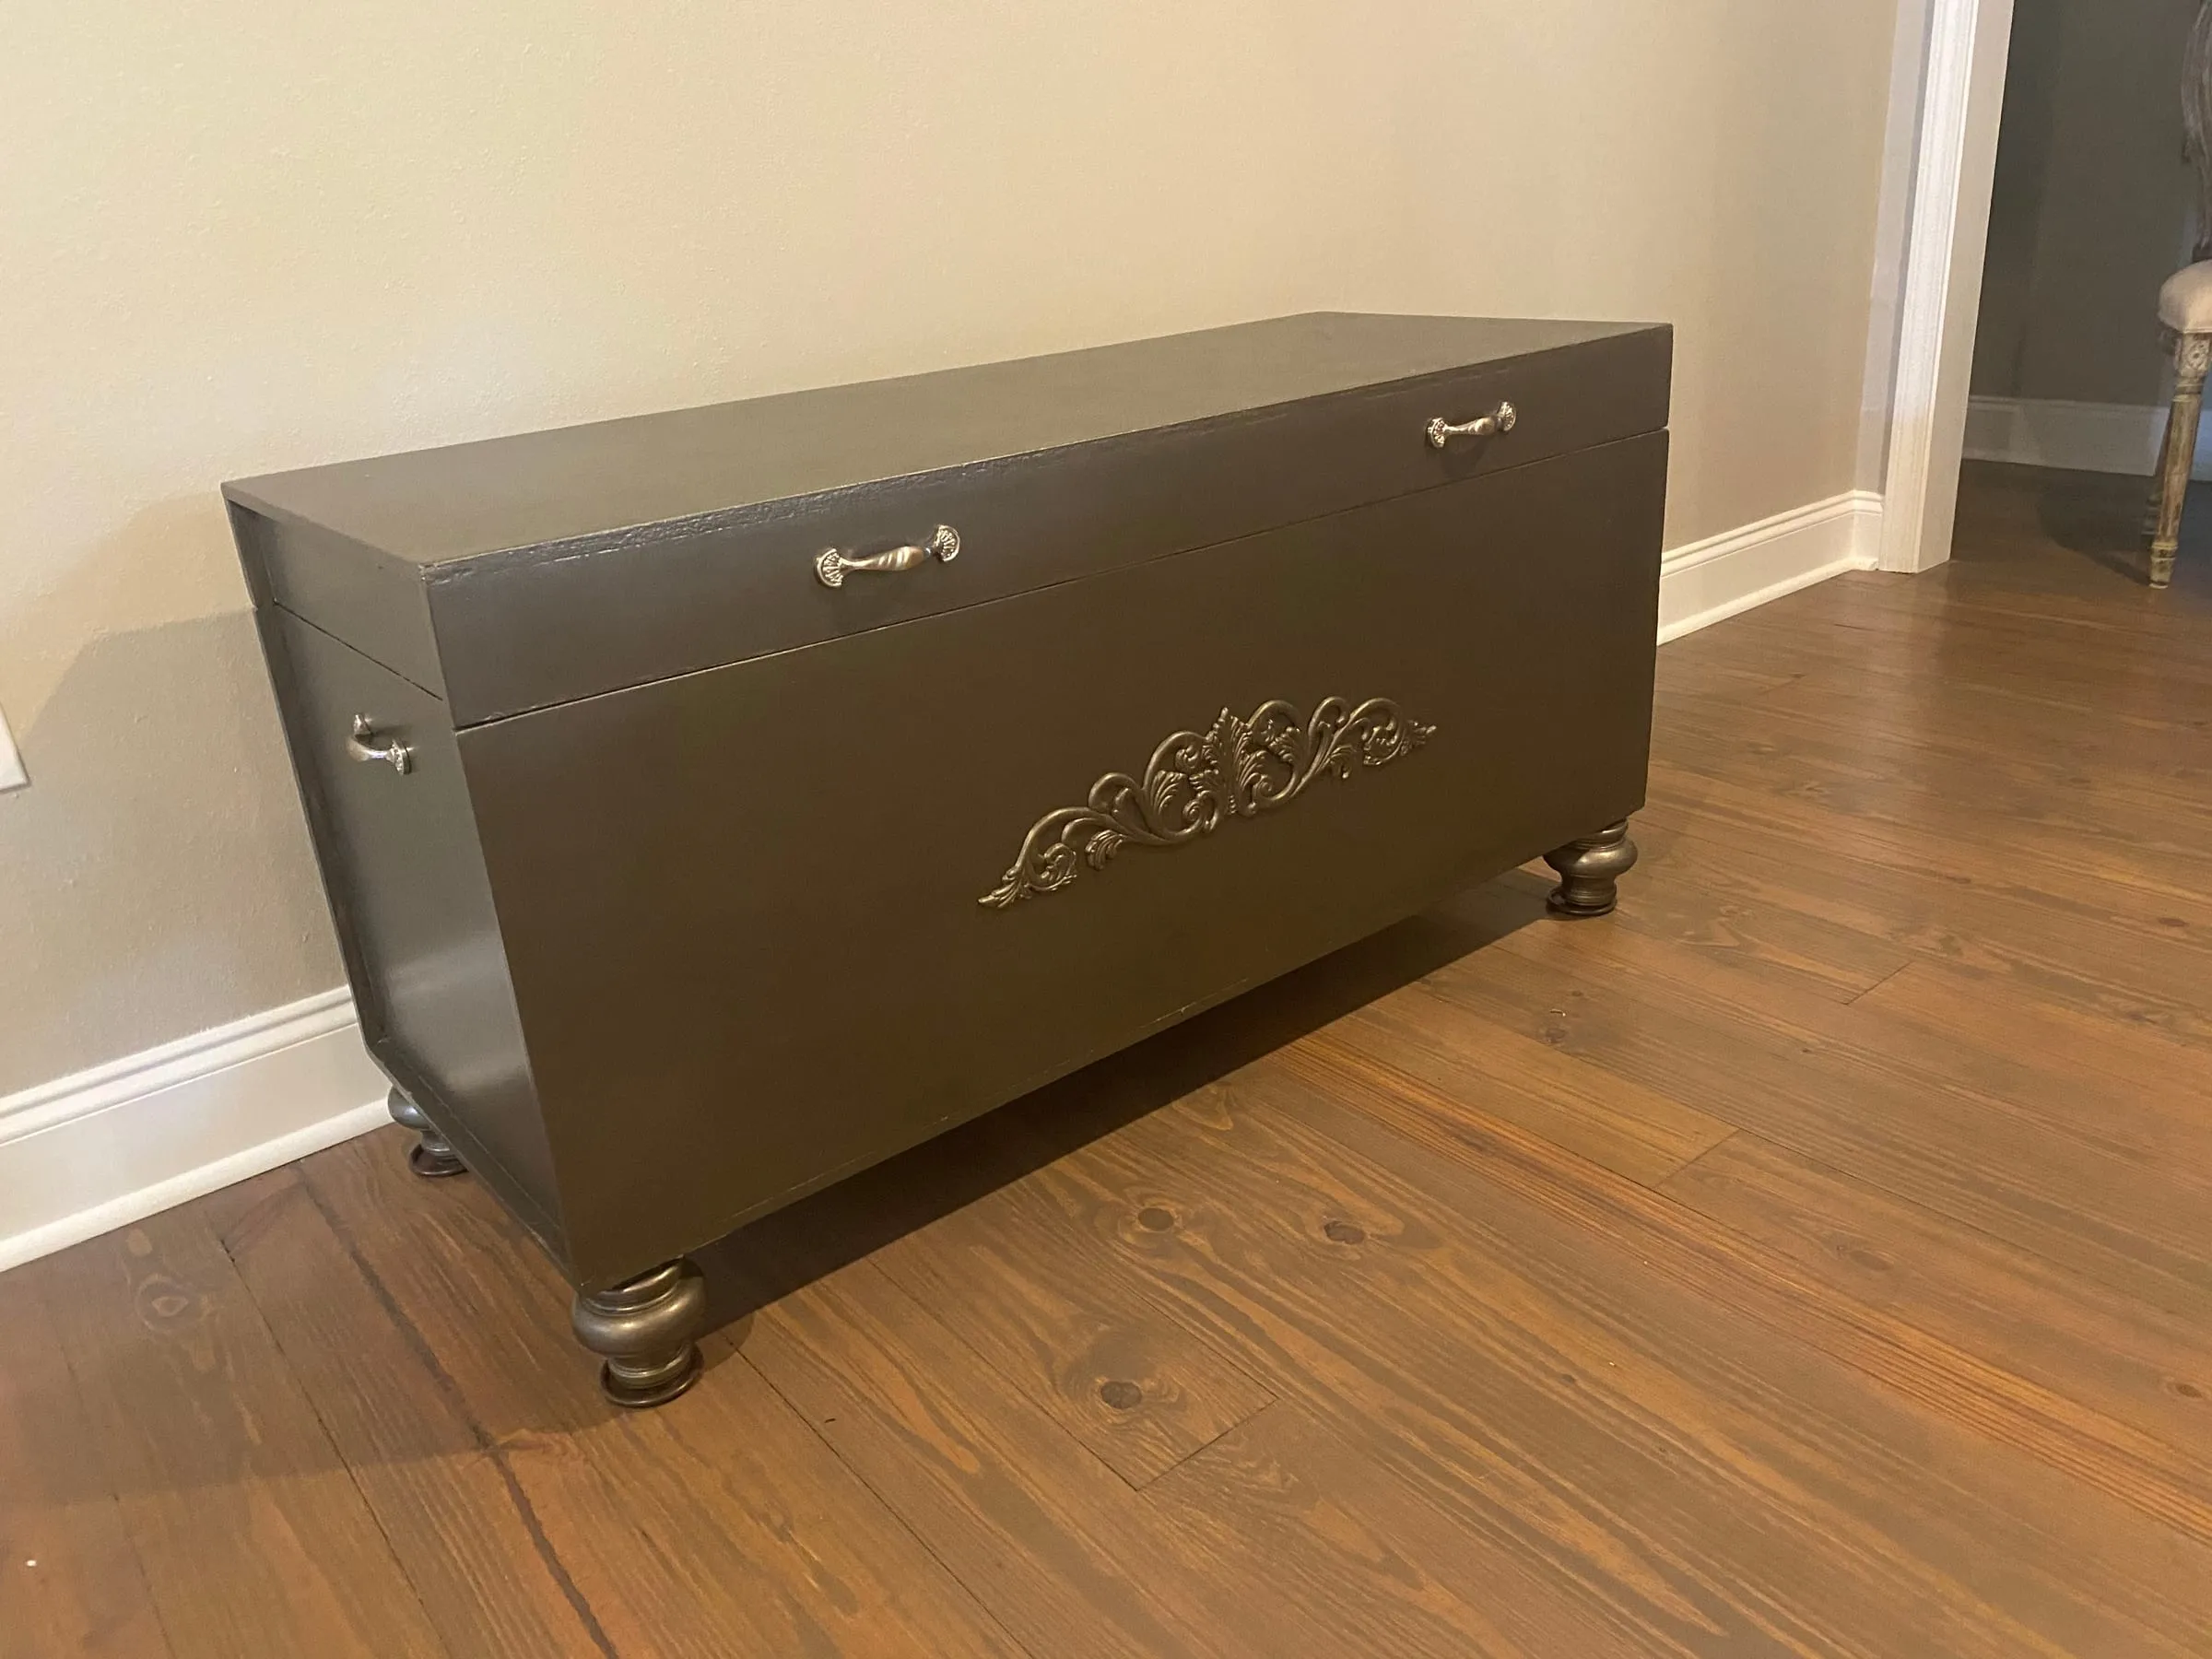
In our new home, it found it’s place in my mom’s room and is just in front of her bed. This project was so meaningful as I gave a new purpose to an old piece but most importantly, I think of my dad every time I walk by it.
If you’ve done a similar project or want to try this one, I’d love to see before and after photos!
To complete this project, you will need:
-
4-Turned Legs
-
4 corner brackets
-
Applique of choice
-
4 Drawer pulls
-
Damp Cloth
-
M&H Ready Patch
-
Putty Knife
-
Electric of battery operated orbital sander
-
Mouse sander
-
120 grit sandpaper for orbital and mouse sander
-
220 grit sandpaper
-
Zinser Bullseye Primer (optional)
-
Tack cloth (optional)
-
Foam rollers
-
Paintbrush
-
Shop Vac (optional)
-
Base Coat
-
Modern Masters Metallic Paint
-
Modern Masters Extender
-
Modern Masters Clearcoat
-
Finish Nails
-
Screwdriver