From Lackluster to Luxe: A Bathroom Remodel
How a dated 90s kids’ bath with pink carpet and bunny wallpaper became a luxe, marble-look retreat with a dumpster-find double vanity, crystal lighting, and beaded mirrors.
A bathroom remodel
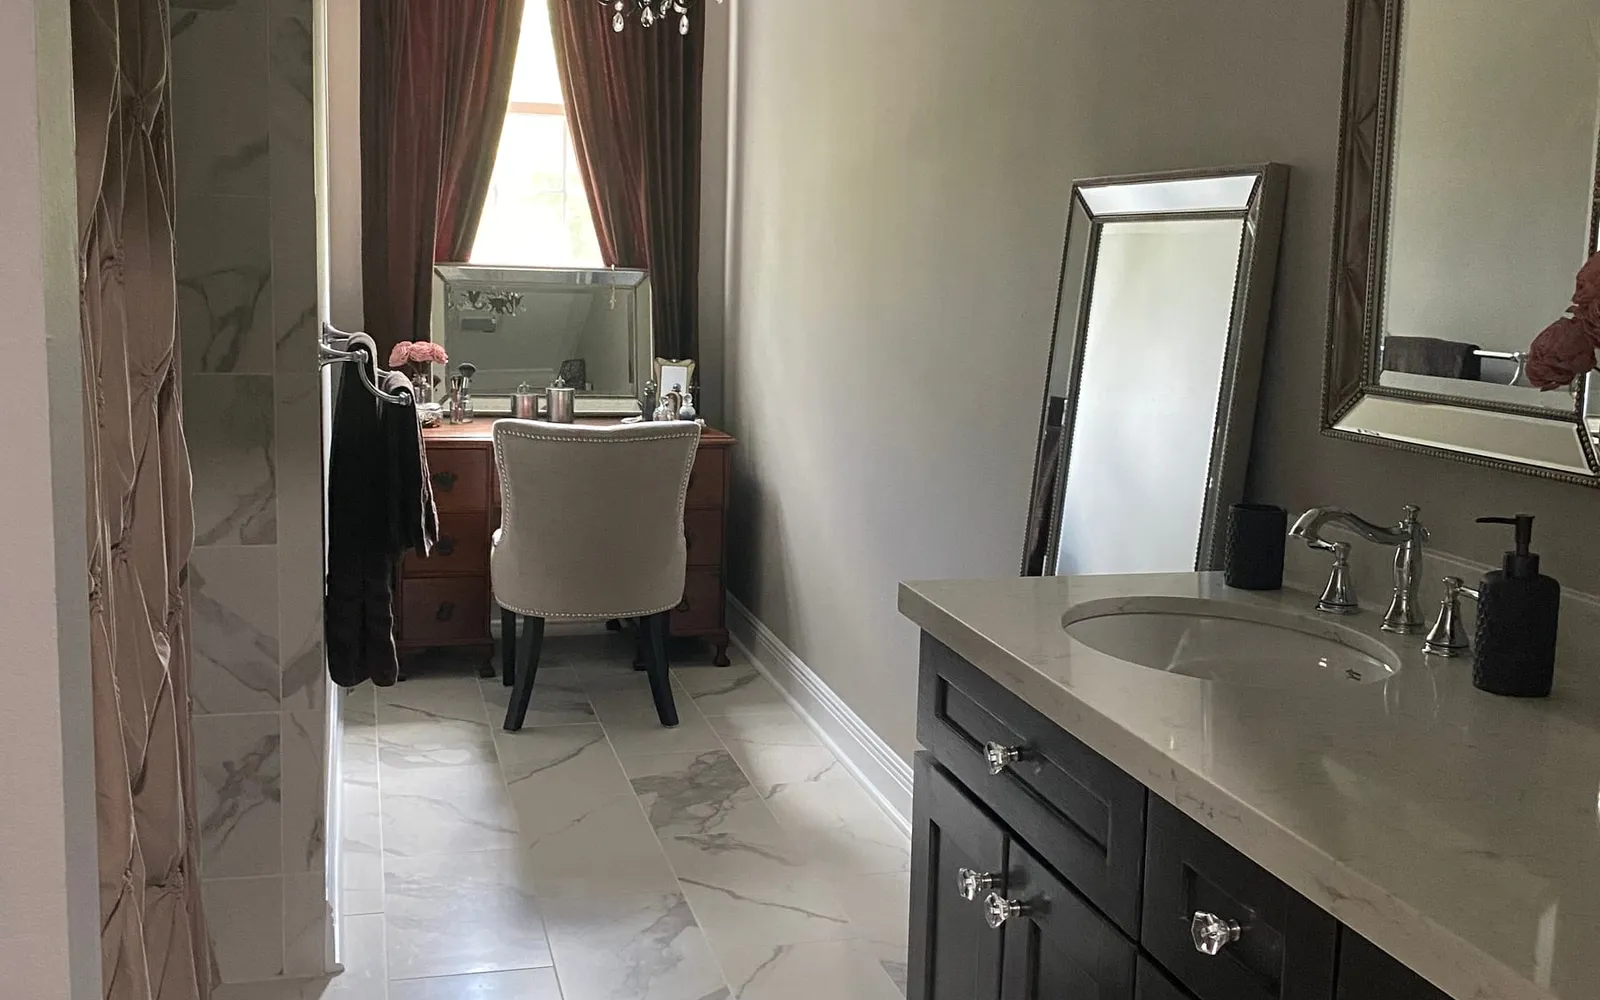
When I first saw this bathroom, my eyes were immediately drawn to the dormer window. It was the perfect spot for a dressing table to apply my makeup. Originally intended to be a bathroom for kids, it started out with pink carpet and wallpaper with hearts and bunnies. In fact, there were several rooms in the home with a variation of heart themed wallpaper. You have to love the early 90’s! The golden oak colored cabinets were topped with a 30 year old cultured marble cabinet and gold faucets and lighting fixtures. Everything was in pristine condition and had probably never, or at least very rarely, been used. To the frugal person that I am, replacing these things felt like a crime…but it was just so dated.
As the new owners of the home, our intention was to have my mom take the first floor suite, so this secondary bathroom now needed to function much more like a primary bath. And, I am certainly used to a little more luxury and storage than is typical in a hall bath. Luckily, the square footage of the room was larger than most and it wasn’t tight or constrictive. There was even extra room to add a longer vanity so that double sinks could be installed.
Demo Day
Demo began with removing the popcorn texture from the ceiling. Our electric drywall sander made short work of it with a minimum of dust and mess. If you don’t have one of these, I highly recommend one, though you need some good shoulder strength to use it. It has a long hose that attaches to a shop vac and eliminates the tedious work of manually scraping the texture from the ceiling.
The carpet was the next thing to go, then the toilet and tub, and finally the vanity and fixtures. With everything out of the way, I painstakingly started removing the wallpaper. This hurt my heart as I assumed the previous owner probably chose the hearts and bunny wallpaper because she expected to have children laughing and playing in the house. I know that she never did and often think it strange that Jason and I, a couple without kiddos, purchased this big, beautiful home on lush grounds, following in the original owners’ footsteps.
The wallpaper in this room did not come off easily…perhaps because it was used so little, there was never any steam to soften the glue. I tried using an electric steamer, the tool that pokes tiny holes in the wallpaper, spraying it with a mixture of fabric softener and warm water, to no avail. I was tearing up the surface of the sheetrock and decided enough was enough.
We opted to re-sheetrock most of the room. At some point after this process, the new tub was installed and progress was made with the cement board on the floors and walls of the tub/shower combo.
The Design Process
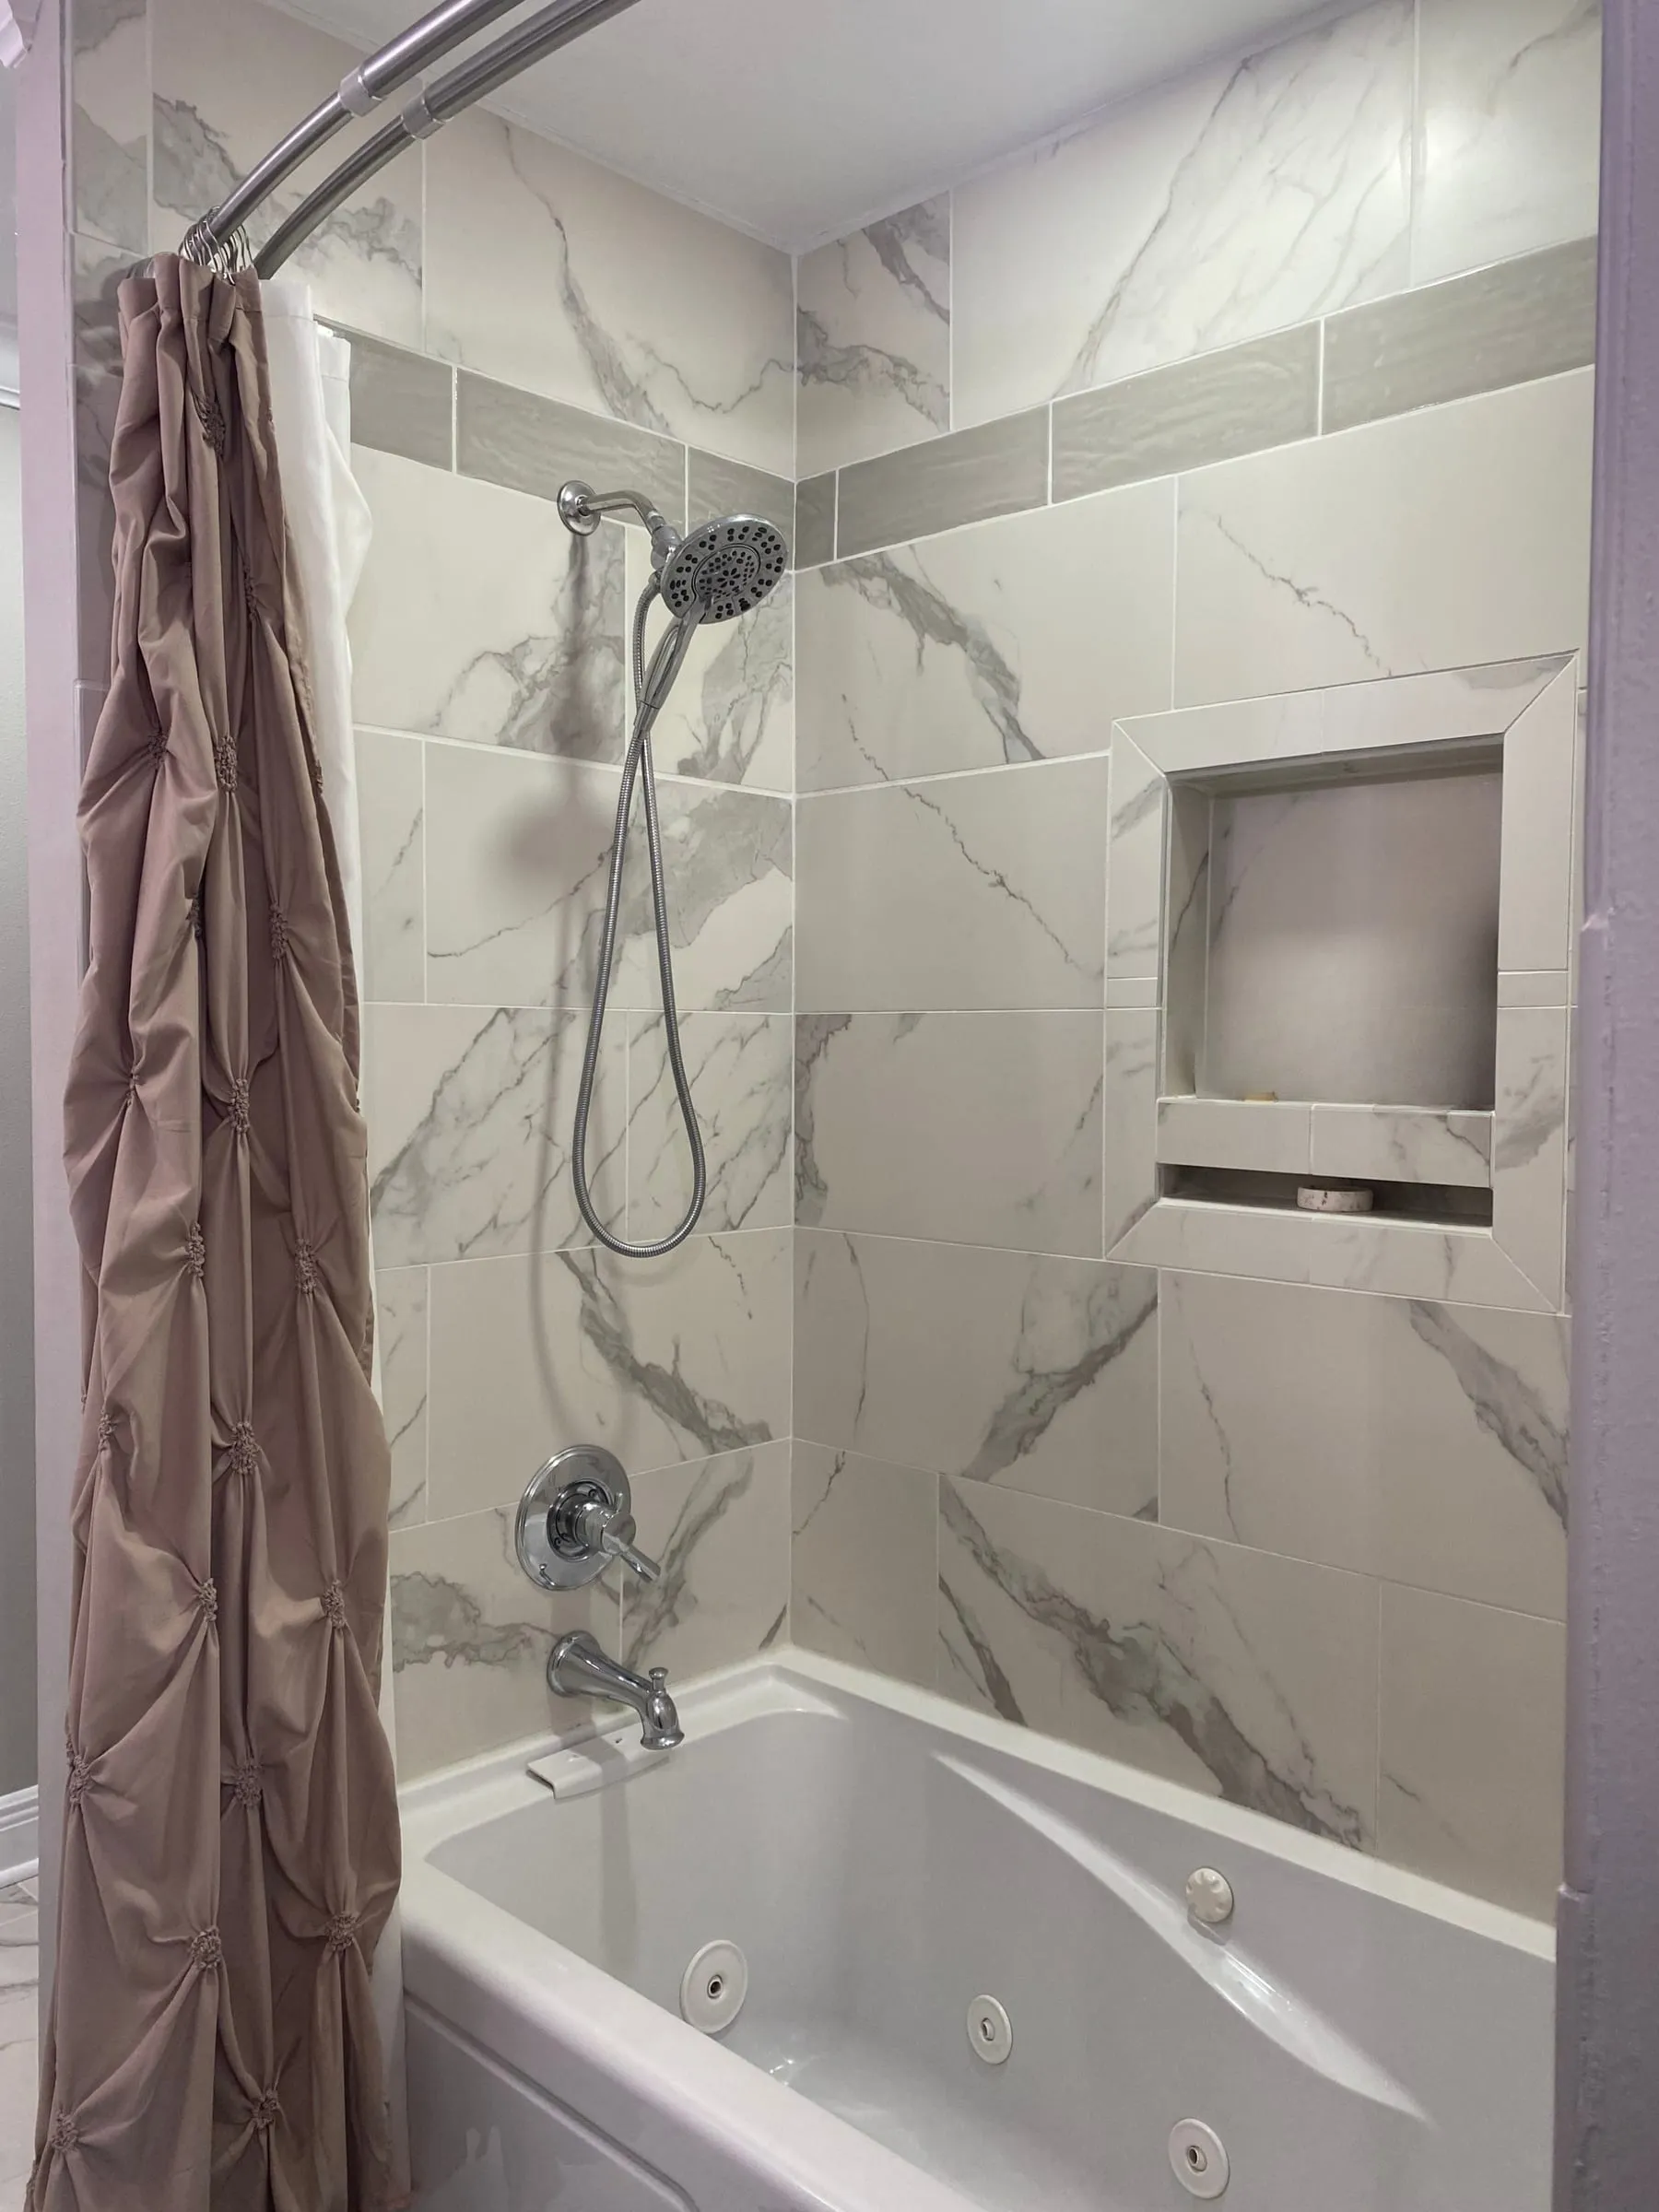
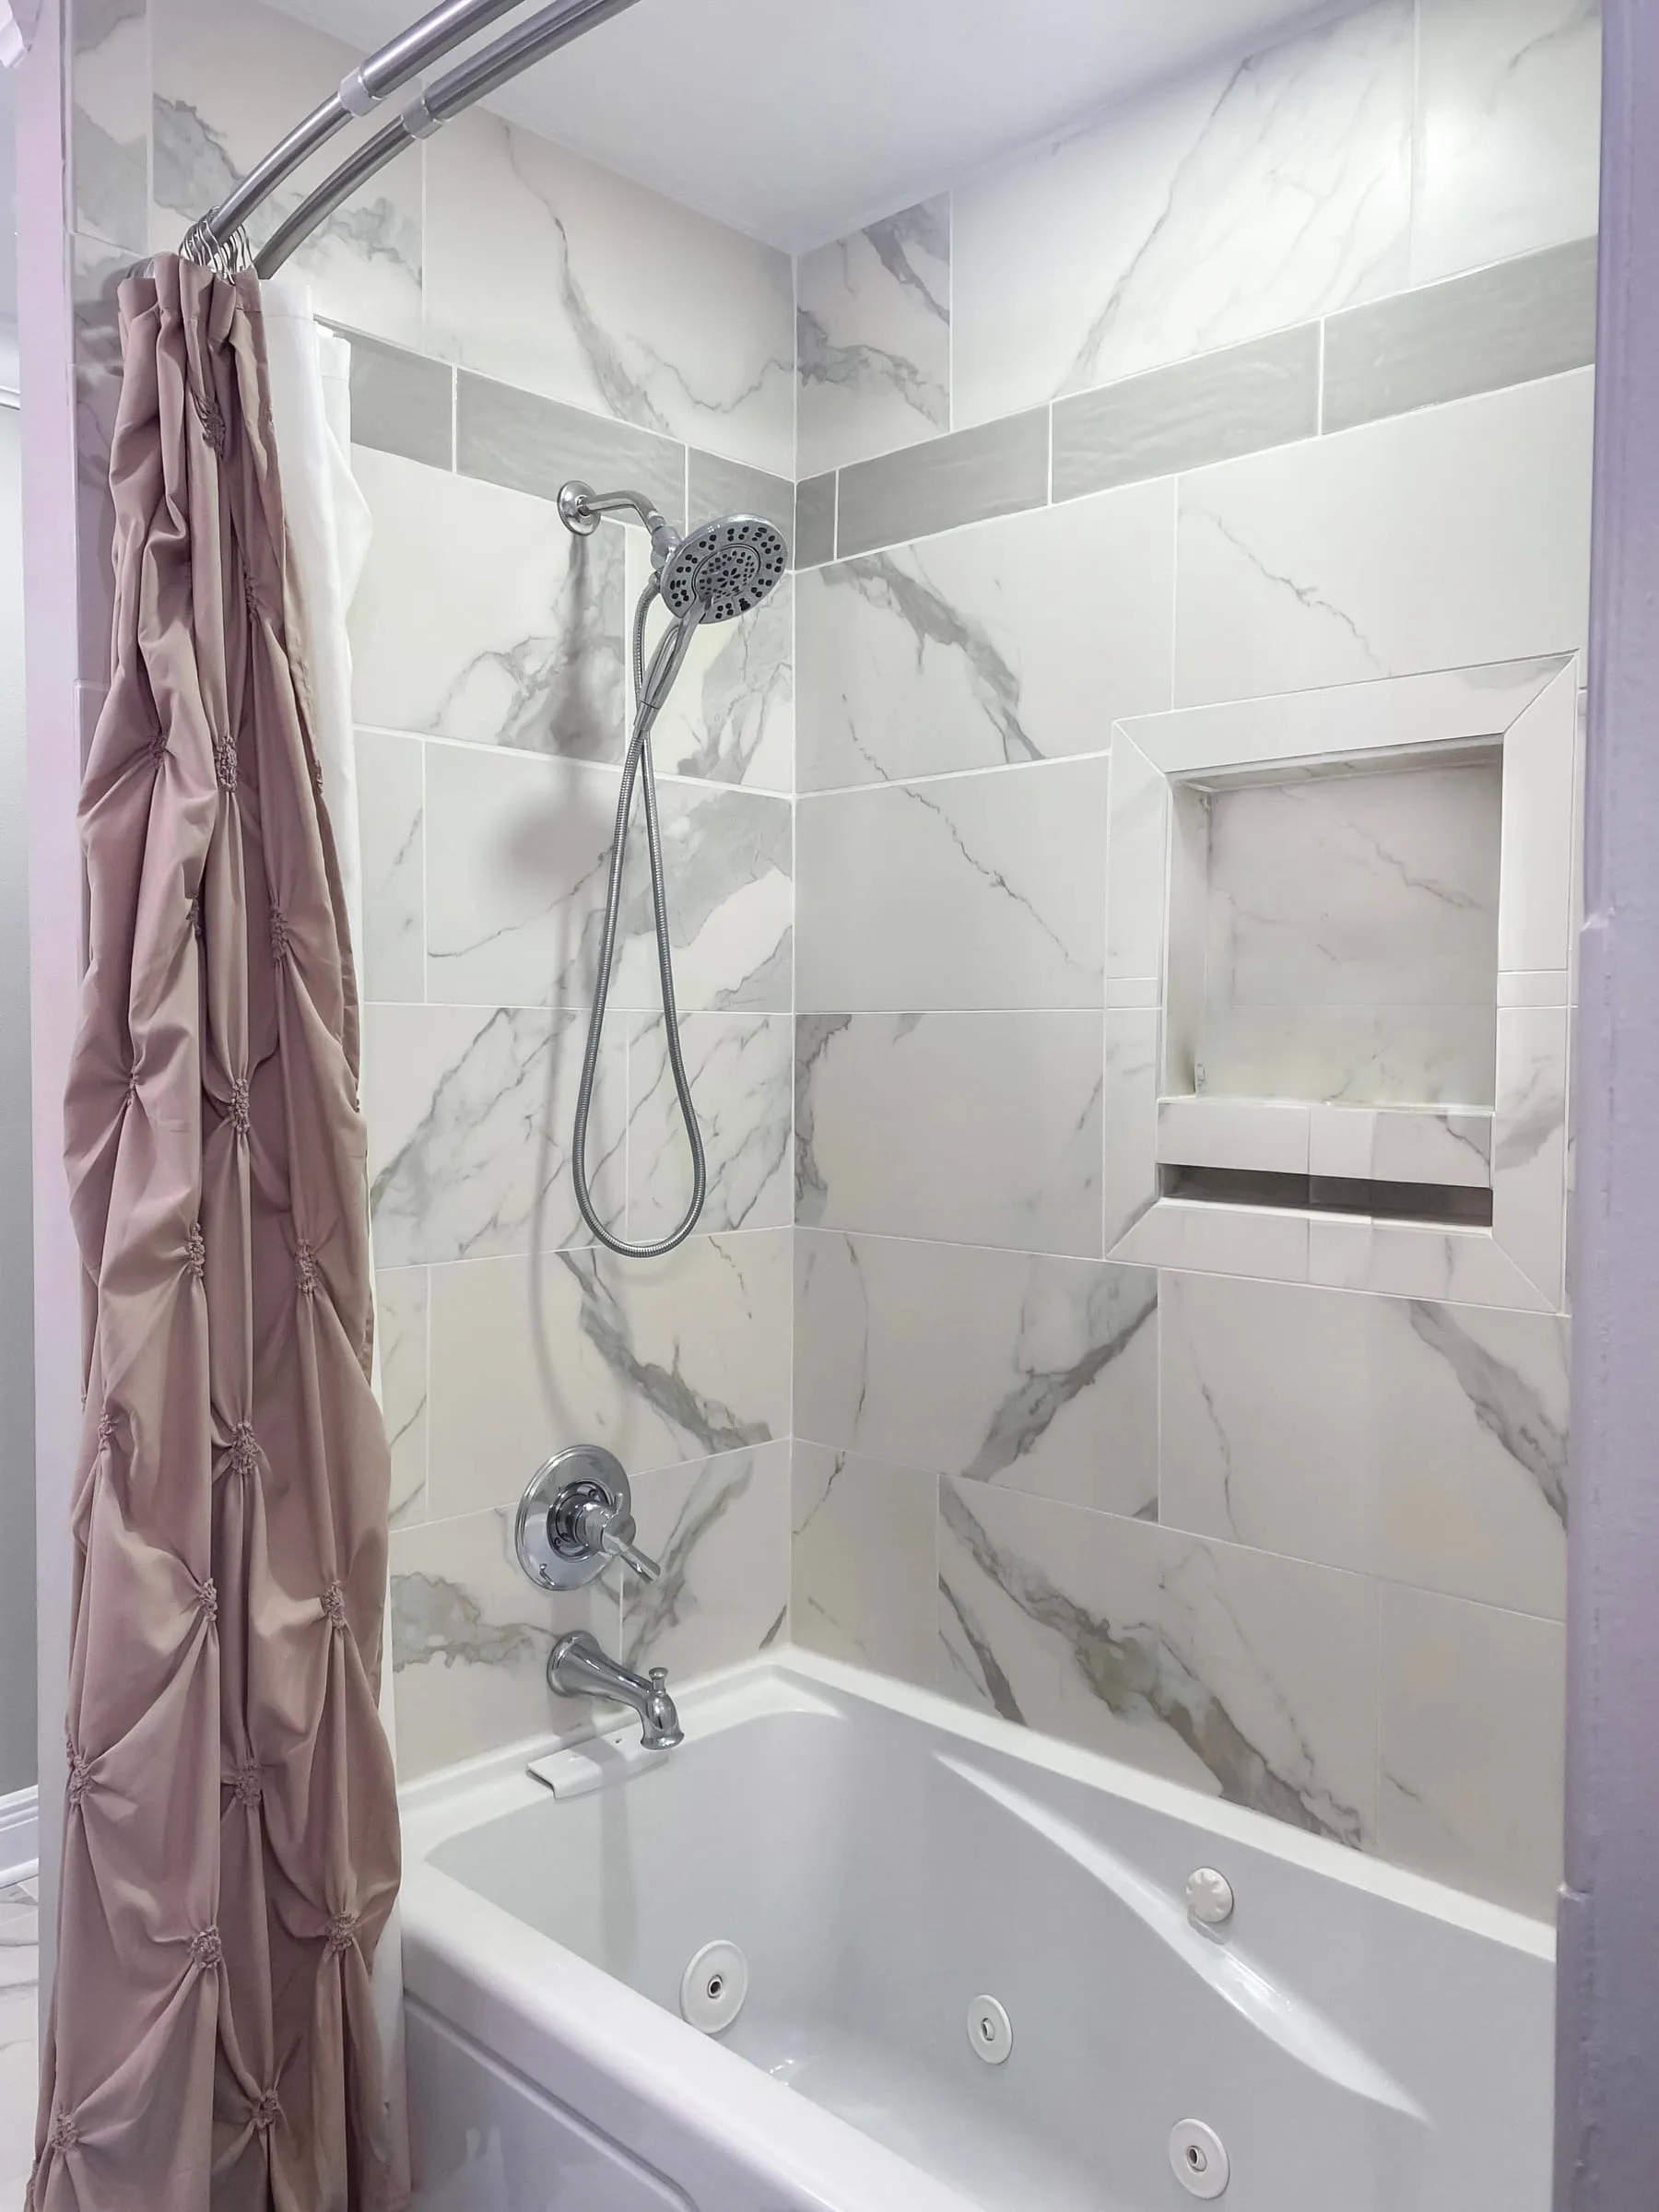
With a clean slate, I began putting together the design and color palette. I had originally pictured the room in a sophisticated taupe with marble floors and rich brown accents. I remember my mom saying, “Brown…really, brown?” Yes, a chocolatey, velvety brown. As luck would have it, I found a porcelain marble-look tile that is slightly off white with warm taupe veins with a hint of mauve. Not only was it gorgeous, but the price was also quite literally a steal!
A note here about marble. I absolutely love the look…but not necessarily the maintenance. Real marble, though it will withstand centuries, yellows over time, absorbs moisture, and can stain. In a household with three big dogs, I need materials that will hold up and I don’t ever plan on changing the design of this house in the future. So, I need the style to be timeless and classic. I’ve been ecstatic over the past decade with so many choices of marble look tile in a more durable, life-friendly porcelain.
Since it’s a tub/shower combo, the walls would be tiled using the same 12x24 tiles on the floor and accented with a subway tile about 18 inches from the ceiling. I do this in most of the showers I’ve designed. With a little searching, I found the perfect tile to blend seamlessly with marble-look tile. The color is a beautiful taupe with just the right amount of sheen and a subtle texture that adds some interest. As for the grout color, I knew that all my fixtures would be white, so I chose a grout that would tie all of it together. In retrospect, it’s definitely hard to keep clean, despite sealing it, but I prefer grout colors that blend with the tile rather than define each tile.
With the tile choices wrapped up, I directed my attention to the countertops. When I choose finishes for a room, I make it a priority to find the right countertop either first or second. I’m not an expert by any means, but I feel like there are thousands of paint colors and dozens of floors to choose from to find just the right shade.
Countertops, whether it’s granite, marble, or quartz, are different and the choices can be limited. Doing it in this order helps me to know that the other design elements will tie in beautifully. If you start the actual work on a remodel and leave countertops for later in the project, you may have trouble finding just the right colors and tones, especially if you’re on a budget. For this room, I already had a Carrera Cream quartz in mind and am very happy with how it turned out as well it’s durability.
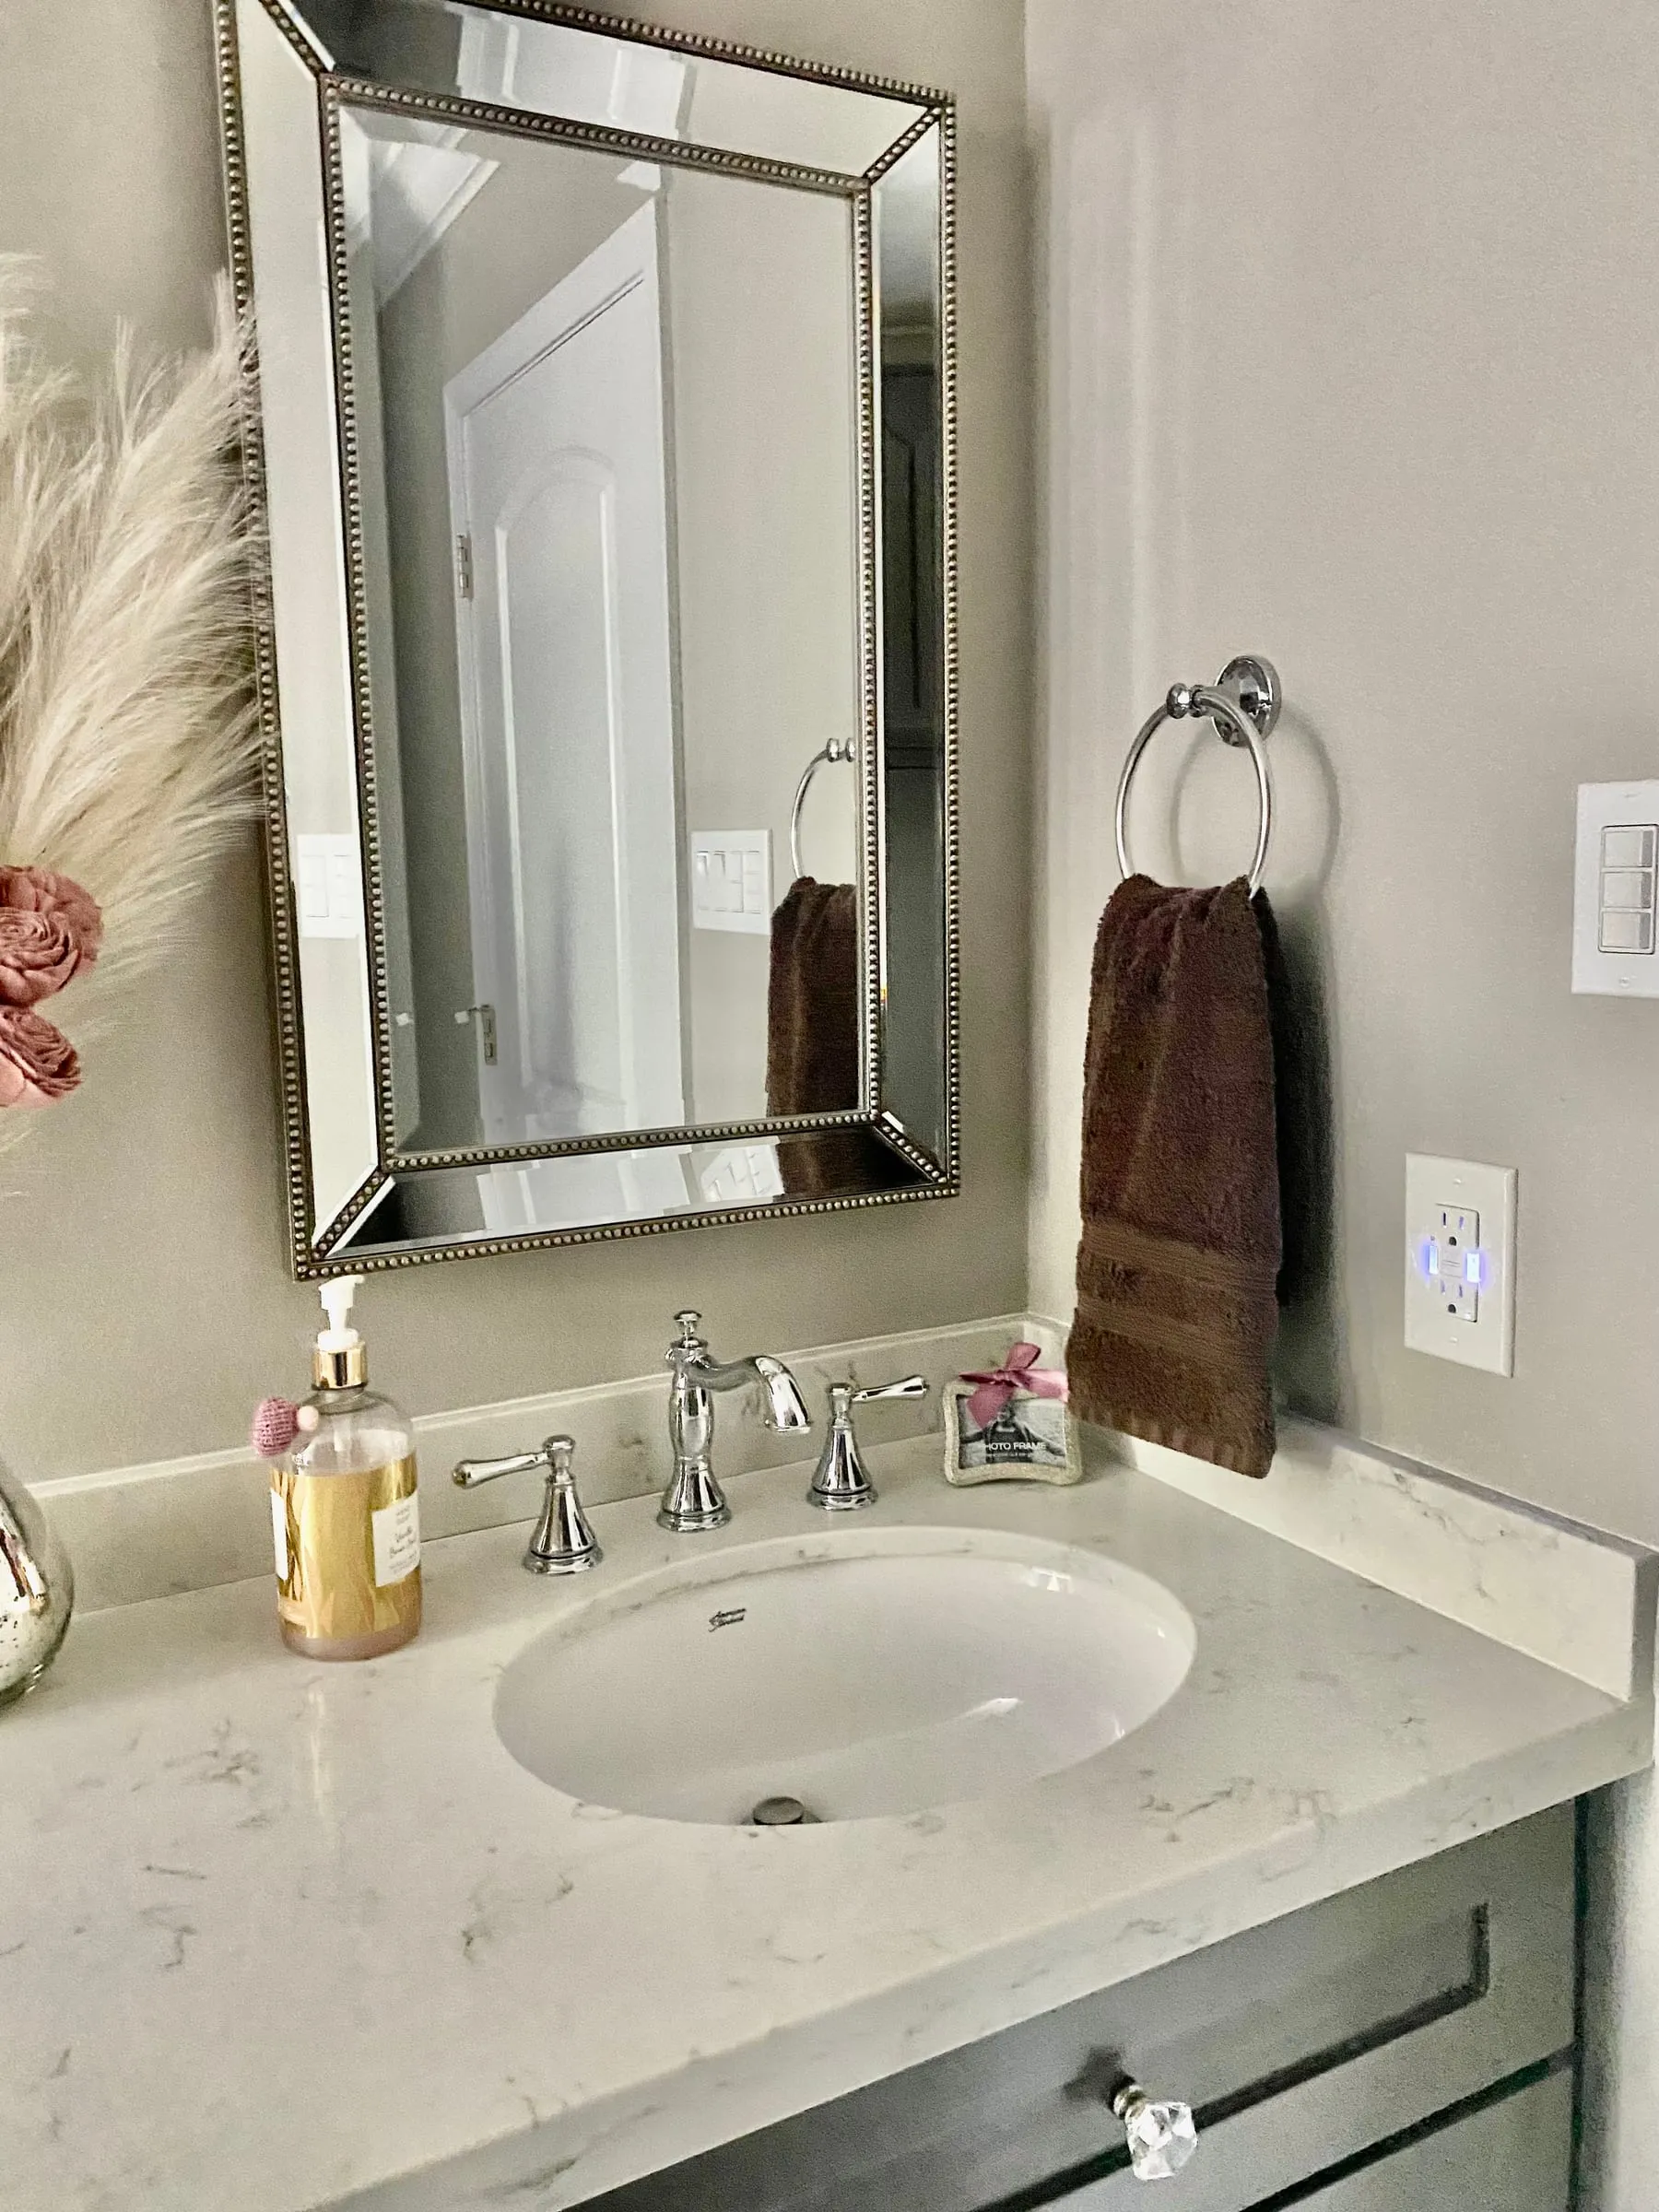
As I mentioned earlier, we changed the plumbing so that we could add a second sink. (In fact, we changed all the plumbing as this house had polybutylene plumbing. I didn’t want to take a chance with it failing after remodeling the whole house, so out it went.)
Vanity Redoux
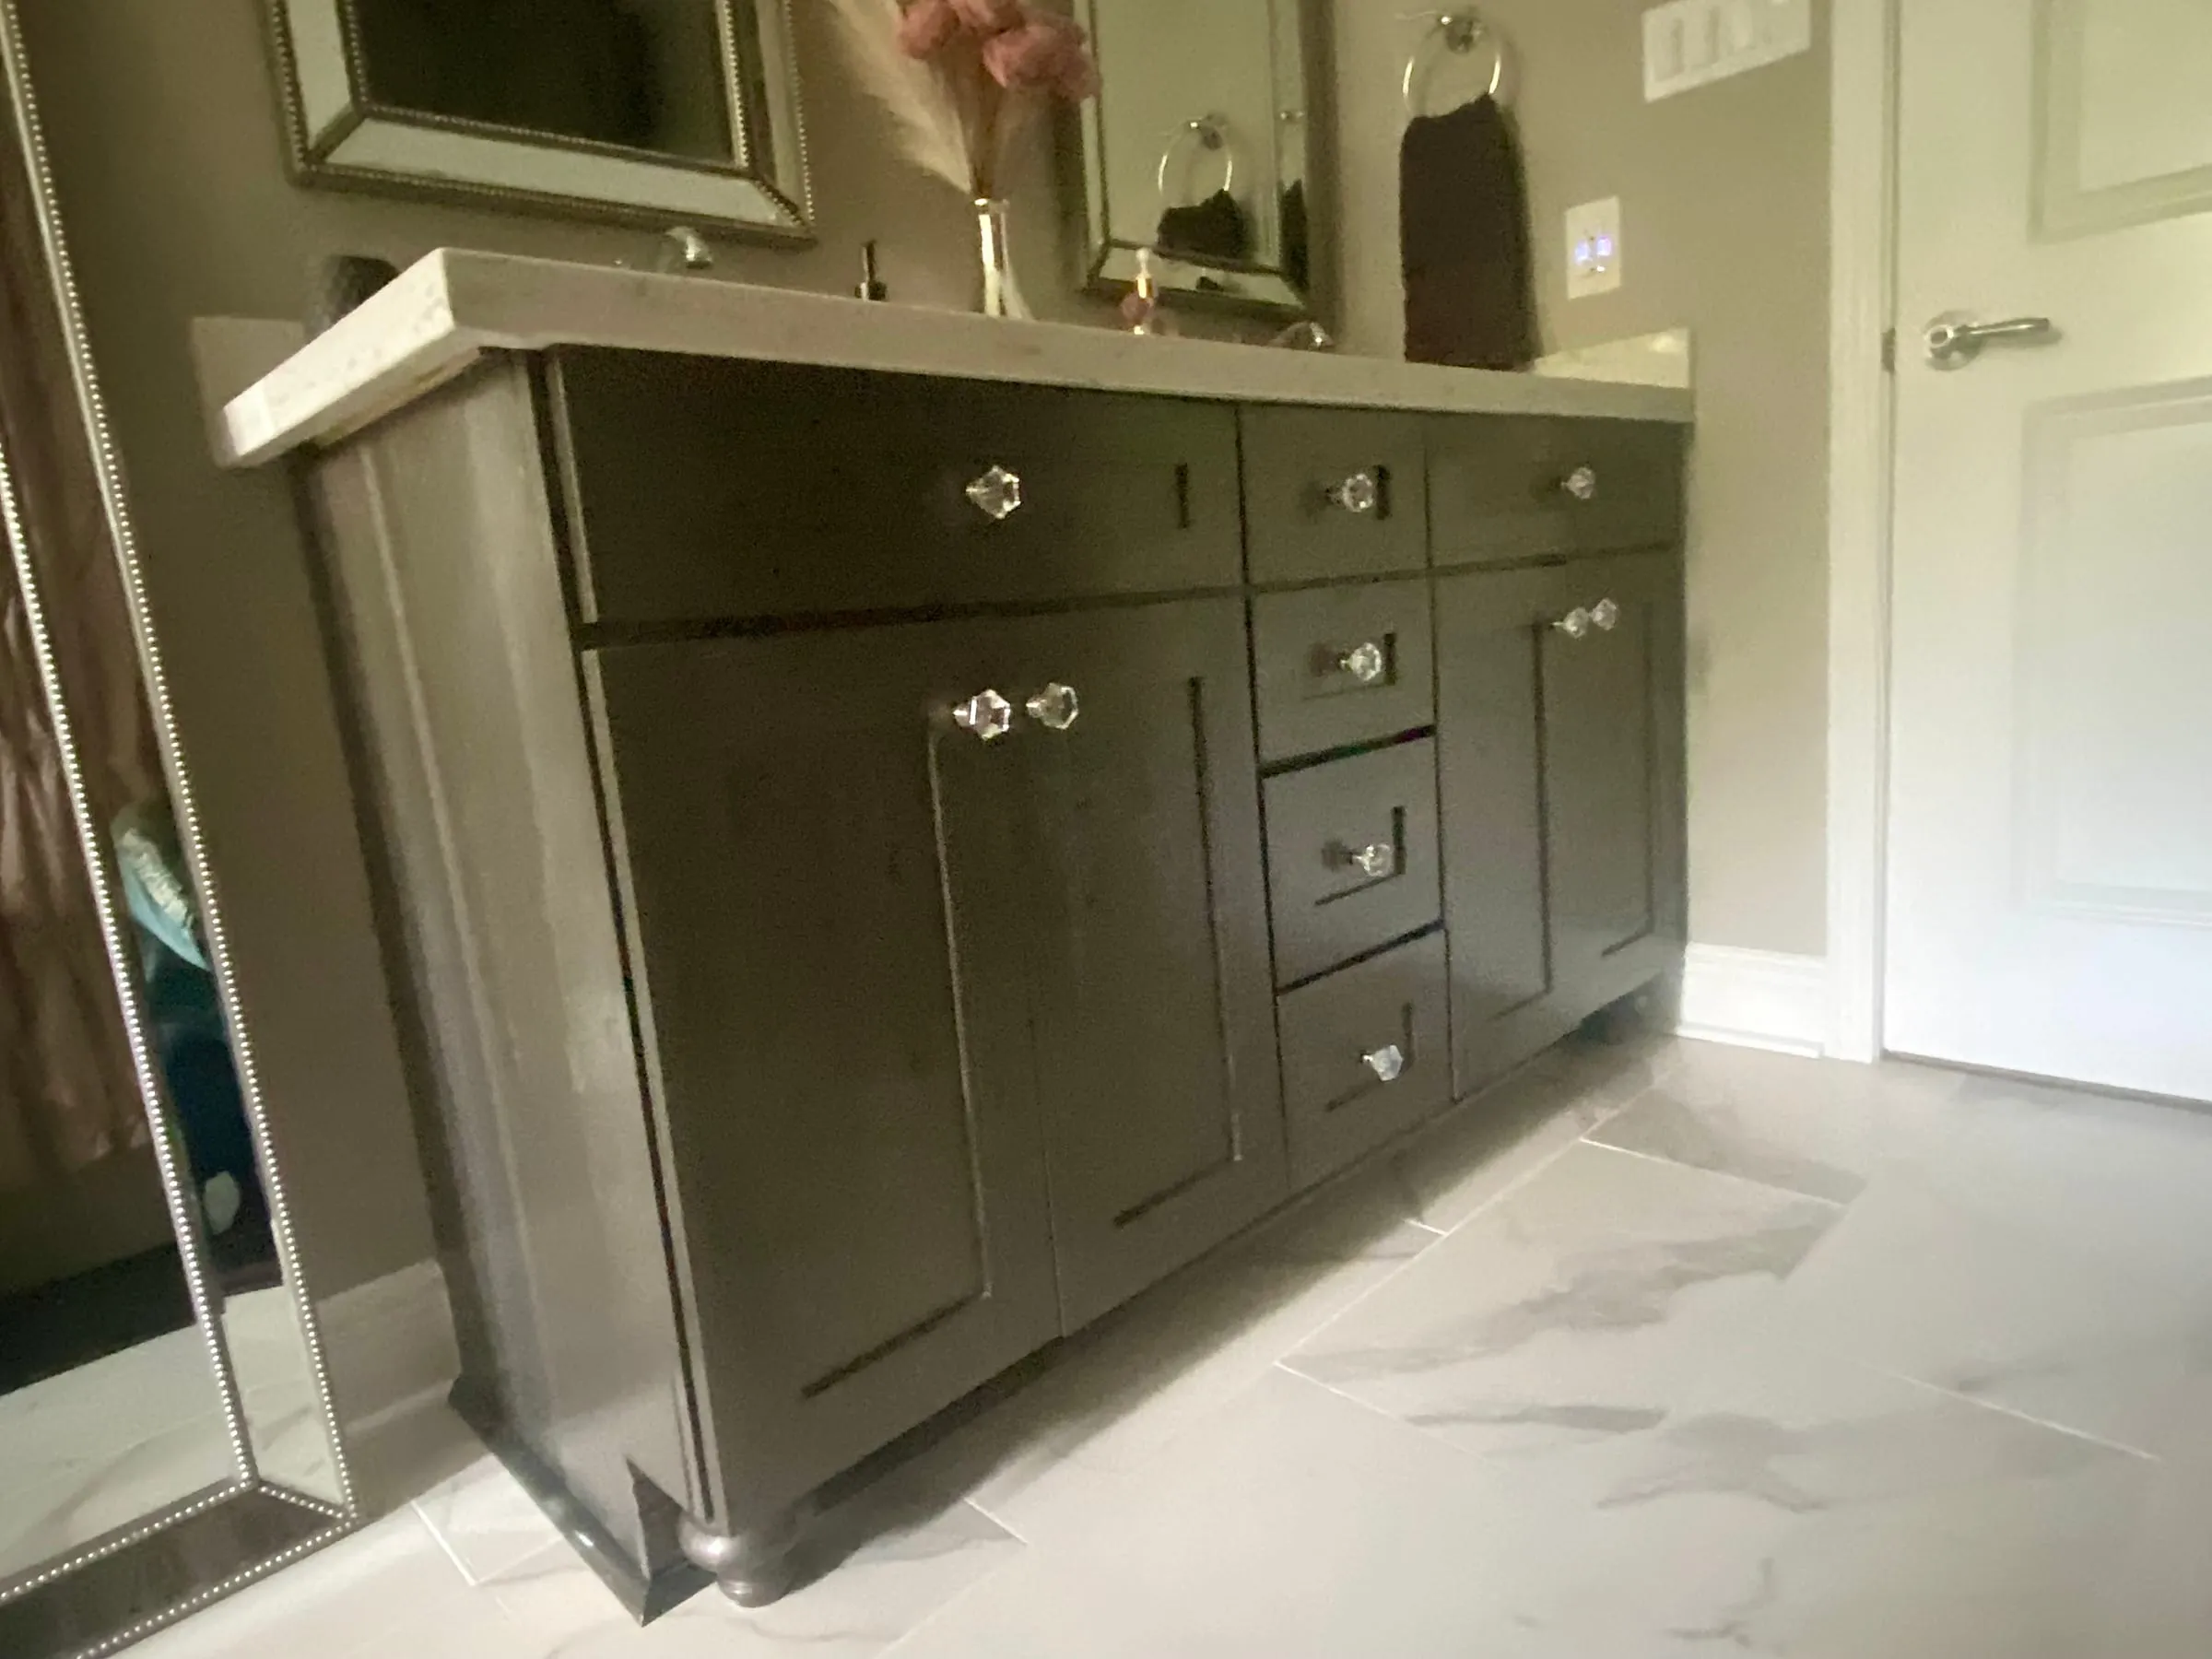
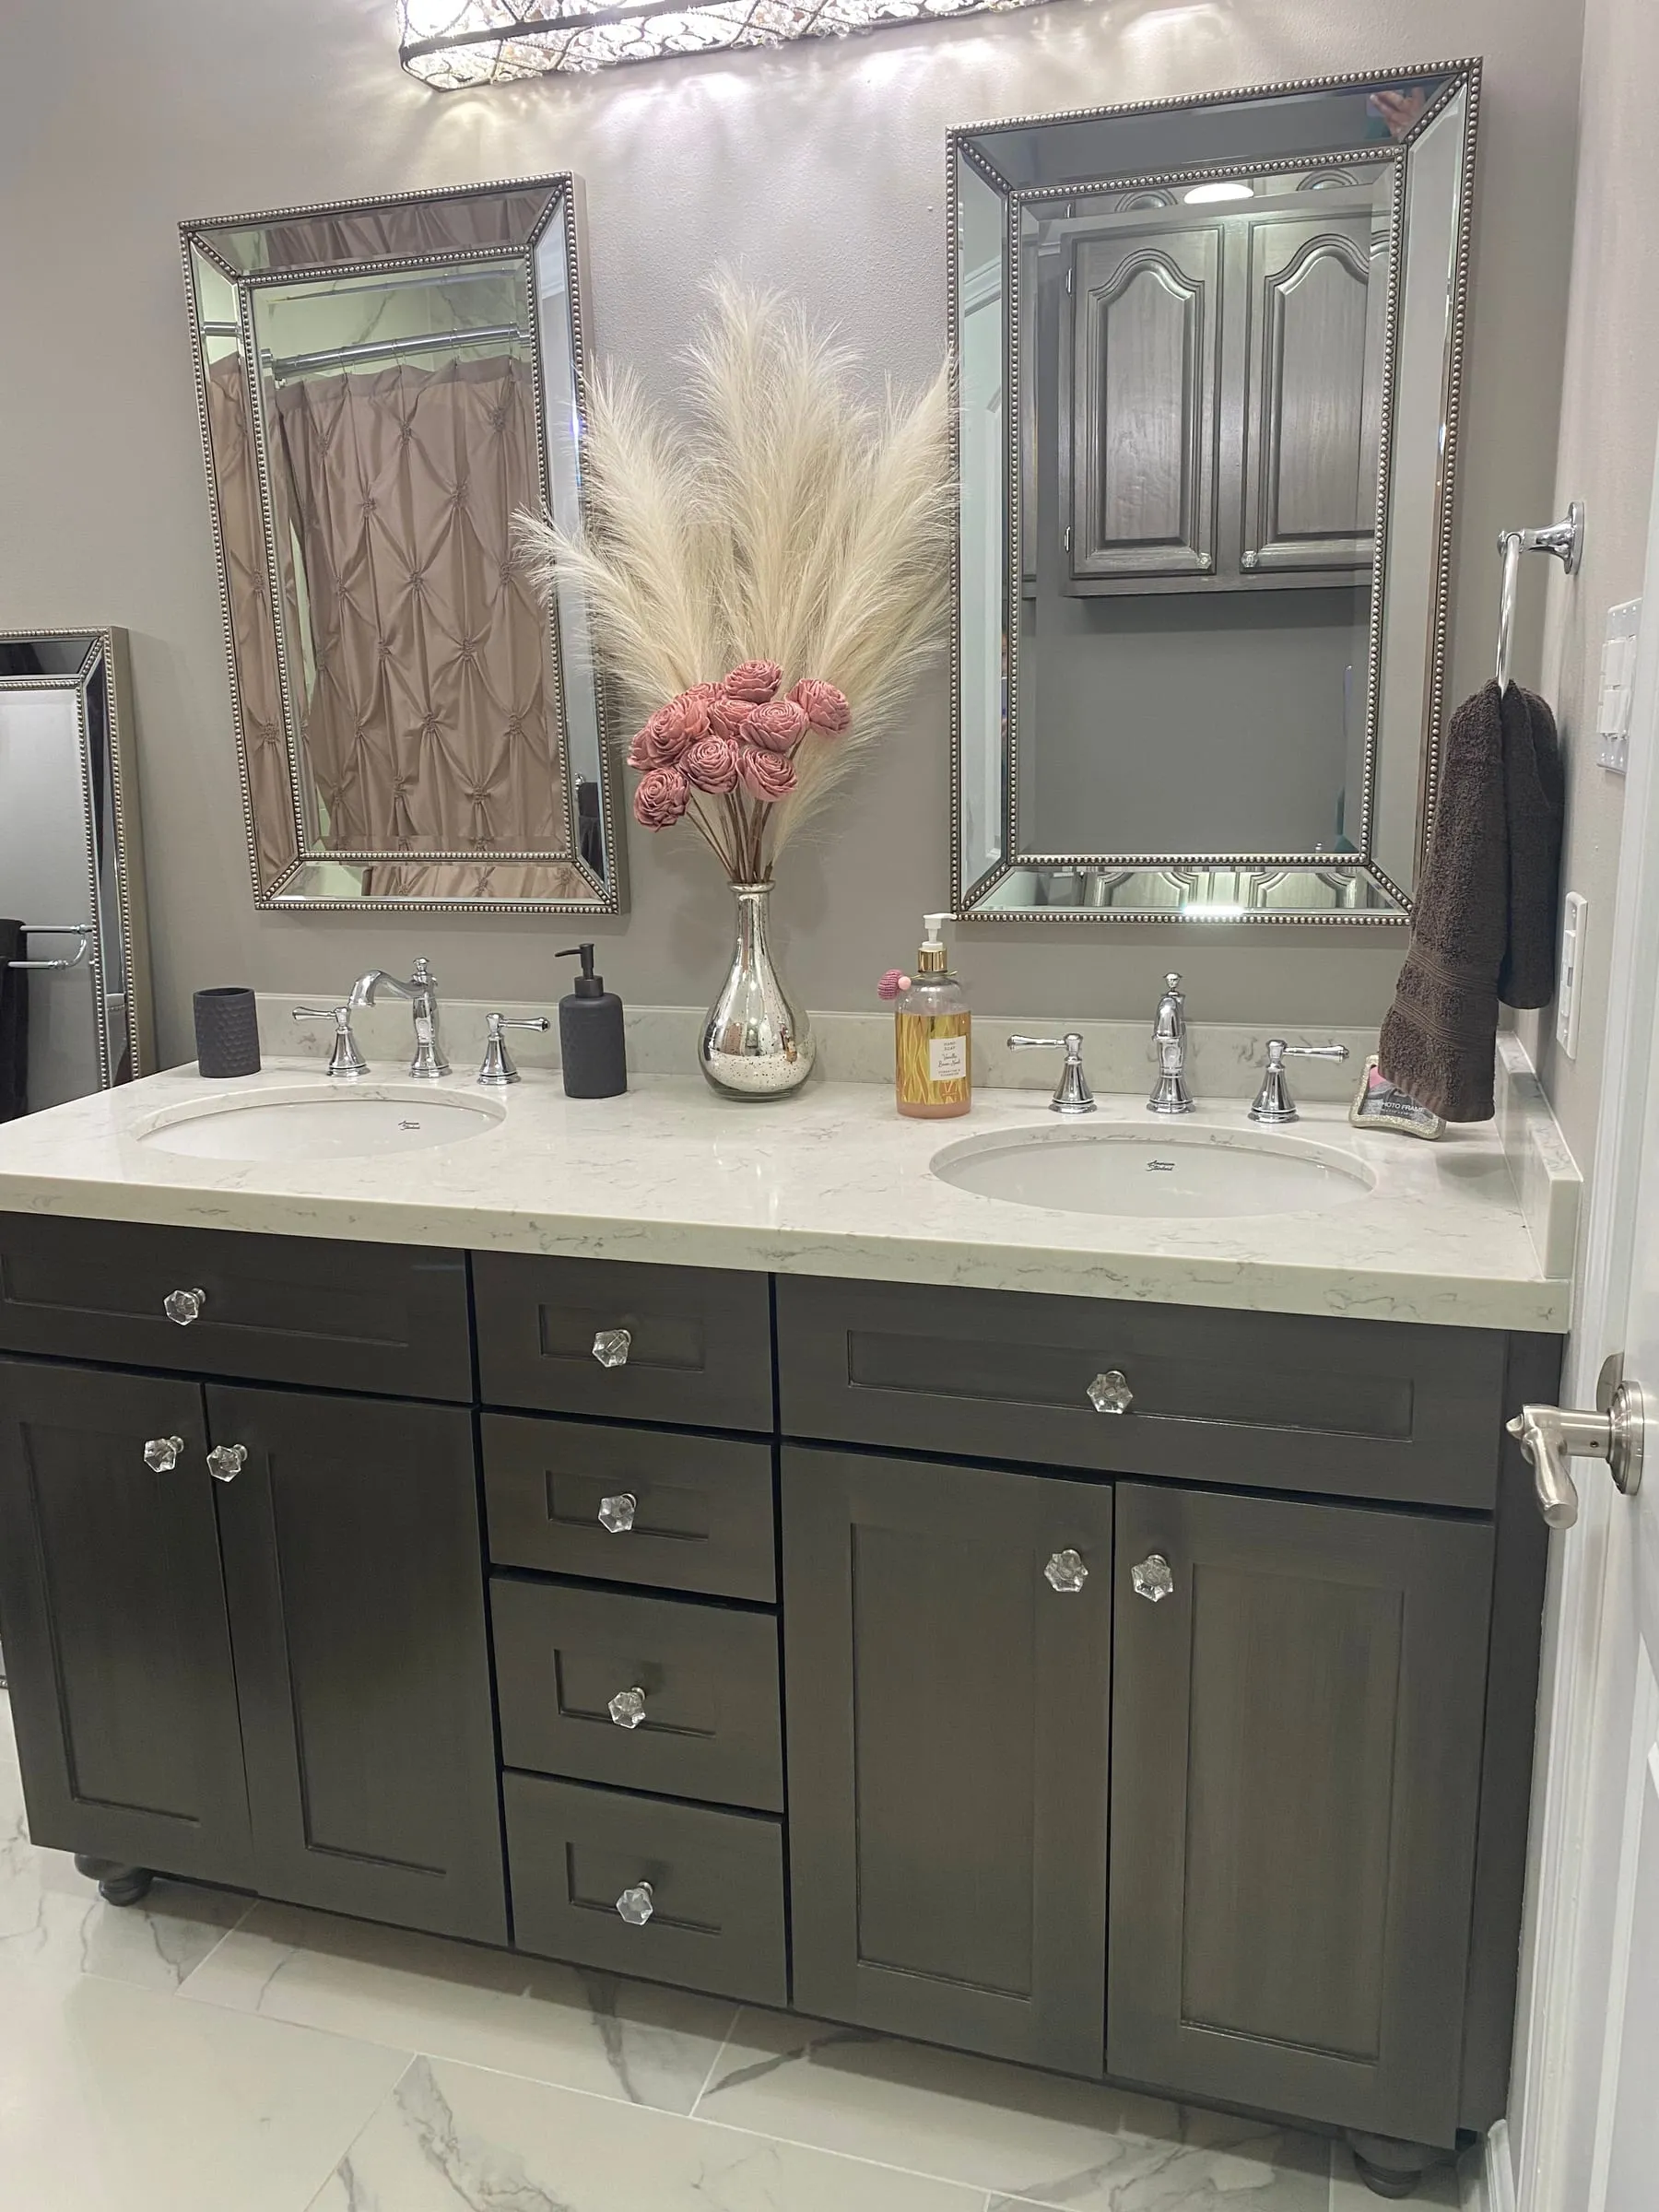
We needed a double vanity and one day my fiancé sends me a picture of a 4 door, 4 drawer vanity. It was a dumpster dive item…literally. He was redoing a bathroom for a couple and his crew had thrown it in the dumpster. Other than one side being damaged from it being tossed around, it was solid wood, the right length, and in good shape. The damaged side would have to be fixed since it was the side that would show in our bathroom. He asked if I wanted it? Hesitantly, I said yes. But, when I got to see it in person, I knew it was a good find!
It took some time, but I worked on refinishing this vanity while other work was going on in the house. We attached a sheet of wood veneer on the damaged side. I removed all the drawers, doors, and hinges. After thoroughly cleaning the entire vanity, I sanded it to rough up the surface, then cleaned it again. I applied a primer on all the painted surfaces and allowed it to dry. (I probably could have skipped this step on the already painted surfaces, but the new piece of veneer required it.) Since I was using a metallic paint that is somewhat transparent, I applied a basecoat in the same color I planned to paint the walls. Once it was dry, I used a sponge painting tool to apply Modern Masters Smoke in a strie pattern. If the paint is only lightly mixed, it can be applied to show some variation in color, which is a look that I love. Two coats of paint were required to get the desired coverage. If I had not used a basecoat, it likely would have taken three coats. I love making cabinetry look like furniture, so I upgraded this piece by adding two turned legs. To finish it off, matching shoe molding was applied to the front and sides.
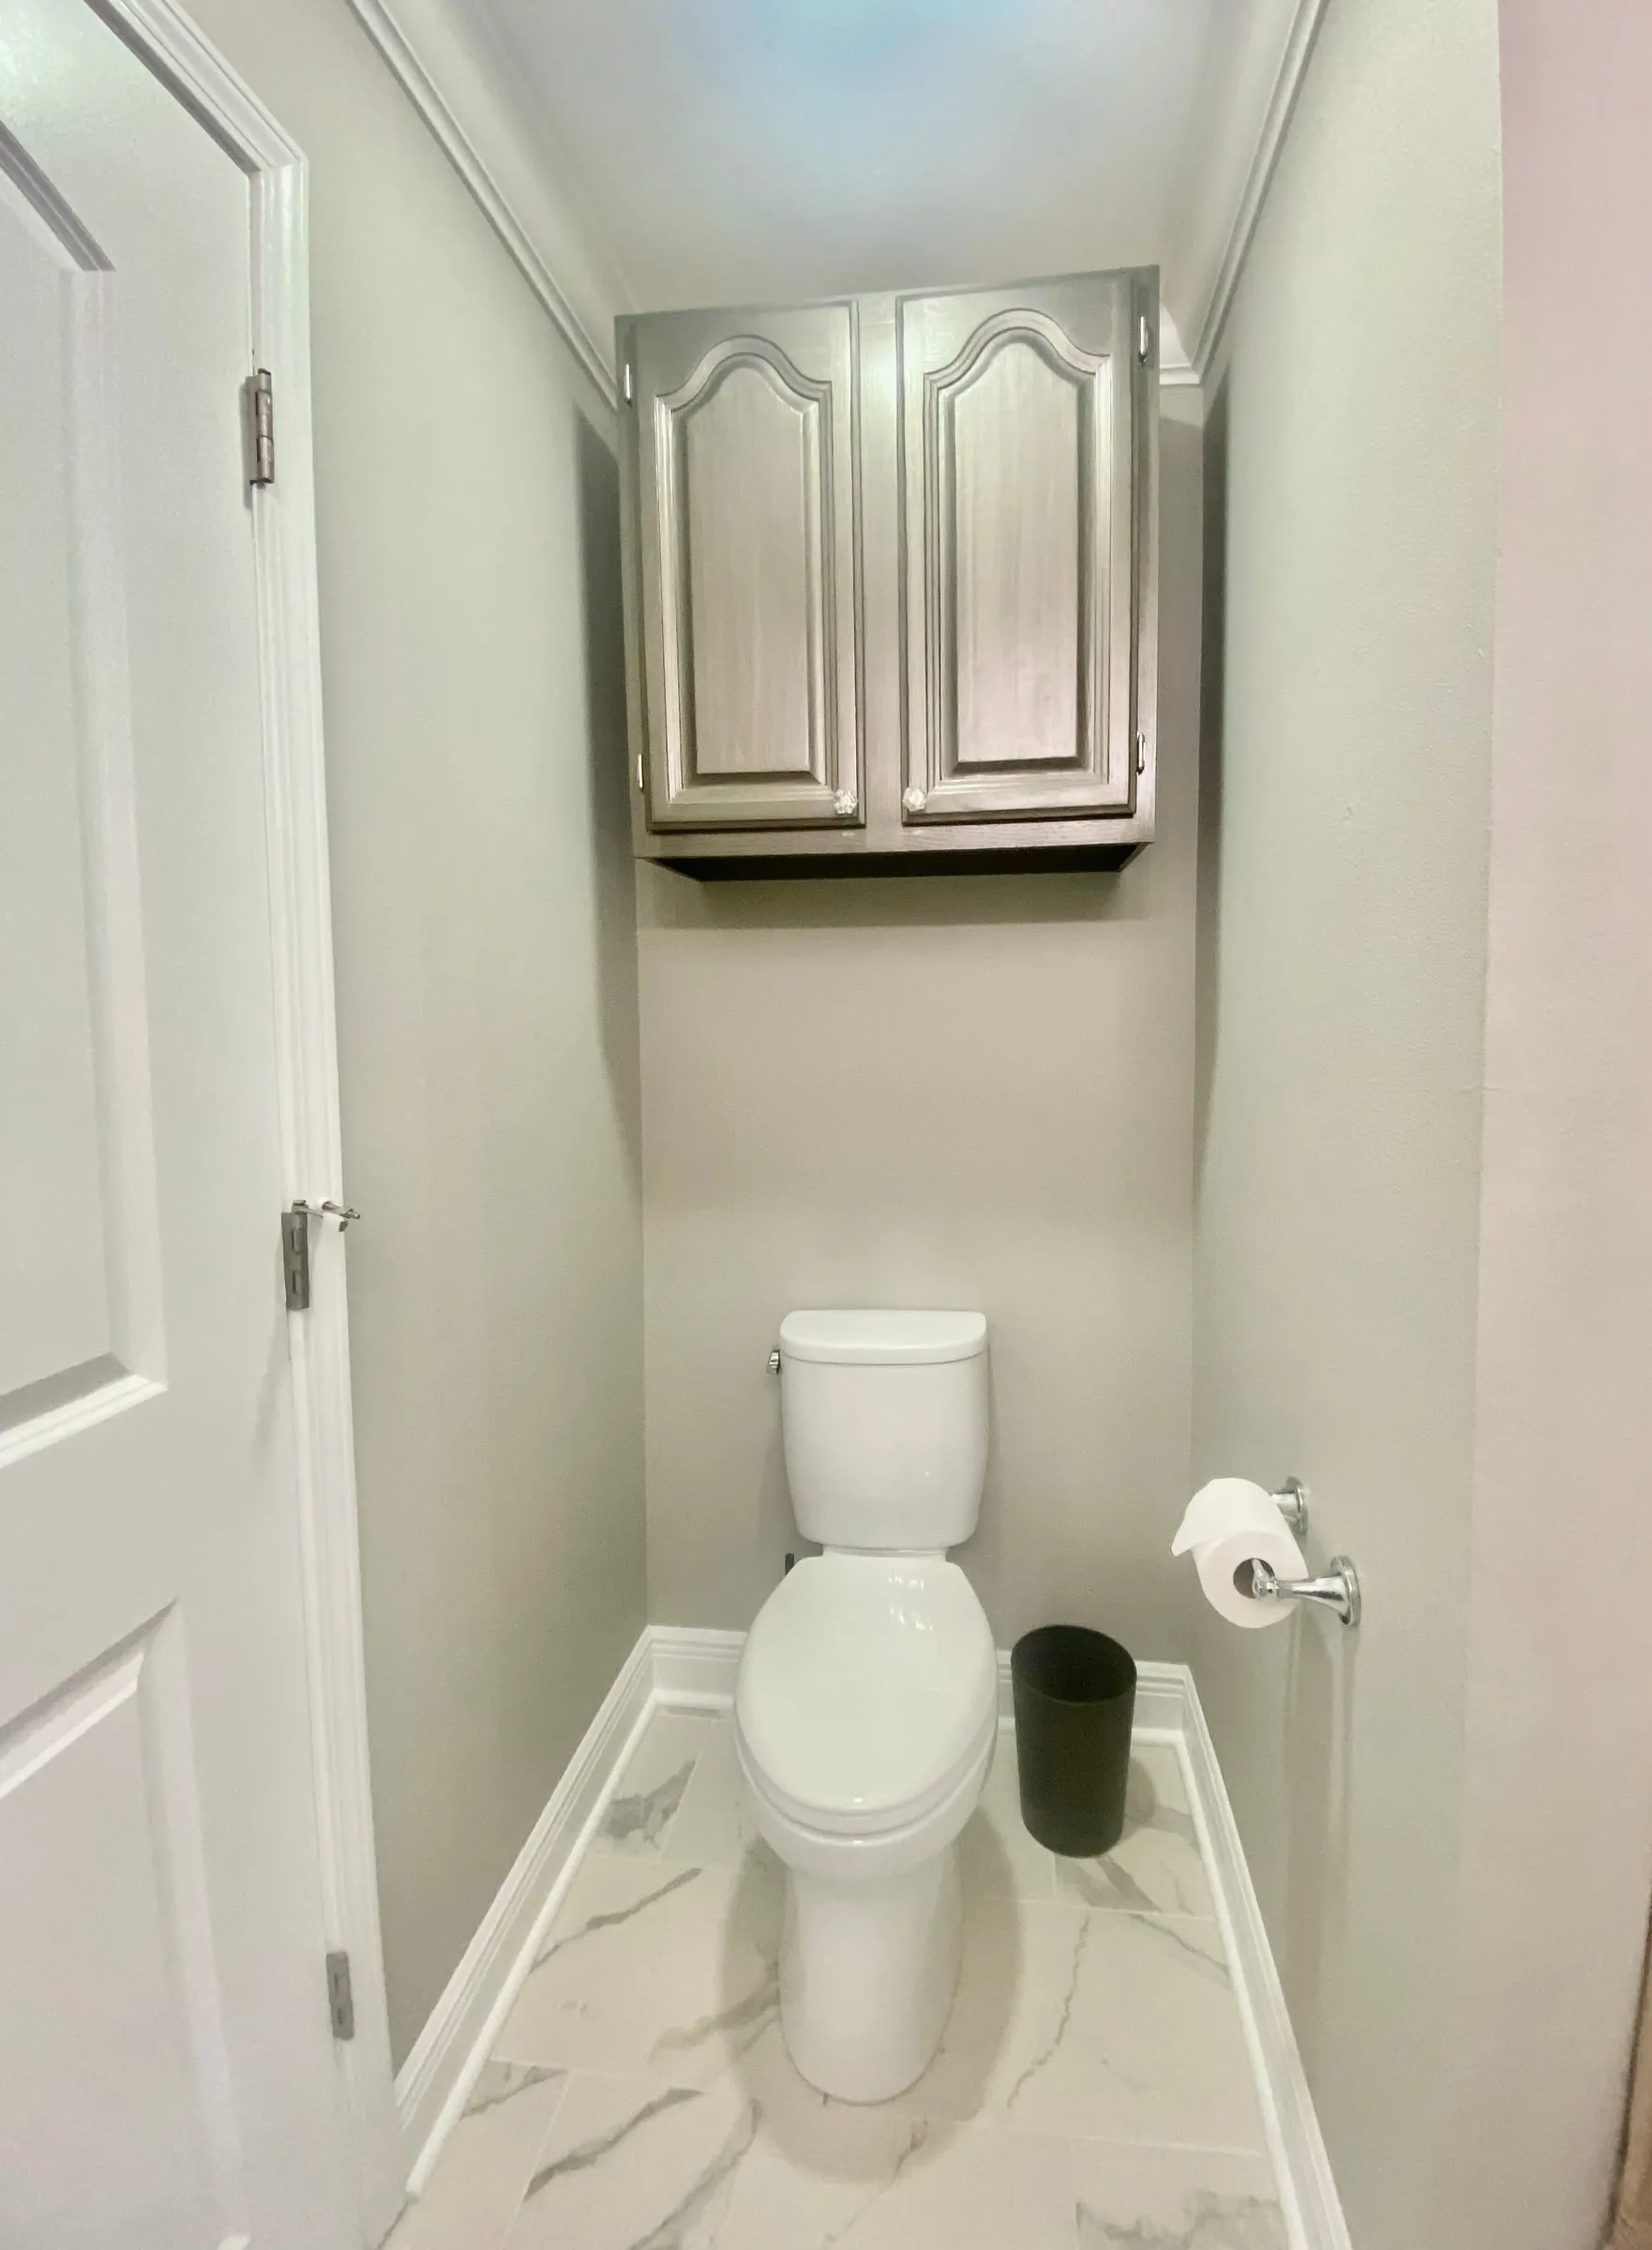
A kitchen wall cabinet was repurposed to be used over the toilet for additional storage. It was refinished in the same way. I planned on adding crown molding to the cabinet, but there was not enough room between the top of the door and the top of the cabinet. We could have lowered the doors ever so slightly had I realized this prior to refinishing the cabinet, but I did not want to make new holes so late in the process. Make a mental note to check into this first if you want crown on the top of your wall cabinet.
While I was busy refinishing the vanity, the ceilings were painted, the walls were textured, skimmed, and primed and ready for paint. This room called out for one of my favorite colors, Perfect Taupe. It’s a Behr color, but I always buy it 50% lighter.
For bathrooms, I choose to upgrade my paint choice to Benjamin Moore’s Aura Bath & Spa in a Matte finish. It’s specially formulated to withstand the high humidity in bathrooms, (not to mention living in Southern Louisiana). Because of these two reasons, I also upgrade to real wood crown molding in bathrooms, the laundry room, and usually kitchens.
I also decided to upgrade the windows a bit by adding some C3 trim along the perimeter. Once all the trim was painted, the new doors were installed. As a hand therapist, I prefer using lever style door knobs as it is easier on the hands and wrists, especially with arthritis. And of course I have a favorite! It’s Ashfield by Kwikset. The design is classic and the weight, shape, and dimensions of the handle is very comfortable.
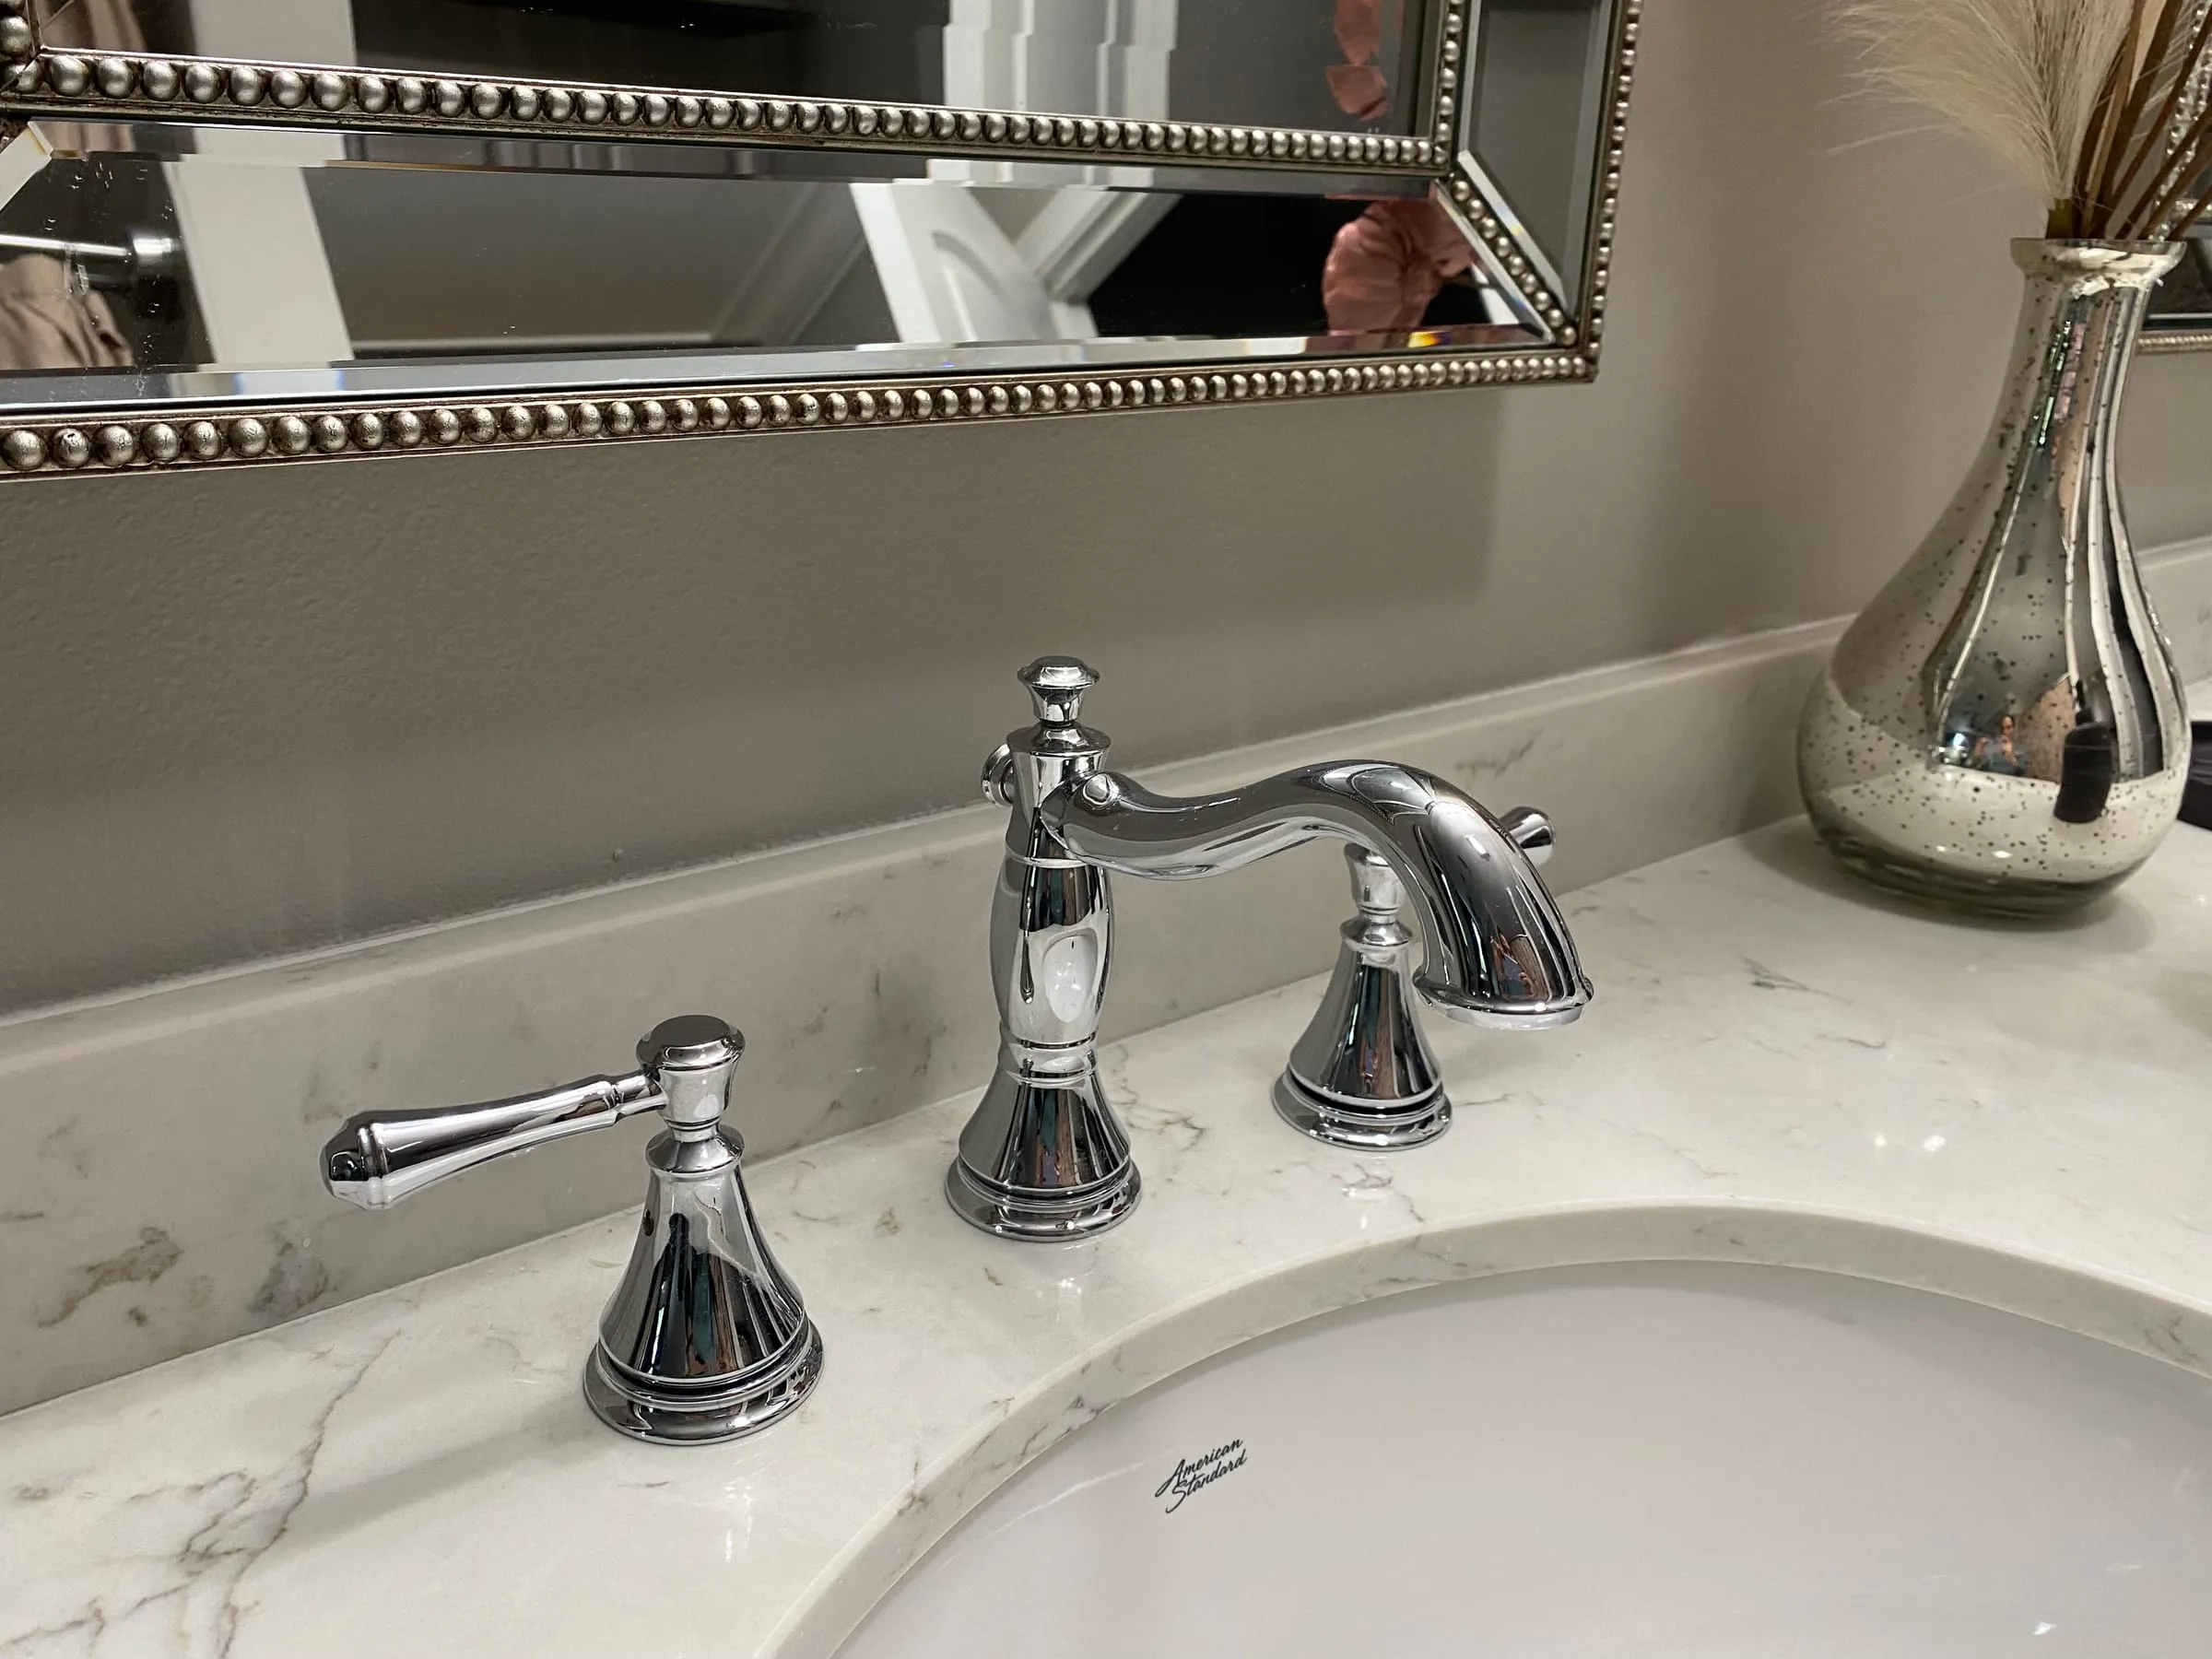
After the vanity, sink, and countertops were installed, it was time to hook up all the plumbing fixtures. My go to faucet is Delta Cassidy. I chose the widespread version, which requires three separate holes to be drilled, but they do have other options. The chrome finish is elegant and provides just a little “bling factor” to create some interest. An oil rubbed bronze finish is also a great complement to this color palette and would be beautiful in this bathroom. From experience, the patina that develops on the bronze was definitely not a part of my design scheme, so I went with timeless chrome.
The Jewelry
Lighting is my favorite part of design. Not only does it make the room functional for tasks, but it also provides such impact! To me, it’s the jewelry for the room. This room had ample lighting prior to our remodel. It had a light over the vanity and recessed lighting entering the dormer, over the shower, and over the toilet alcove. It also had a light in the heater/vent. We did change all the recessed lighting to the flat, hardwired LED units. These have been wonderful as you do not have bulbs to change and you can choose whether you want warm light or cool light with the flip of a switch.
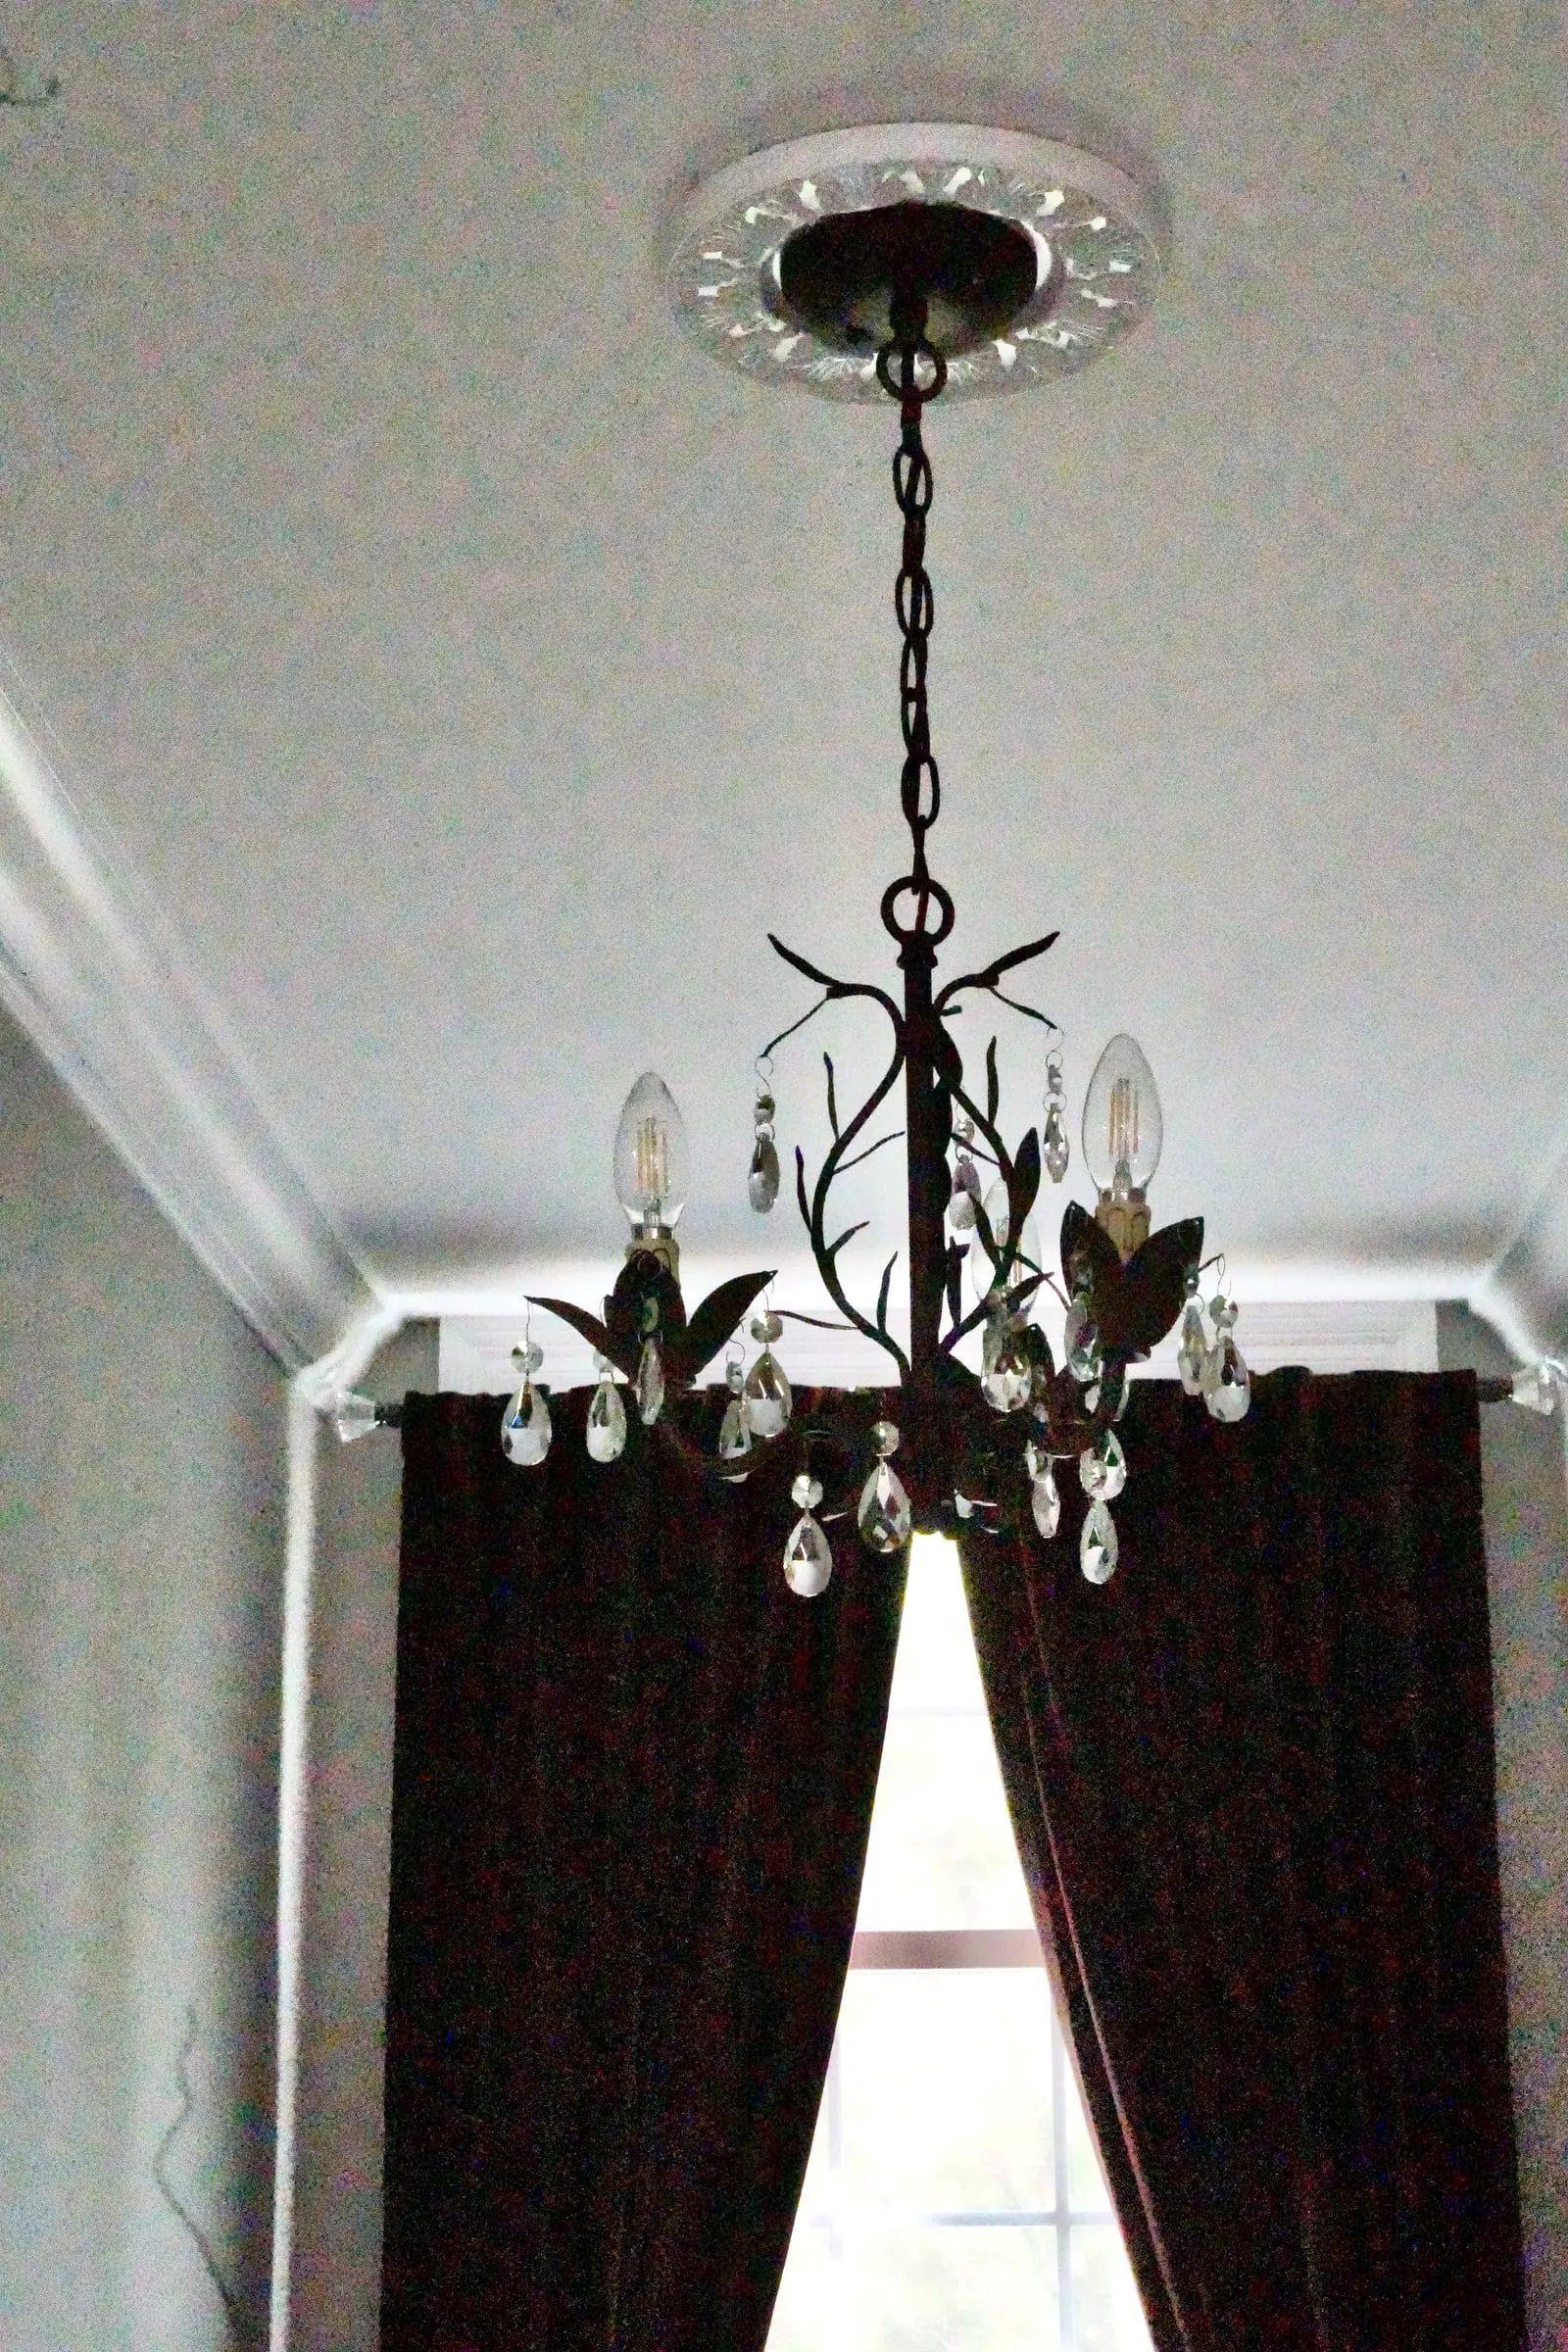
The area at the front of the dormer was the perfect spot for a chandelier. Since I love lighting, I have been collecting lights over the years for my forever home. (If you find a light you love, buy it. They are discontinued rather quickly and are almost impossible to find afterwards.) The chandelier I used here was purchased for a similar area in my mom’s bathroom when I remodeled her home. It wasn’t wired for a light in that location, and, in the end, we opted not to add it. It’s a World Imports 3 light chandelier, part of the Bijoux Collection, in a Weathered Bronze finish with glittering crystals and leaf accents. (I’m subconsciously drawn to leaves on lighting. Who knew?)
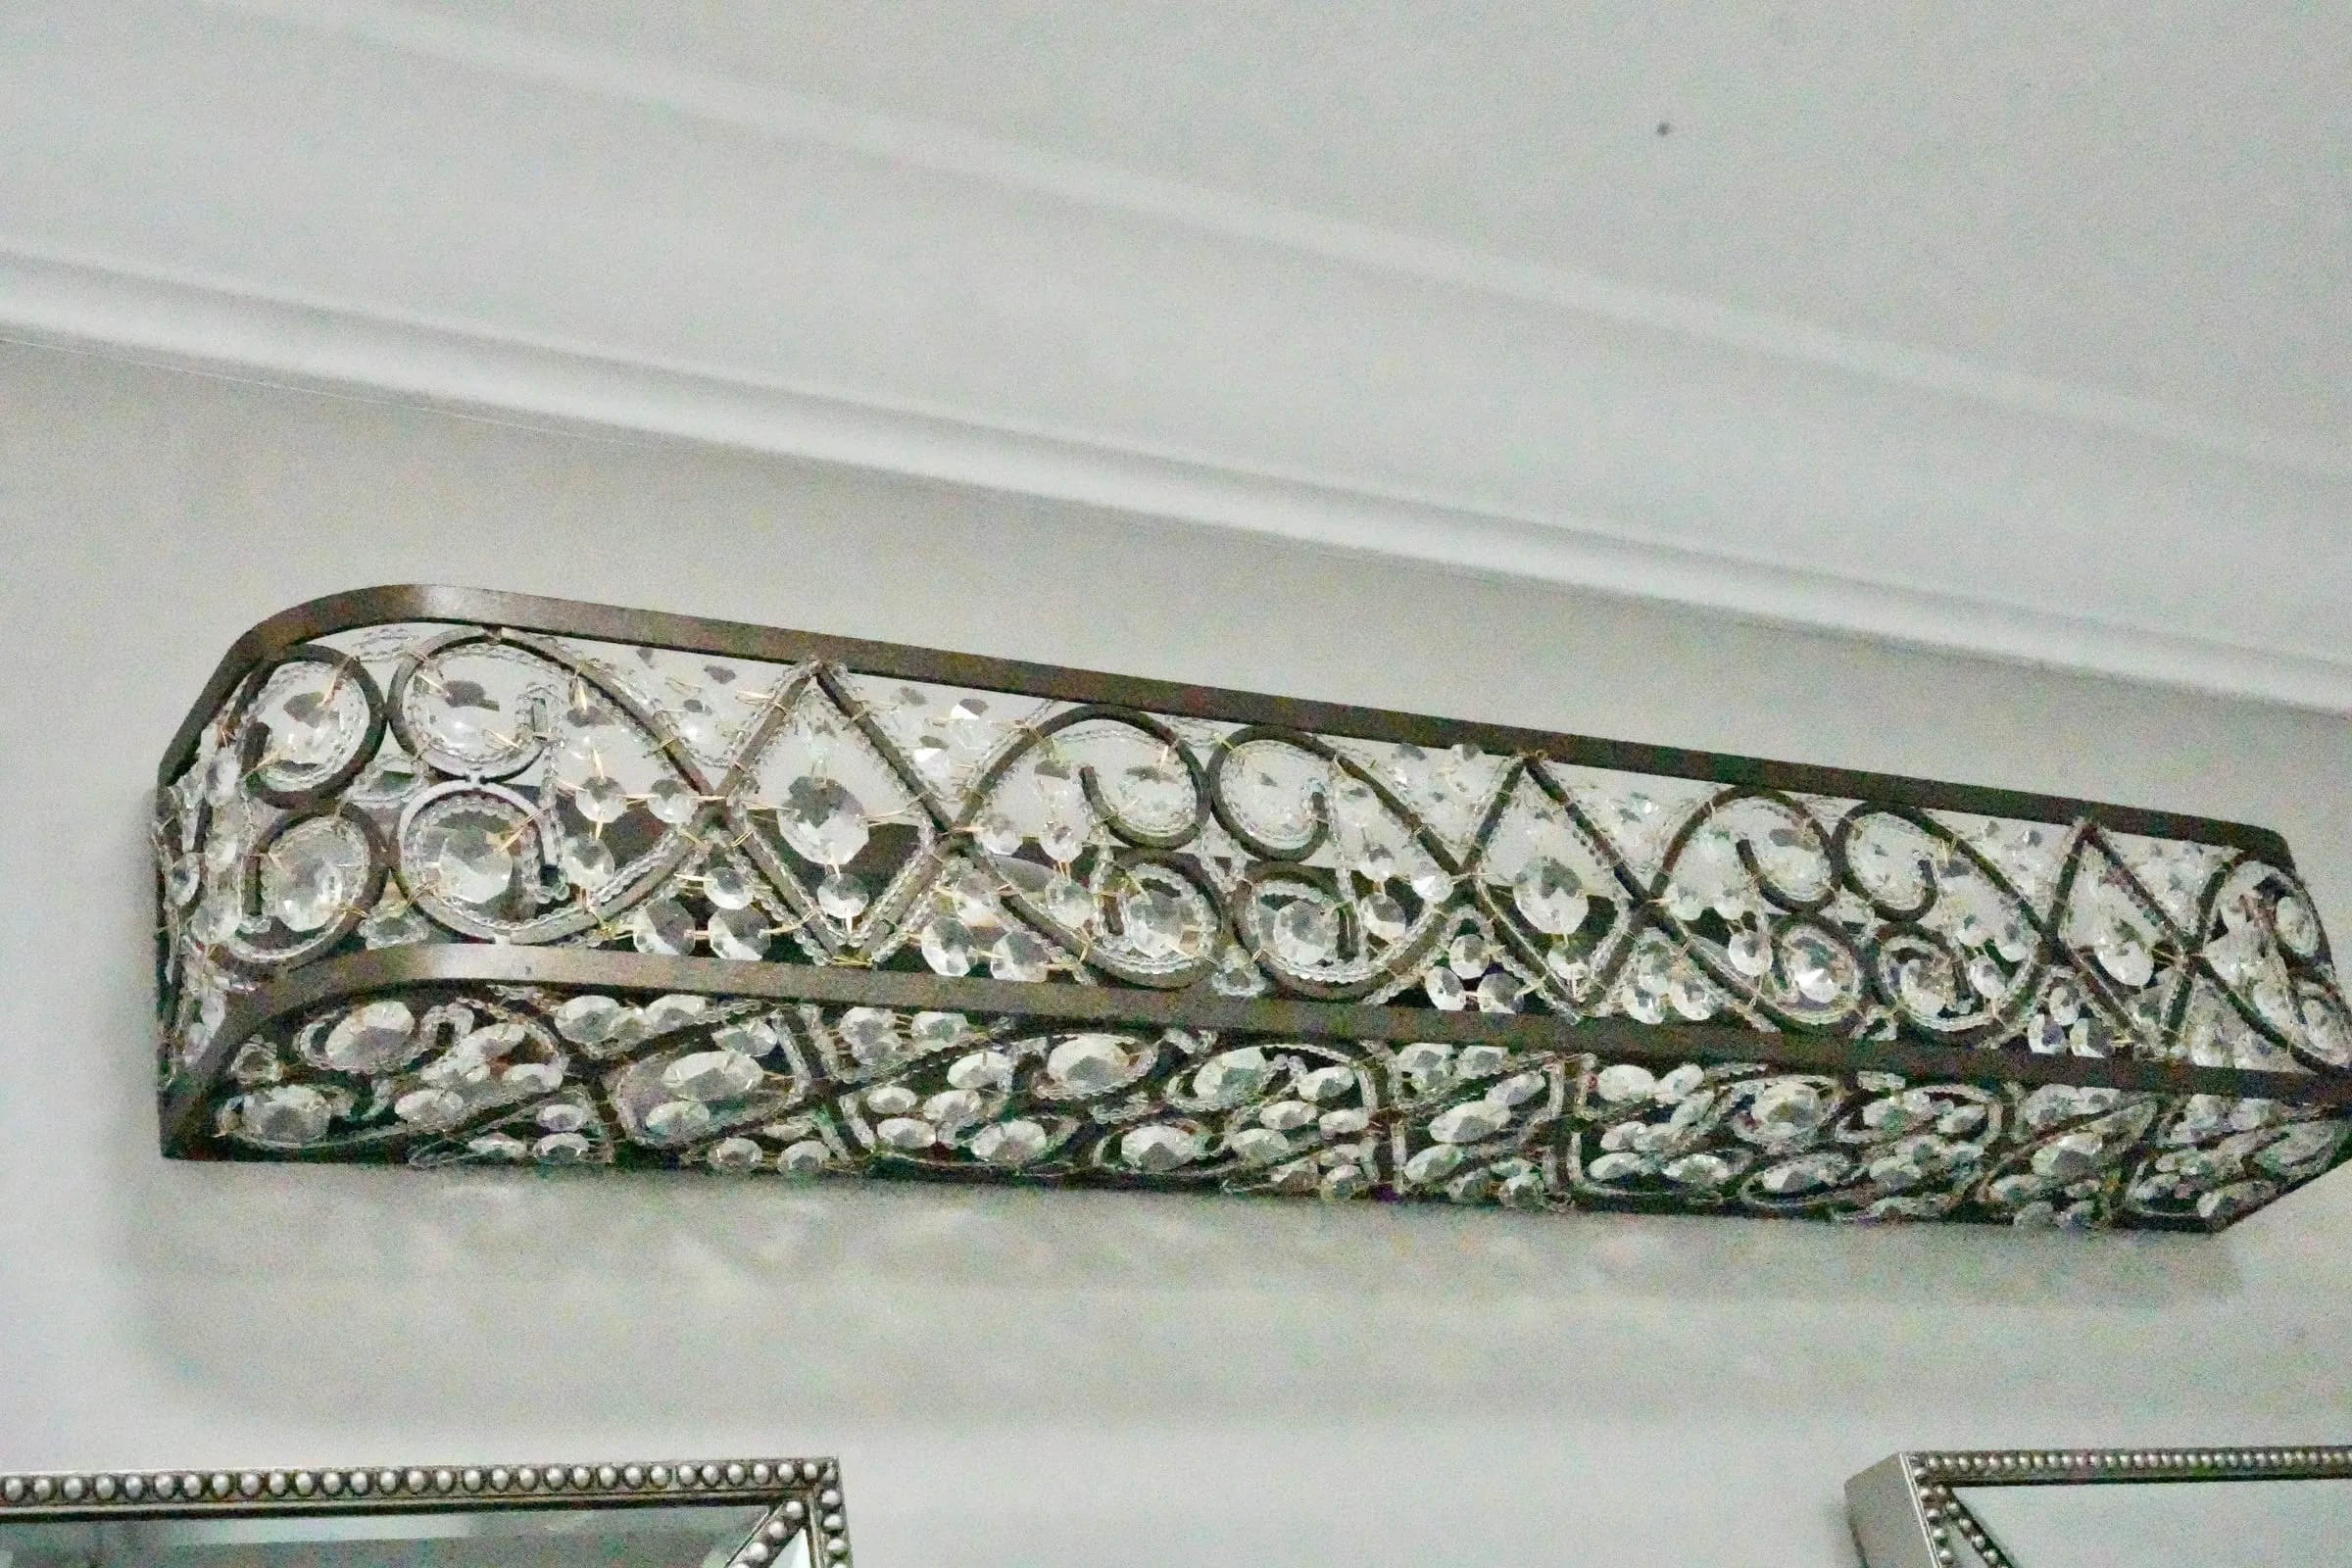
Over the vanity, I wanted a lot of light and went on the hunt for lights with 4-6 bulbs. I found what I was looking for on Houzz and it was on sale! The vanity light has 6 bulbs and is shaped like a box with rounded corners. It is a deep bronze finish with intricate crystal beadwork throughout. It glimmers in the light and provides a gorgeous finish to the room!
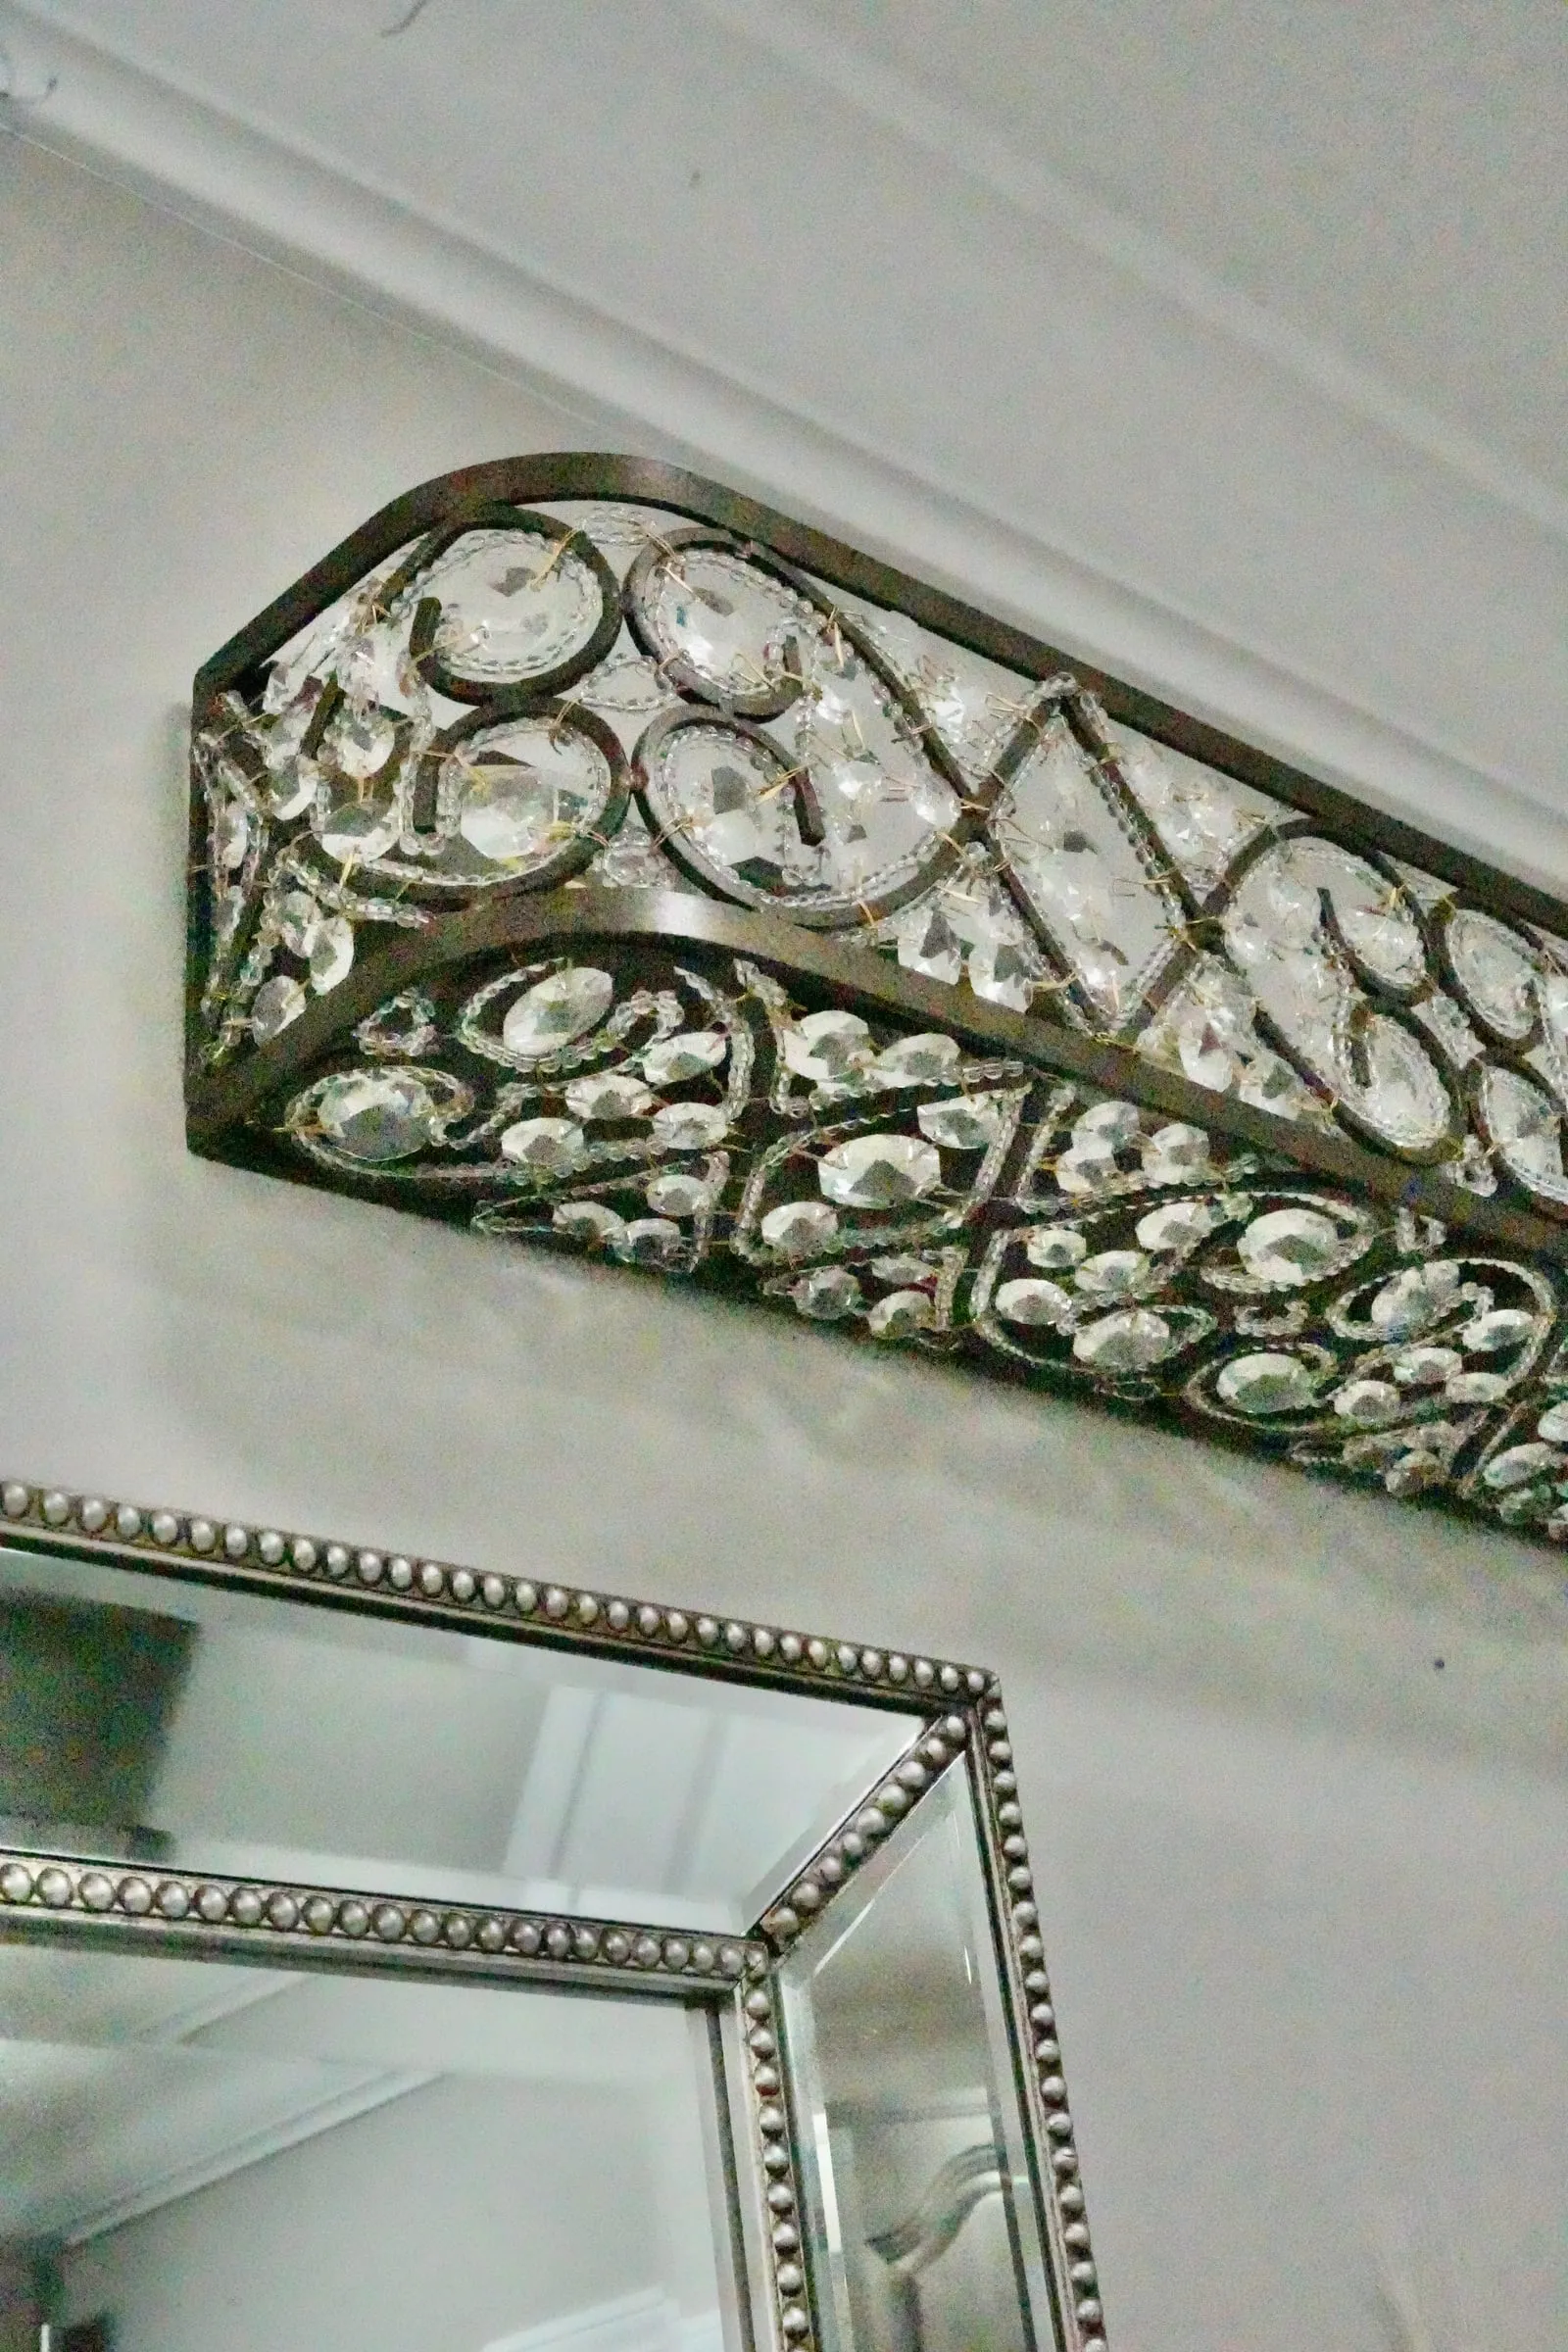
Finishing Touches
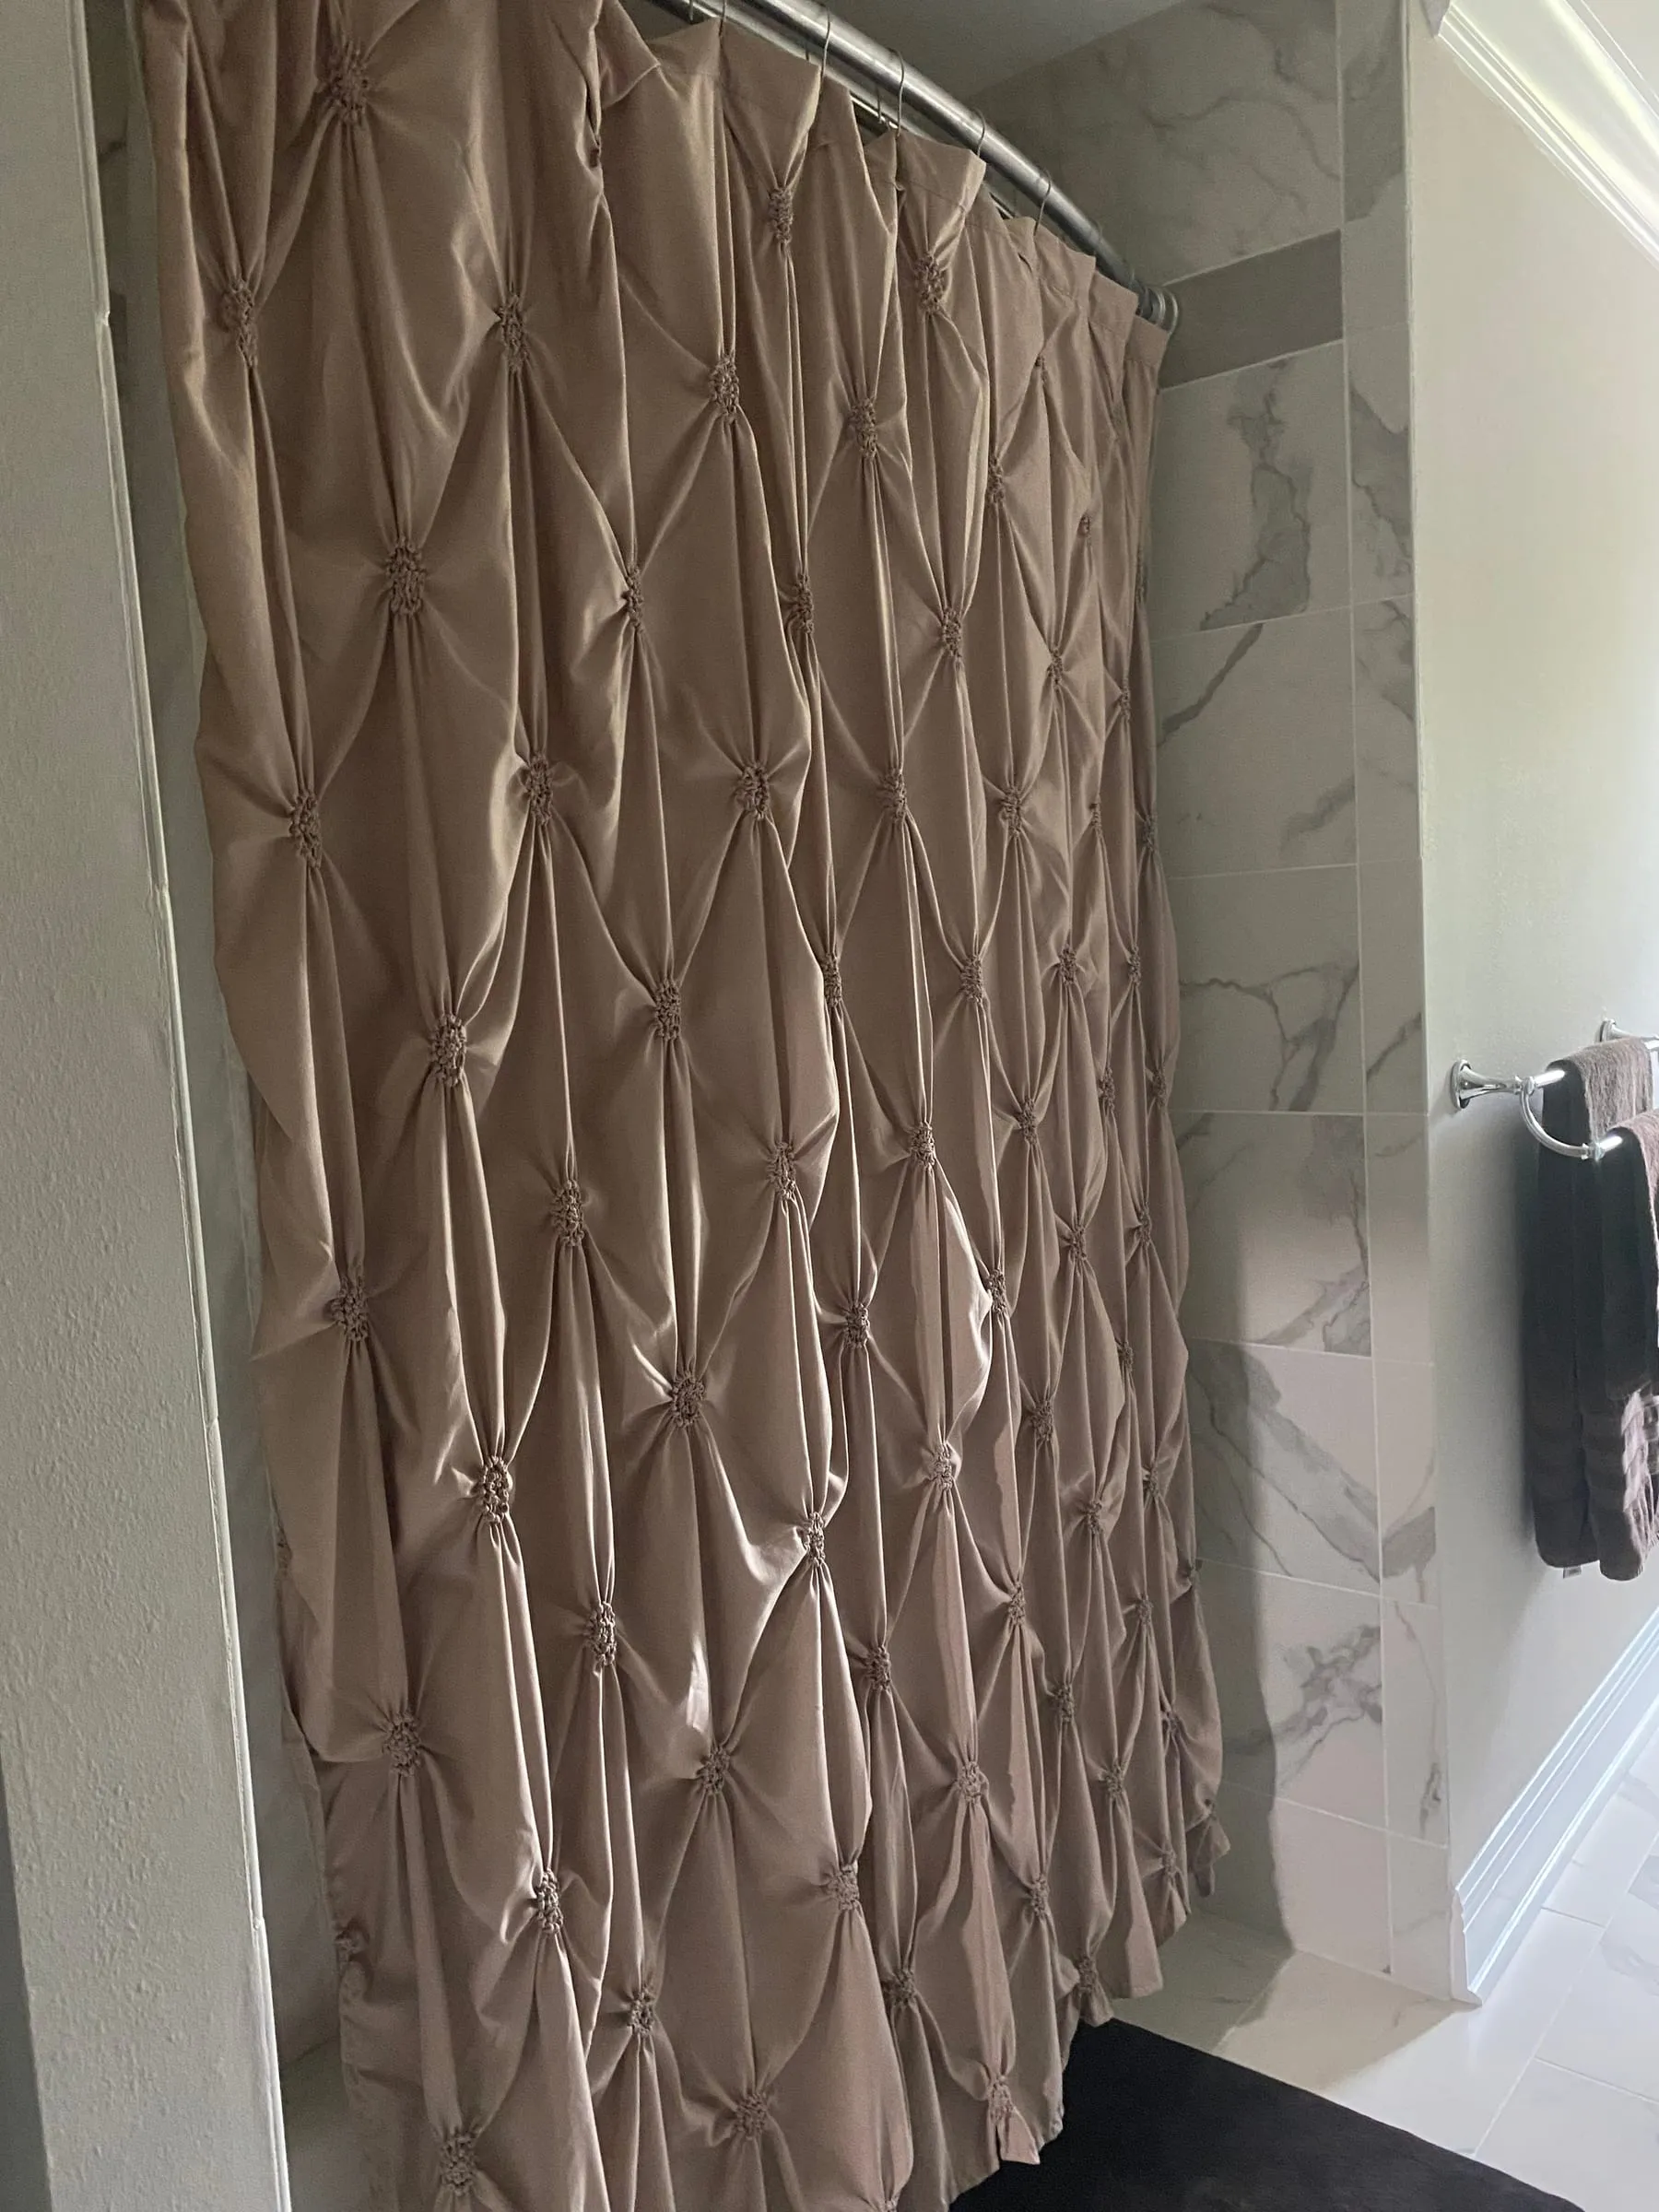
With the bathroom completed, I set to work on adding the final touches to the space. There were still shortages for some items at the time and prices had skyrocketed due to Covid, so I had trouble finding a few things. After what seemed like months of looking, I found a shower curtain in taupe with a ruched design. It was worth the wait as it is a more sophisticated style than most shower curtains.
I also love curved shower rods. If you haven’t experienced one, consider changing yours out. When installed properly, the curved design allows the shower curtain to stick out further on the wall allowing more room to move around. That small amount of space adds the feel of luxury making the shower feel less cramped.
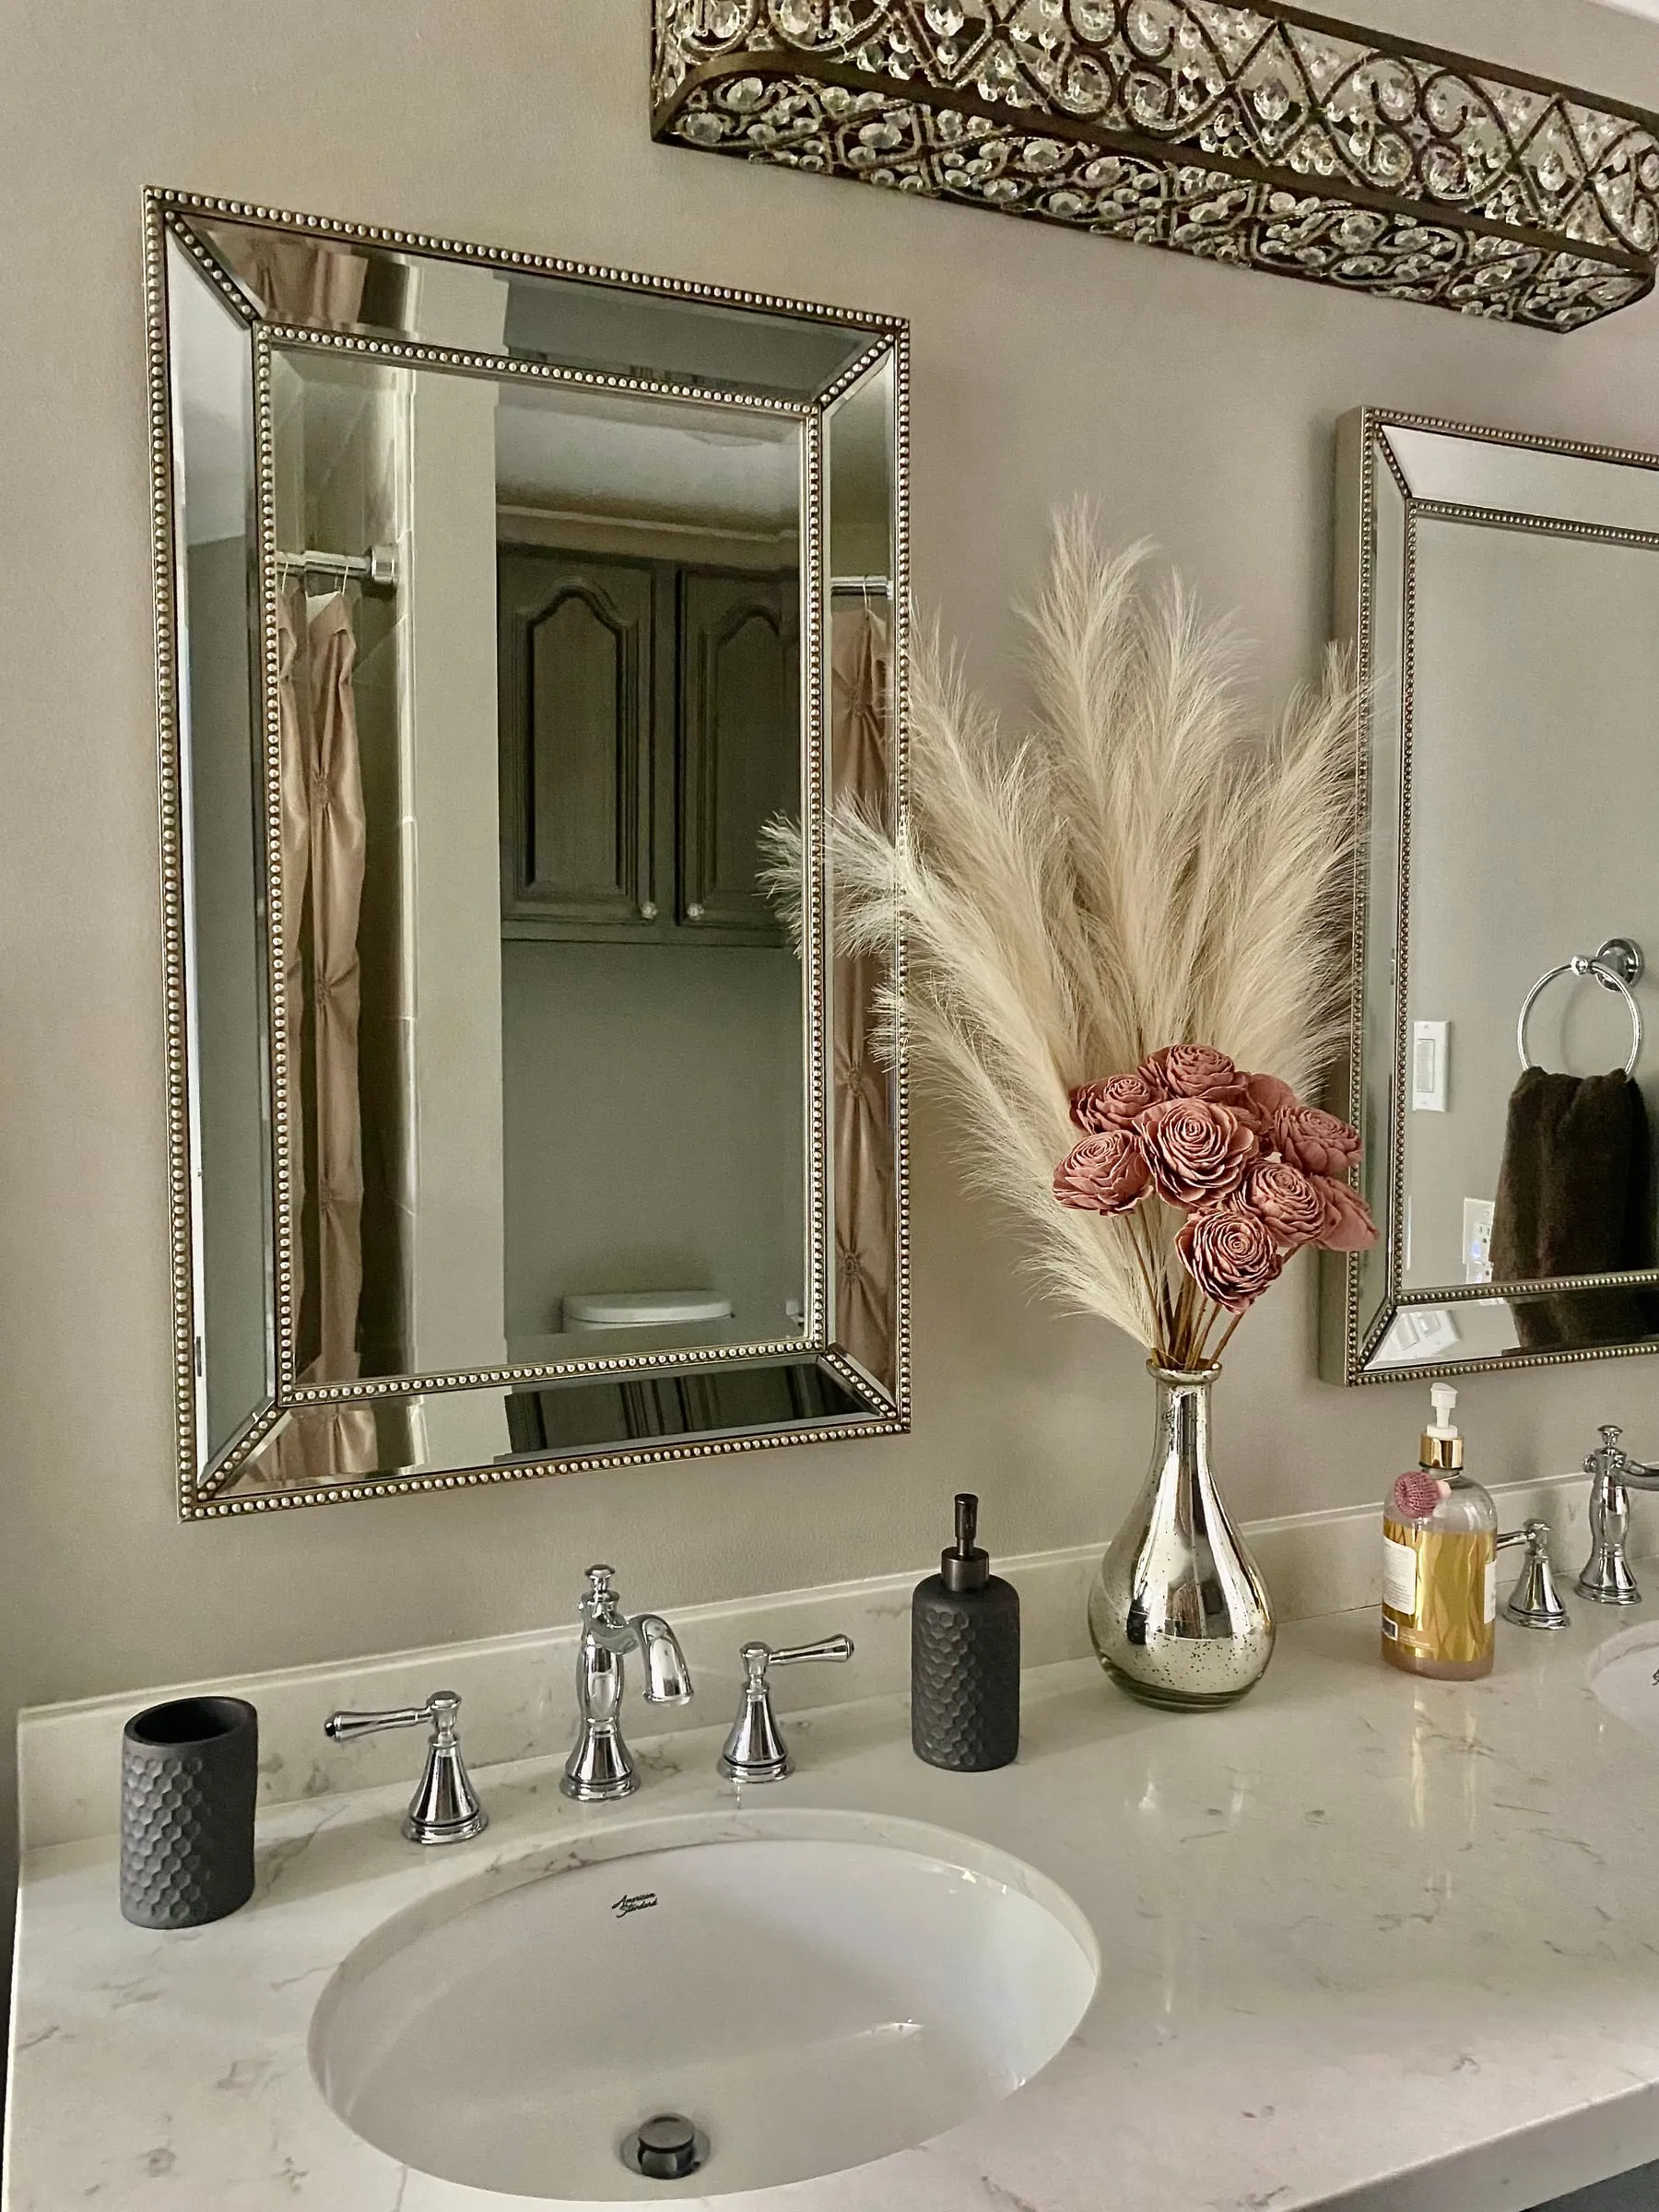
As for the mirrors above the sink, in case you haven’t noticed, I can’t get enough of beaded mirrors. They add so much glamour to a space! Initially, I hoped to use a large beaded mirror that I already had but the dimensions didn’t work out between the height of the backsplash and the electrical wires for the lighting. I wasn’t too upset since… I now had an opportunity to buy more! I started searching, also hoping for a deal, which were few and far between at that time. I ended up paying full price for two beautiful mirrors, an uncommon occurrence for me. But, it was worth it to complete the room. Shortly after we moved in, I found a matching full length beaded mirror at Home Goods and leaned it against the wall directly next to the vanity.
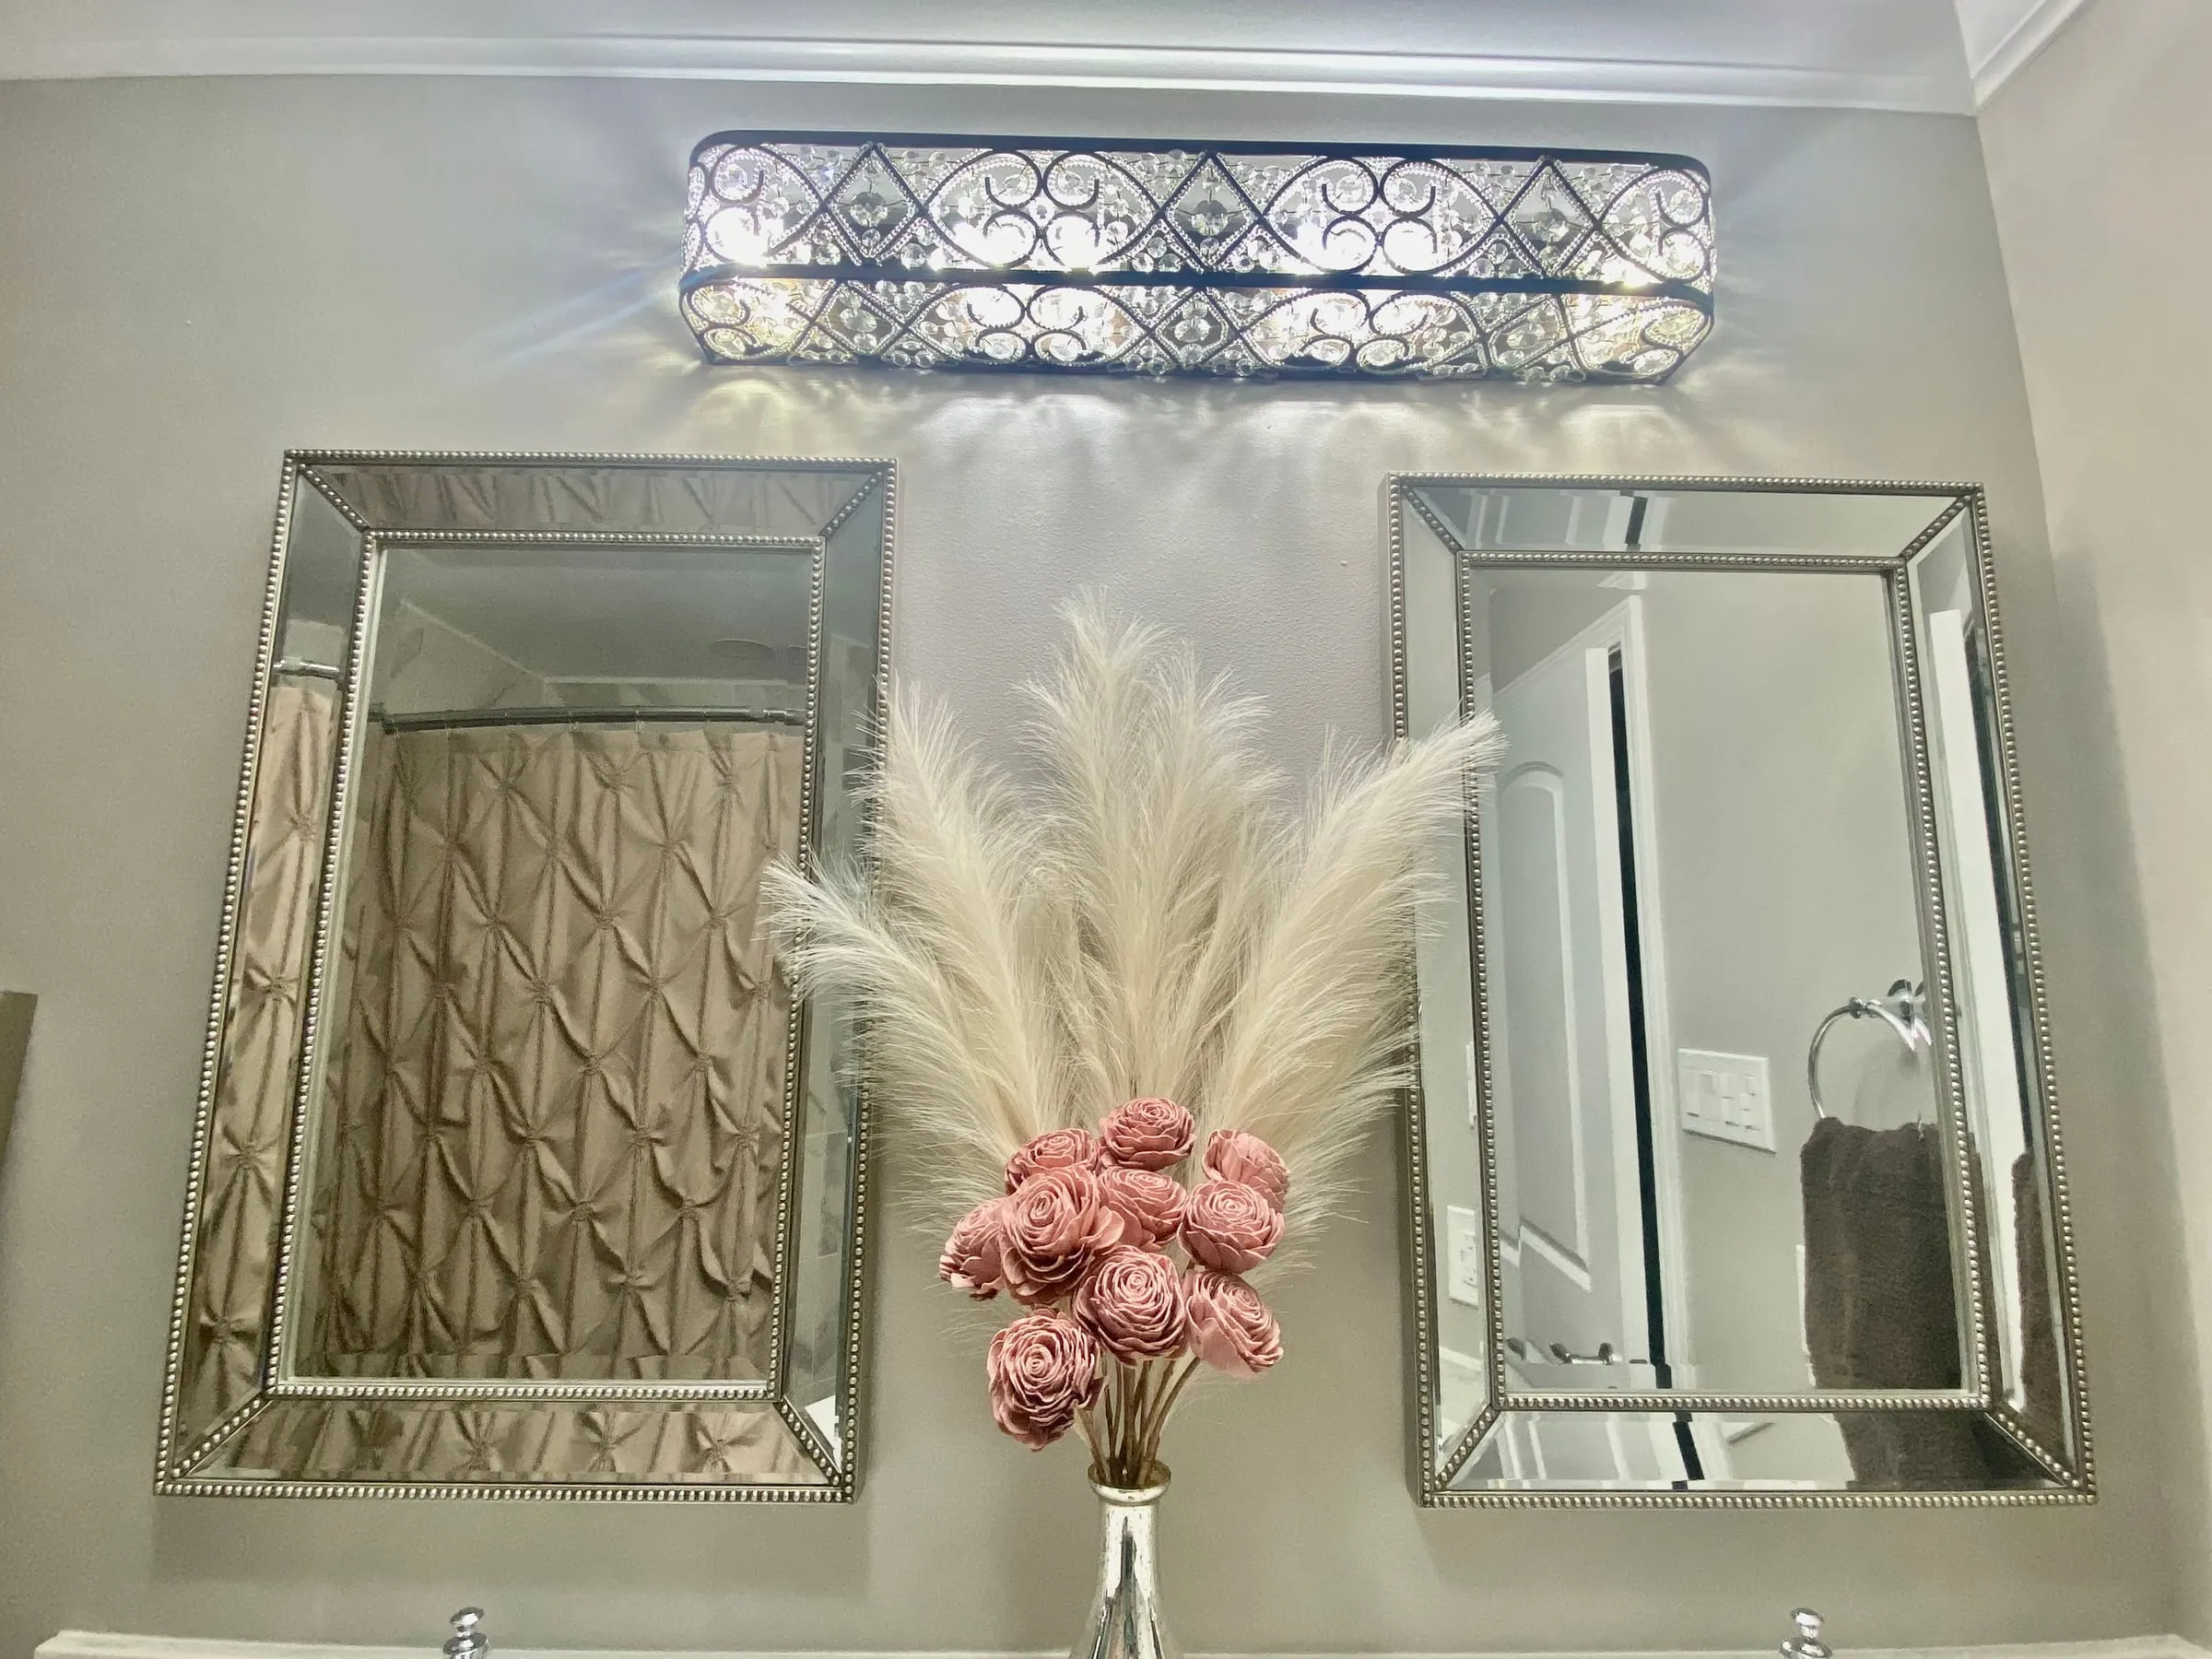
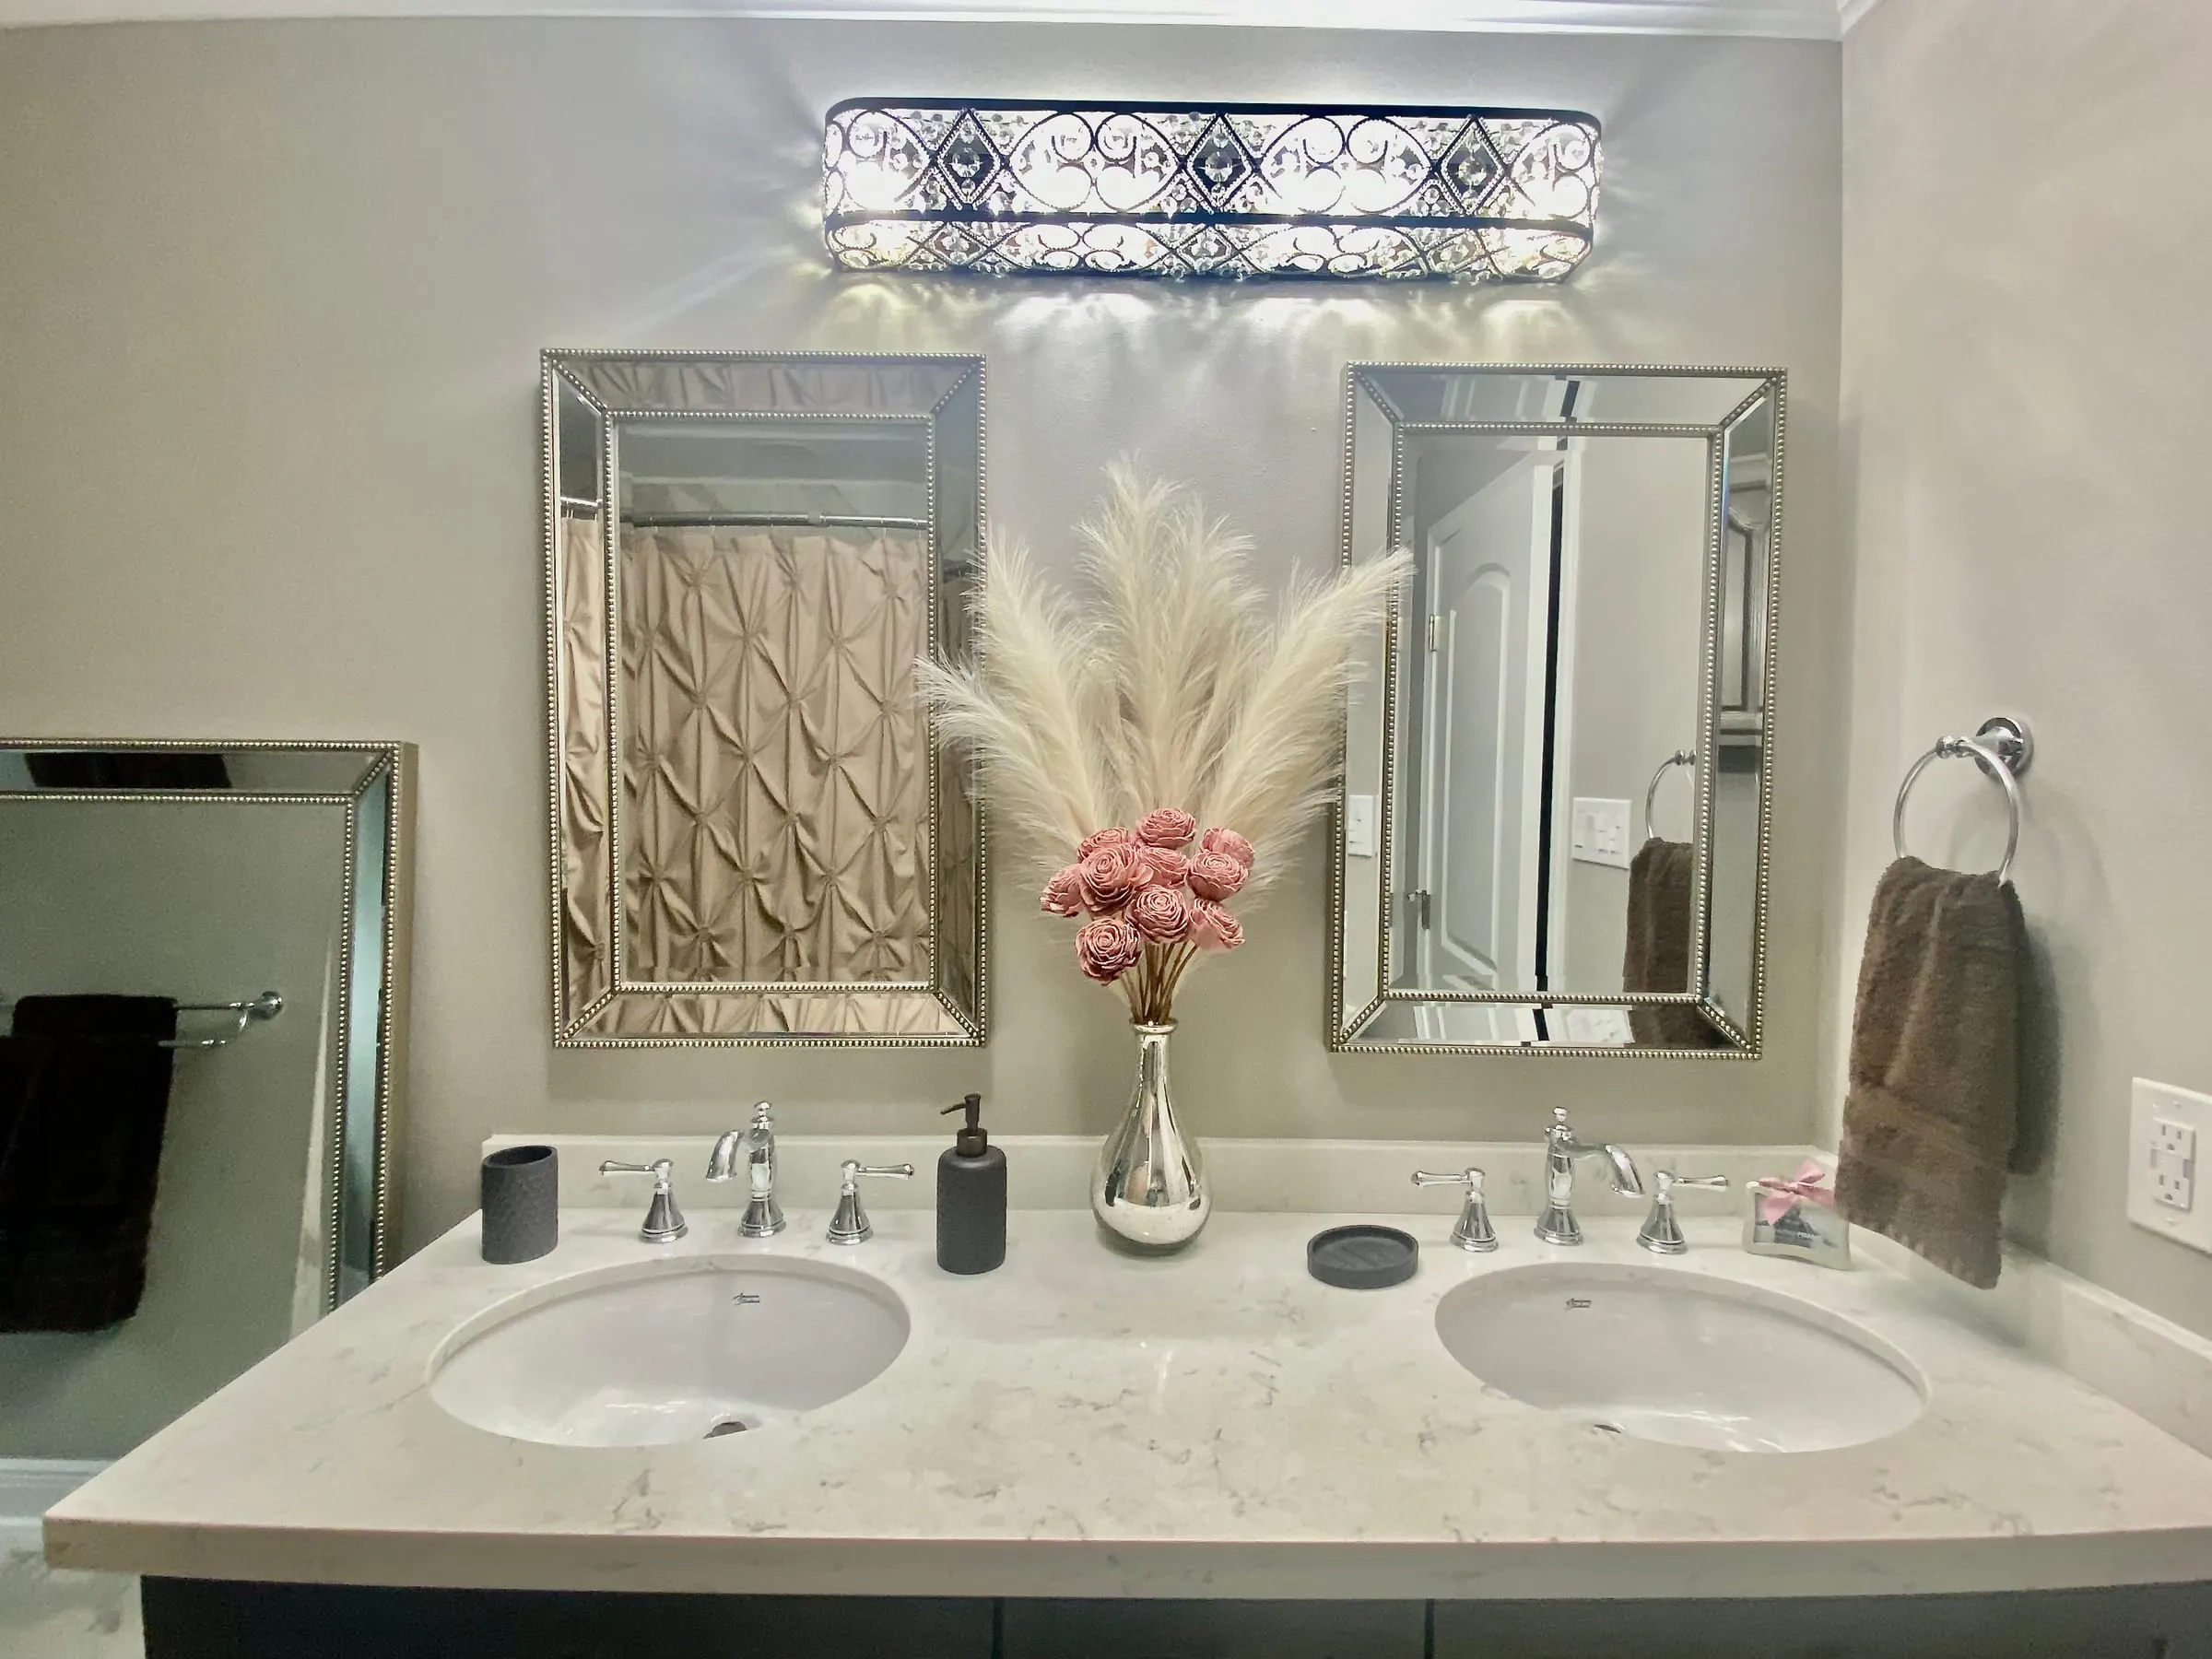
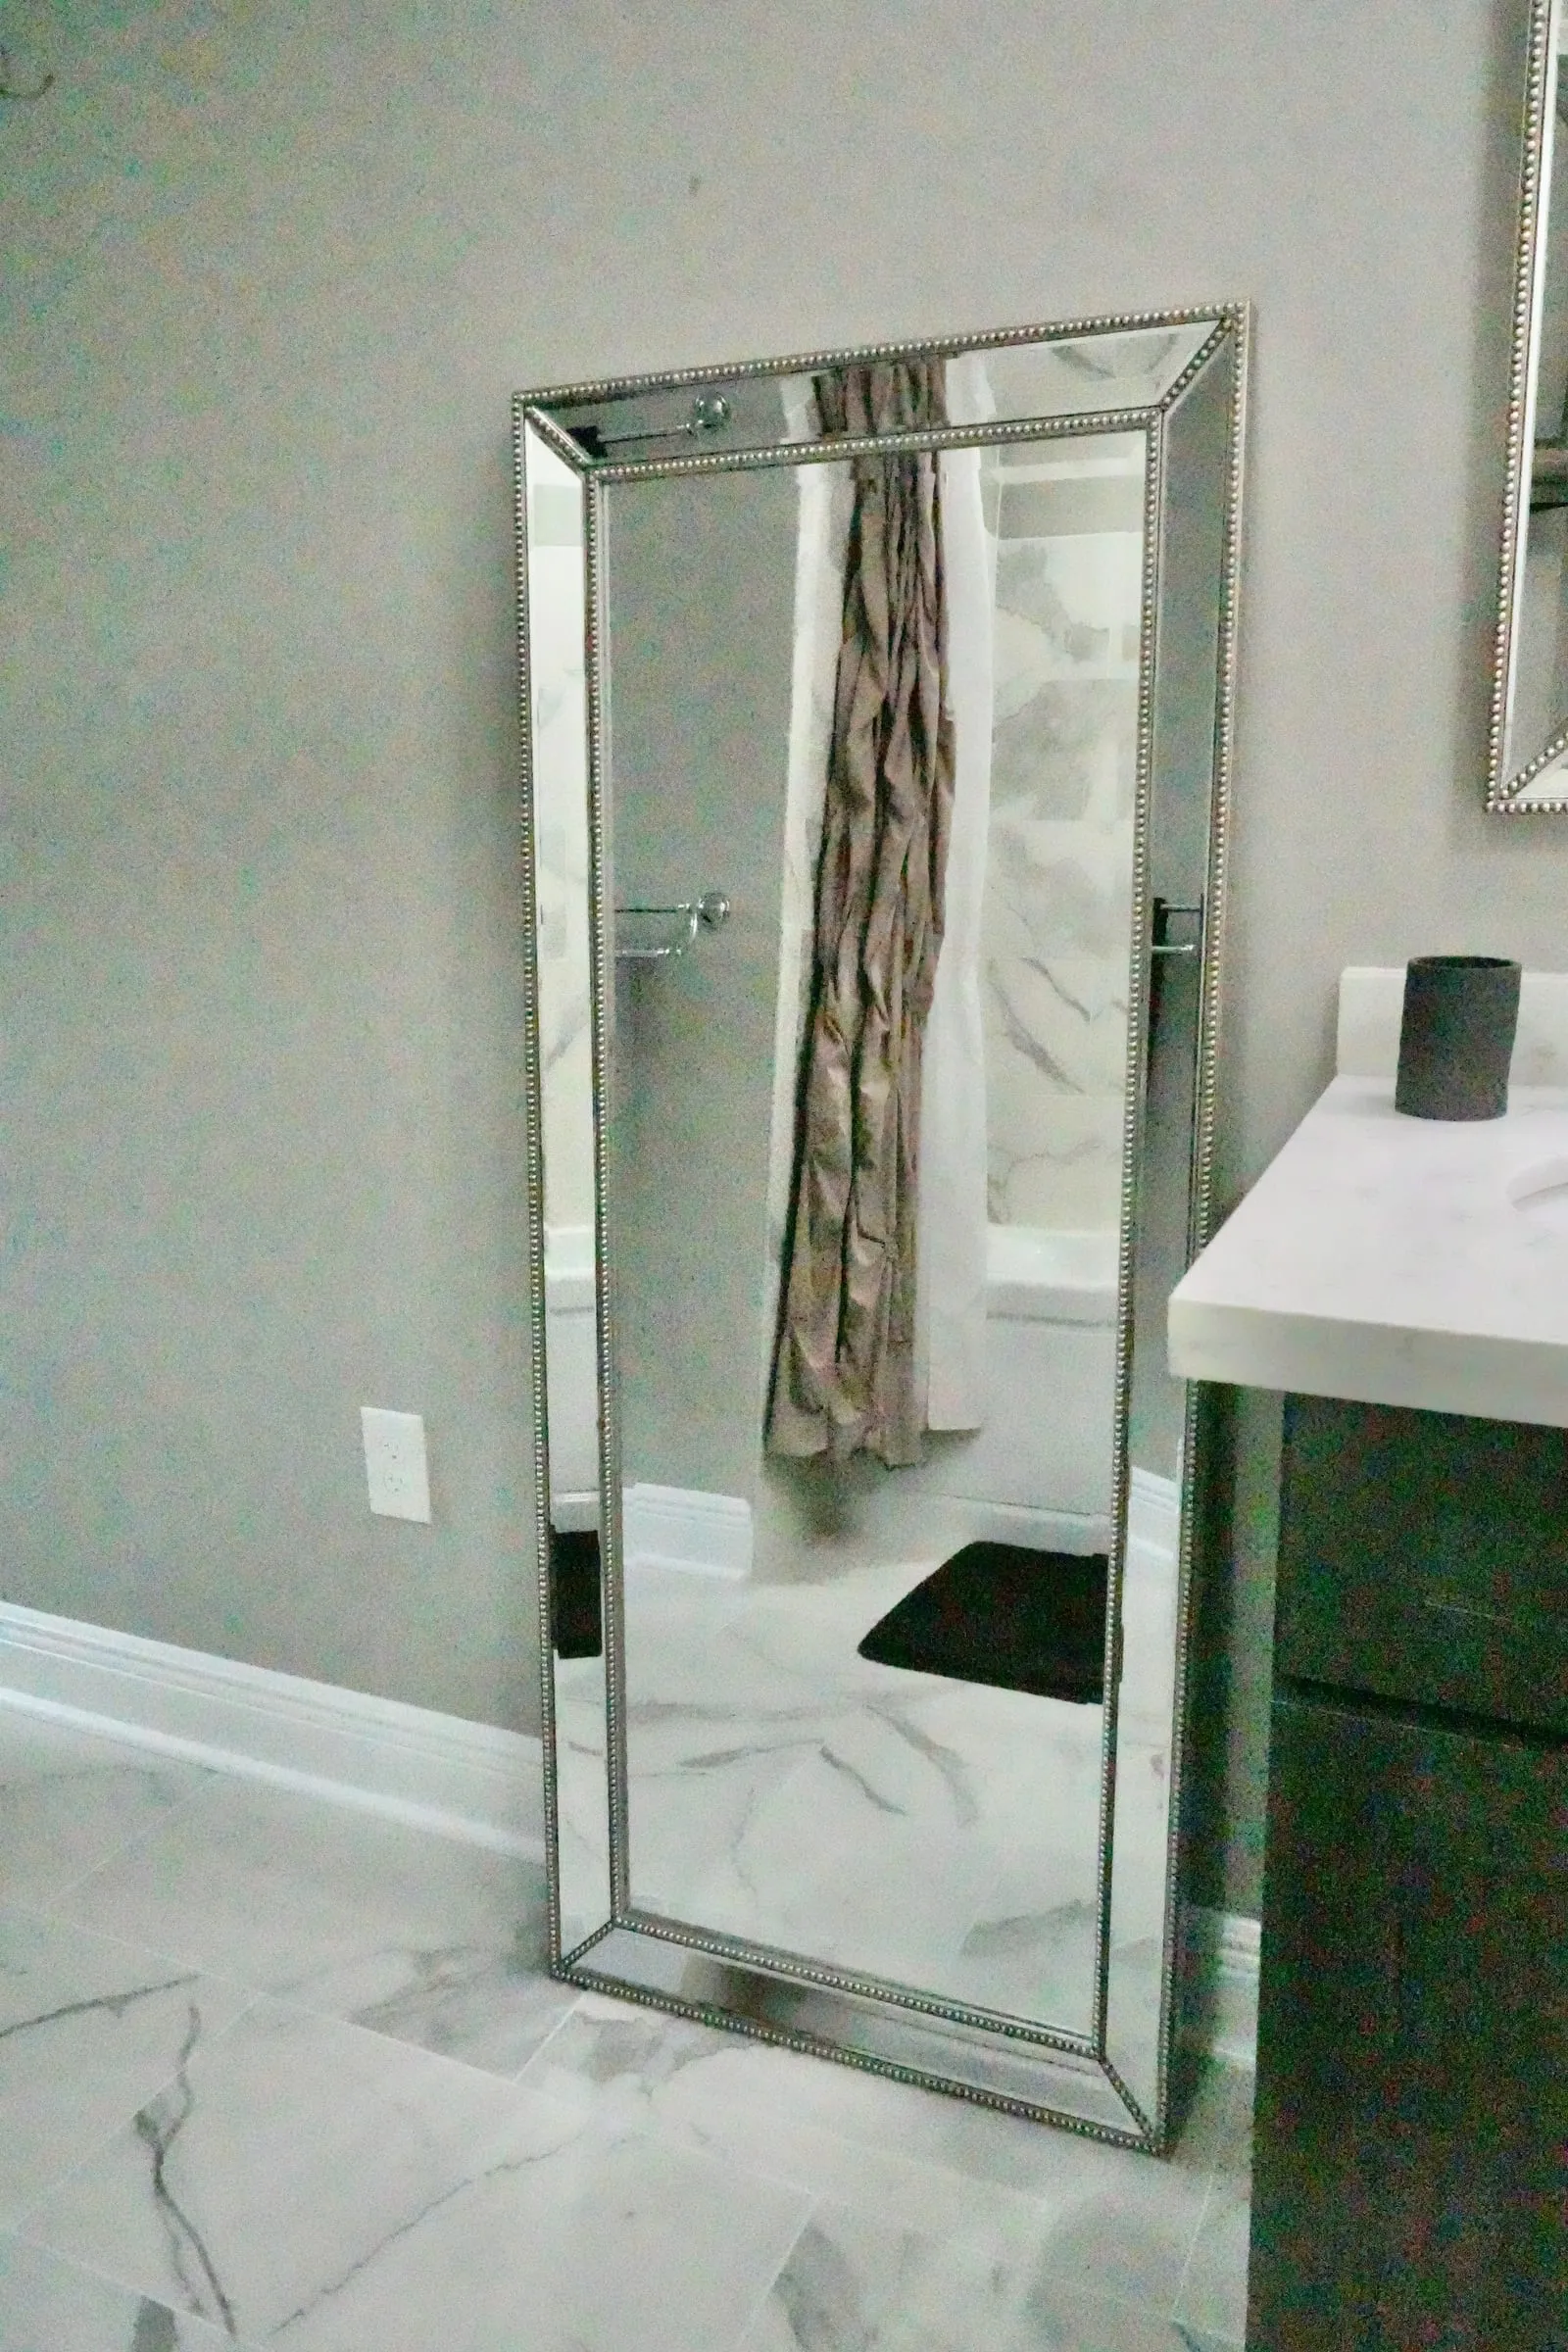
I purchased mercury glass knobs for the vanity and cabinet, but they ended up being slightly too large and didn’t give the piece the “pop” I had anticipated. I tried a few different knobs but none provided the wow factor I was looking for. As a last resort, I decided to try the silver and crystal knobs I used in my last remodel and voila! They were the perfect size and added an air of sophistication without being too much. I ordered the amount needed and love how they turned out!
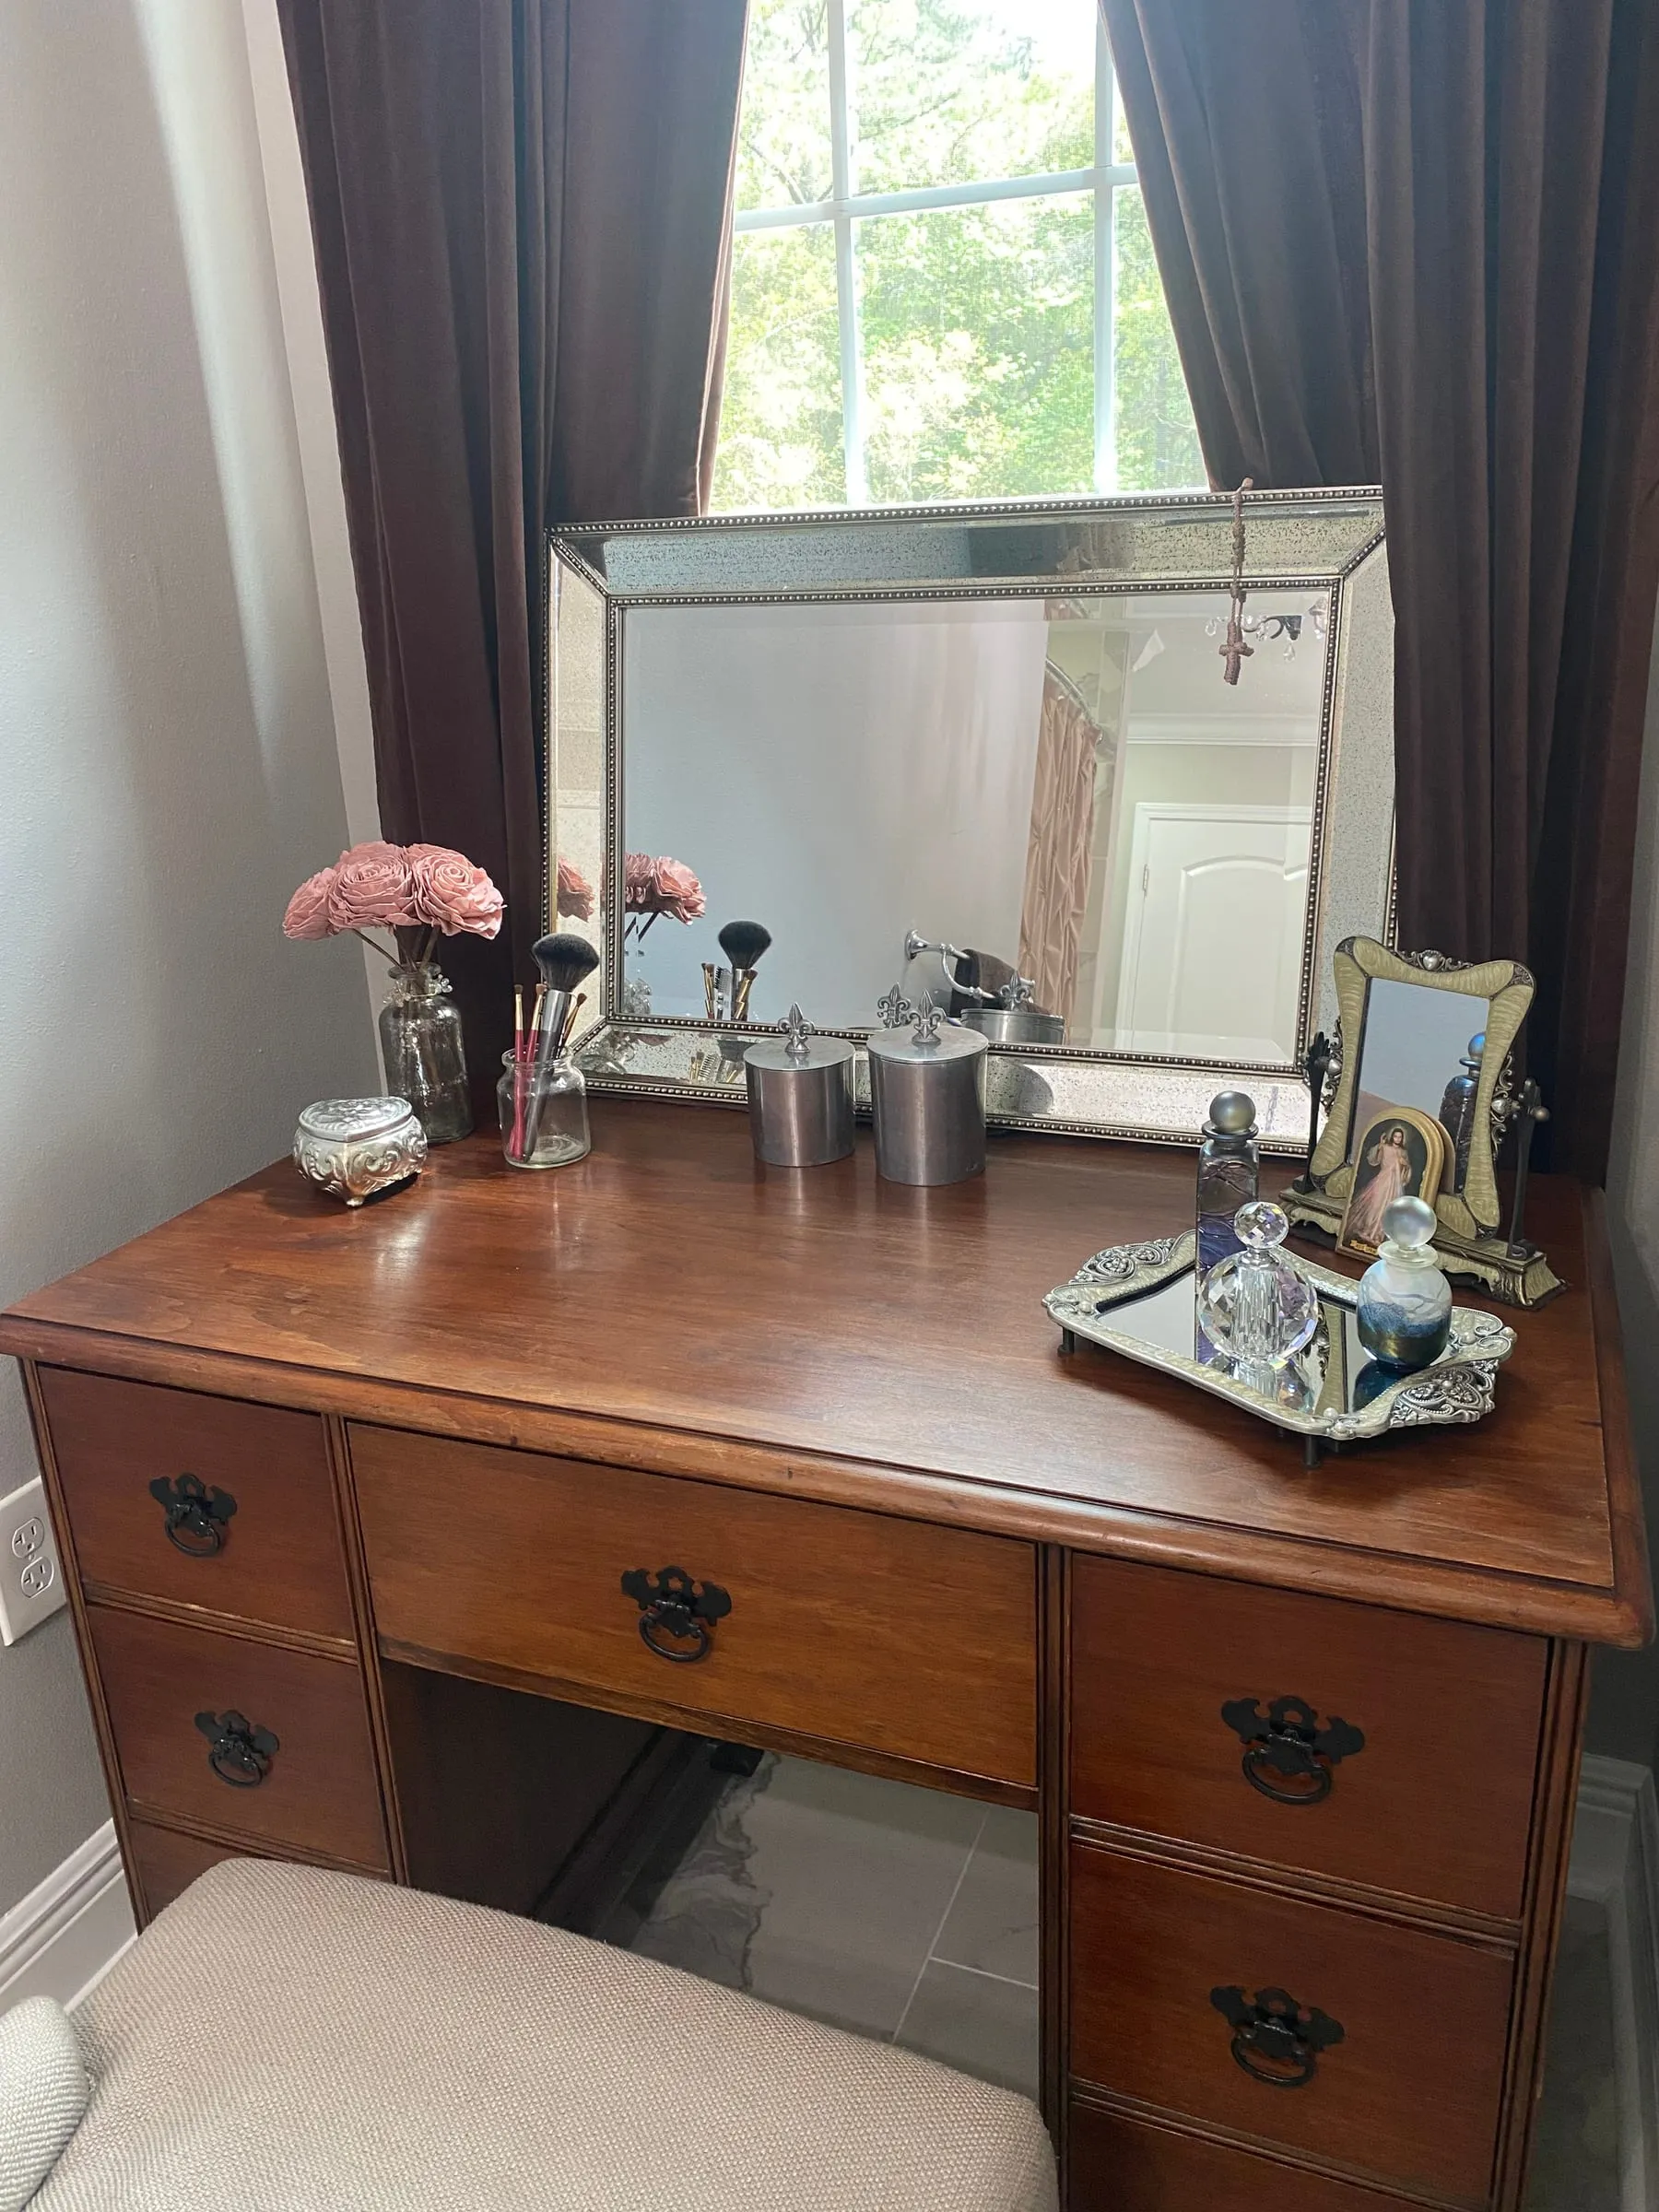
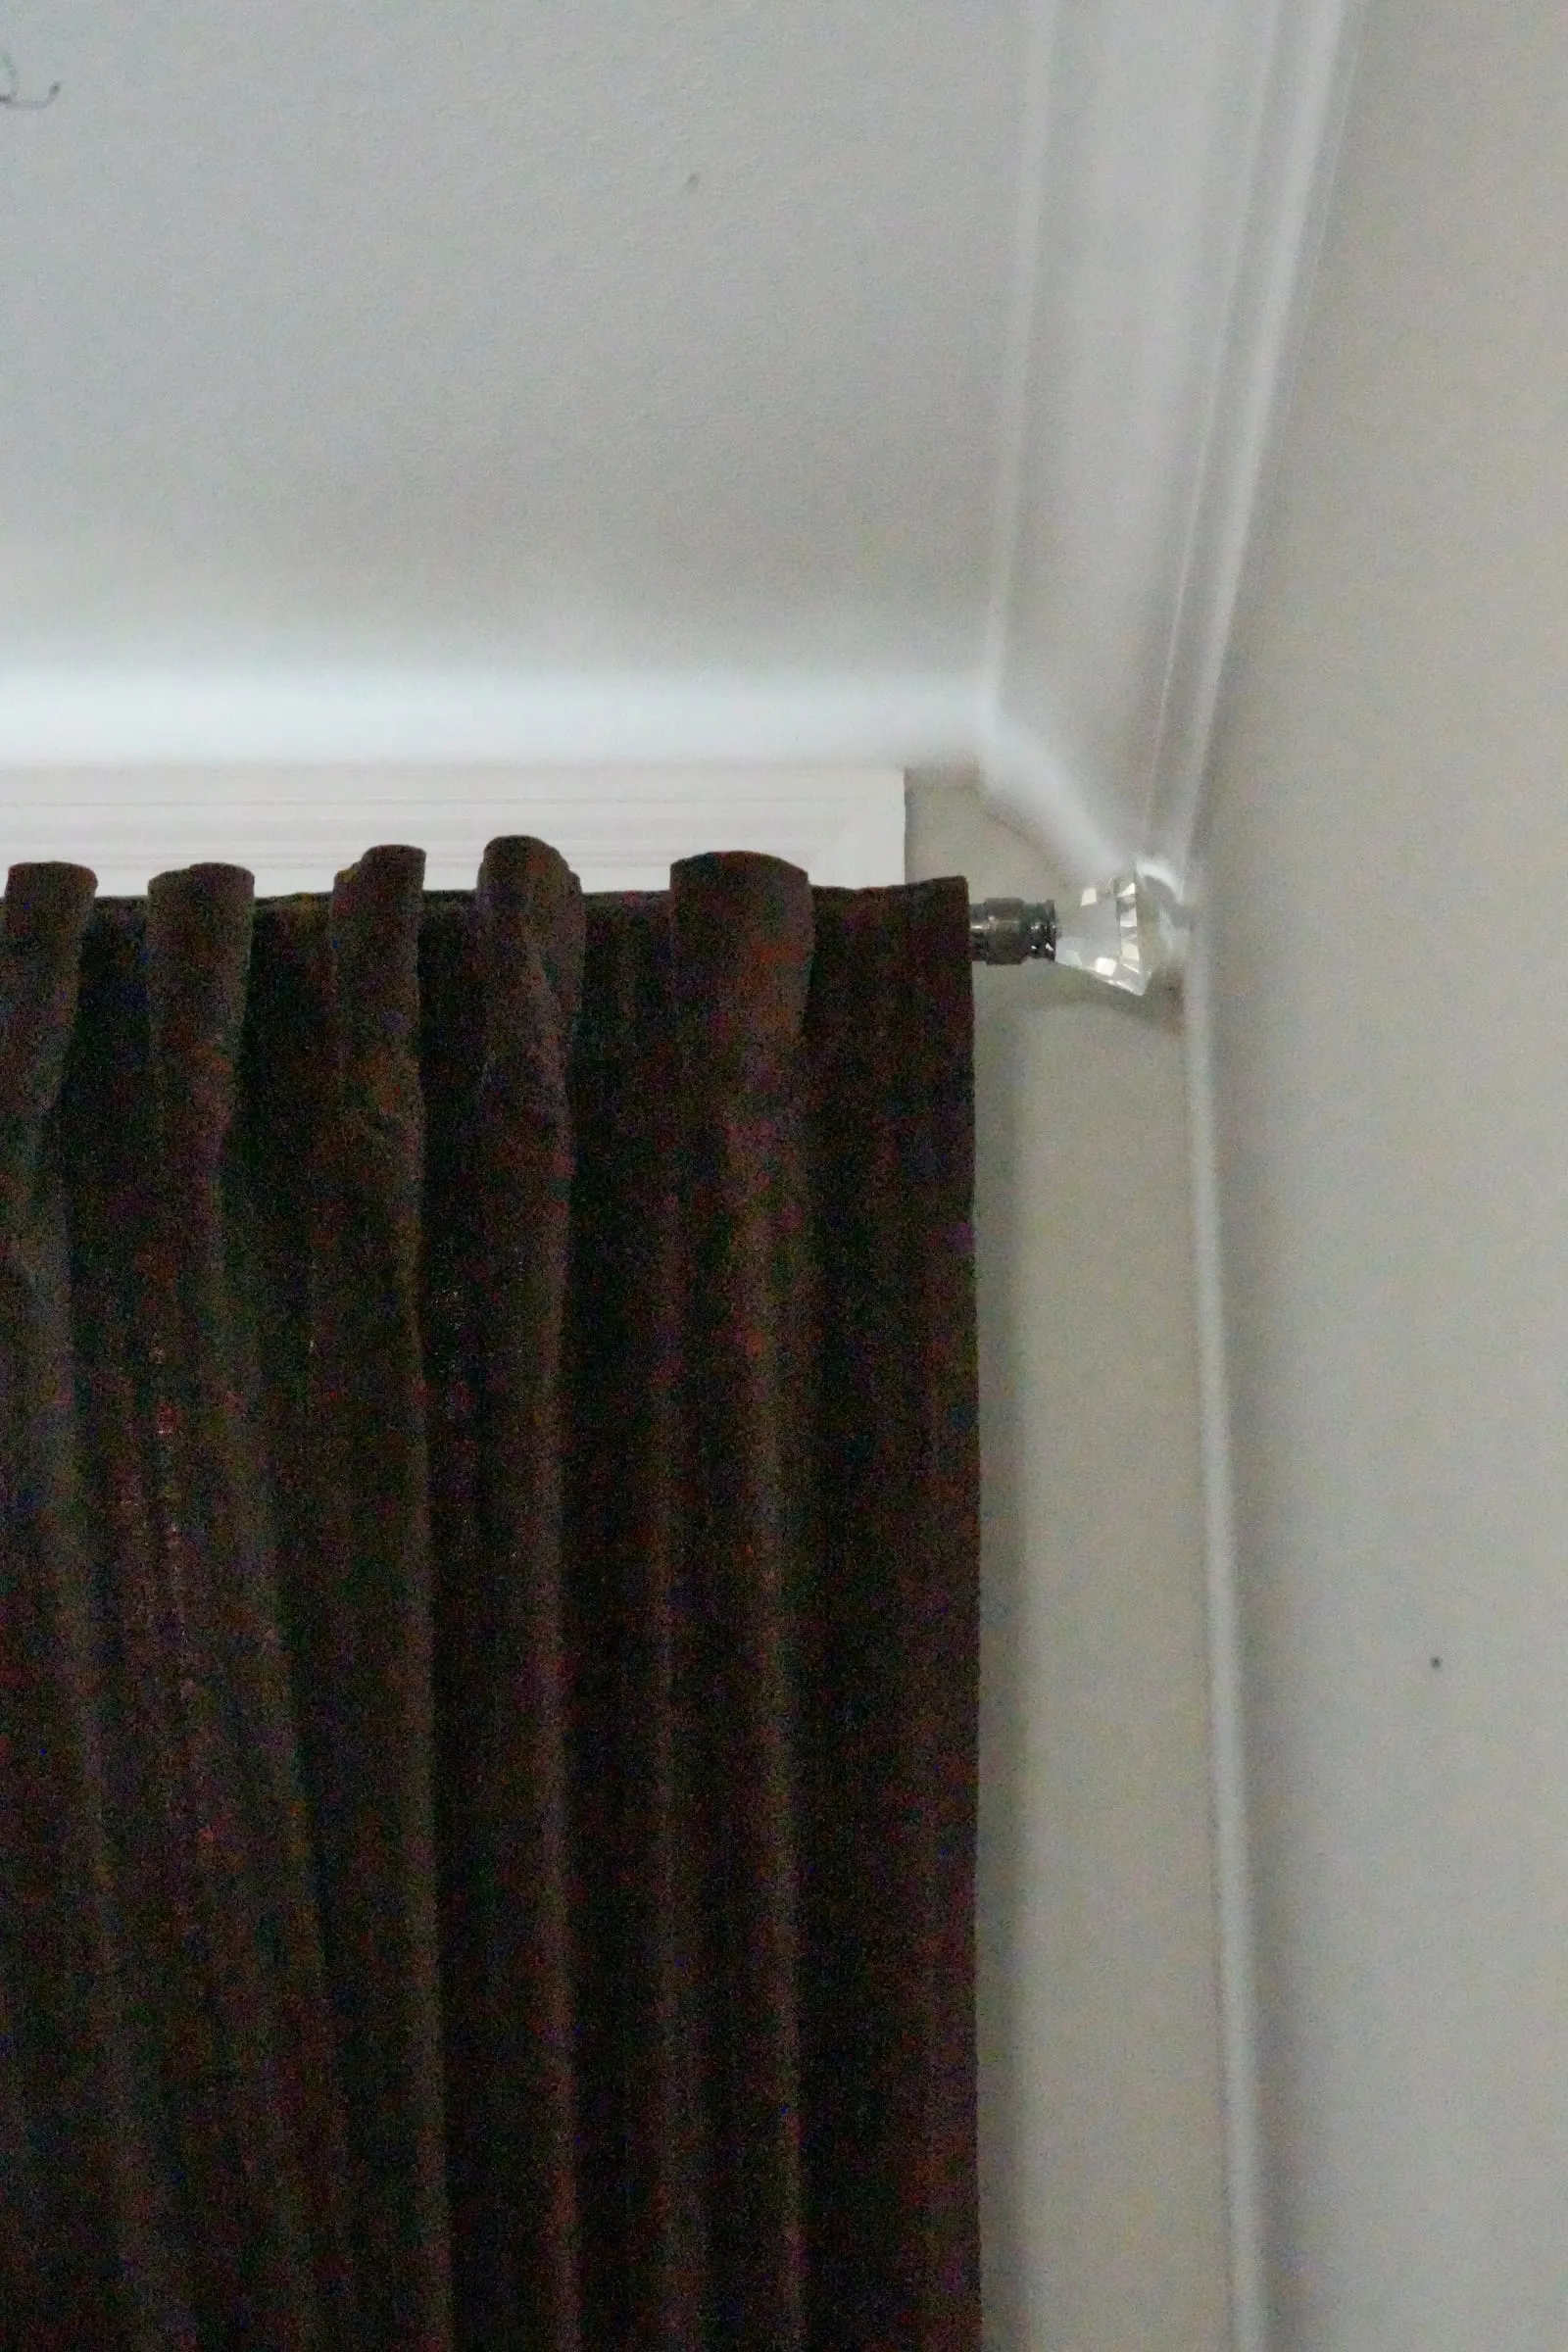
The curtain rod I chose was a deep bronze that matched perfectly with the other elements in the room. The crystal finials echo the glitter in the chandelier, vanity lights, and cabinet knobs. Finally, for the curtains, I already had a pair of rich brown velvet curtains to add both some contrast in color, some warmth, and a little texture.
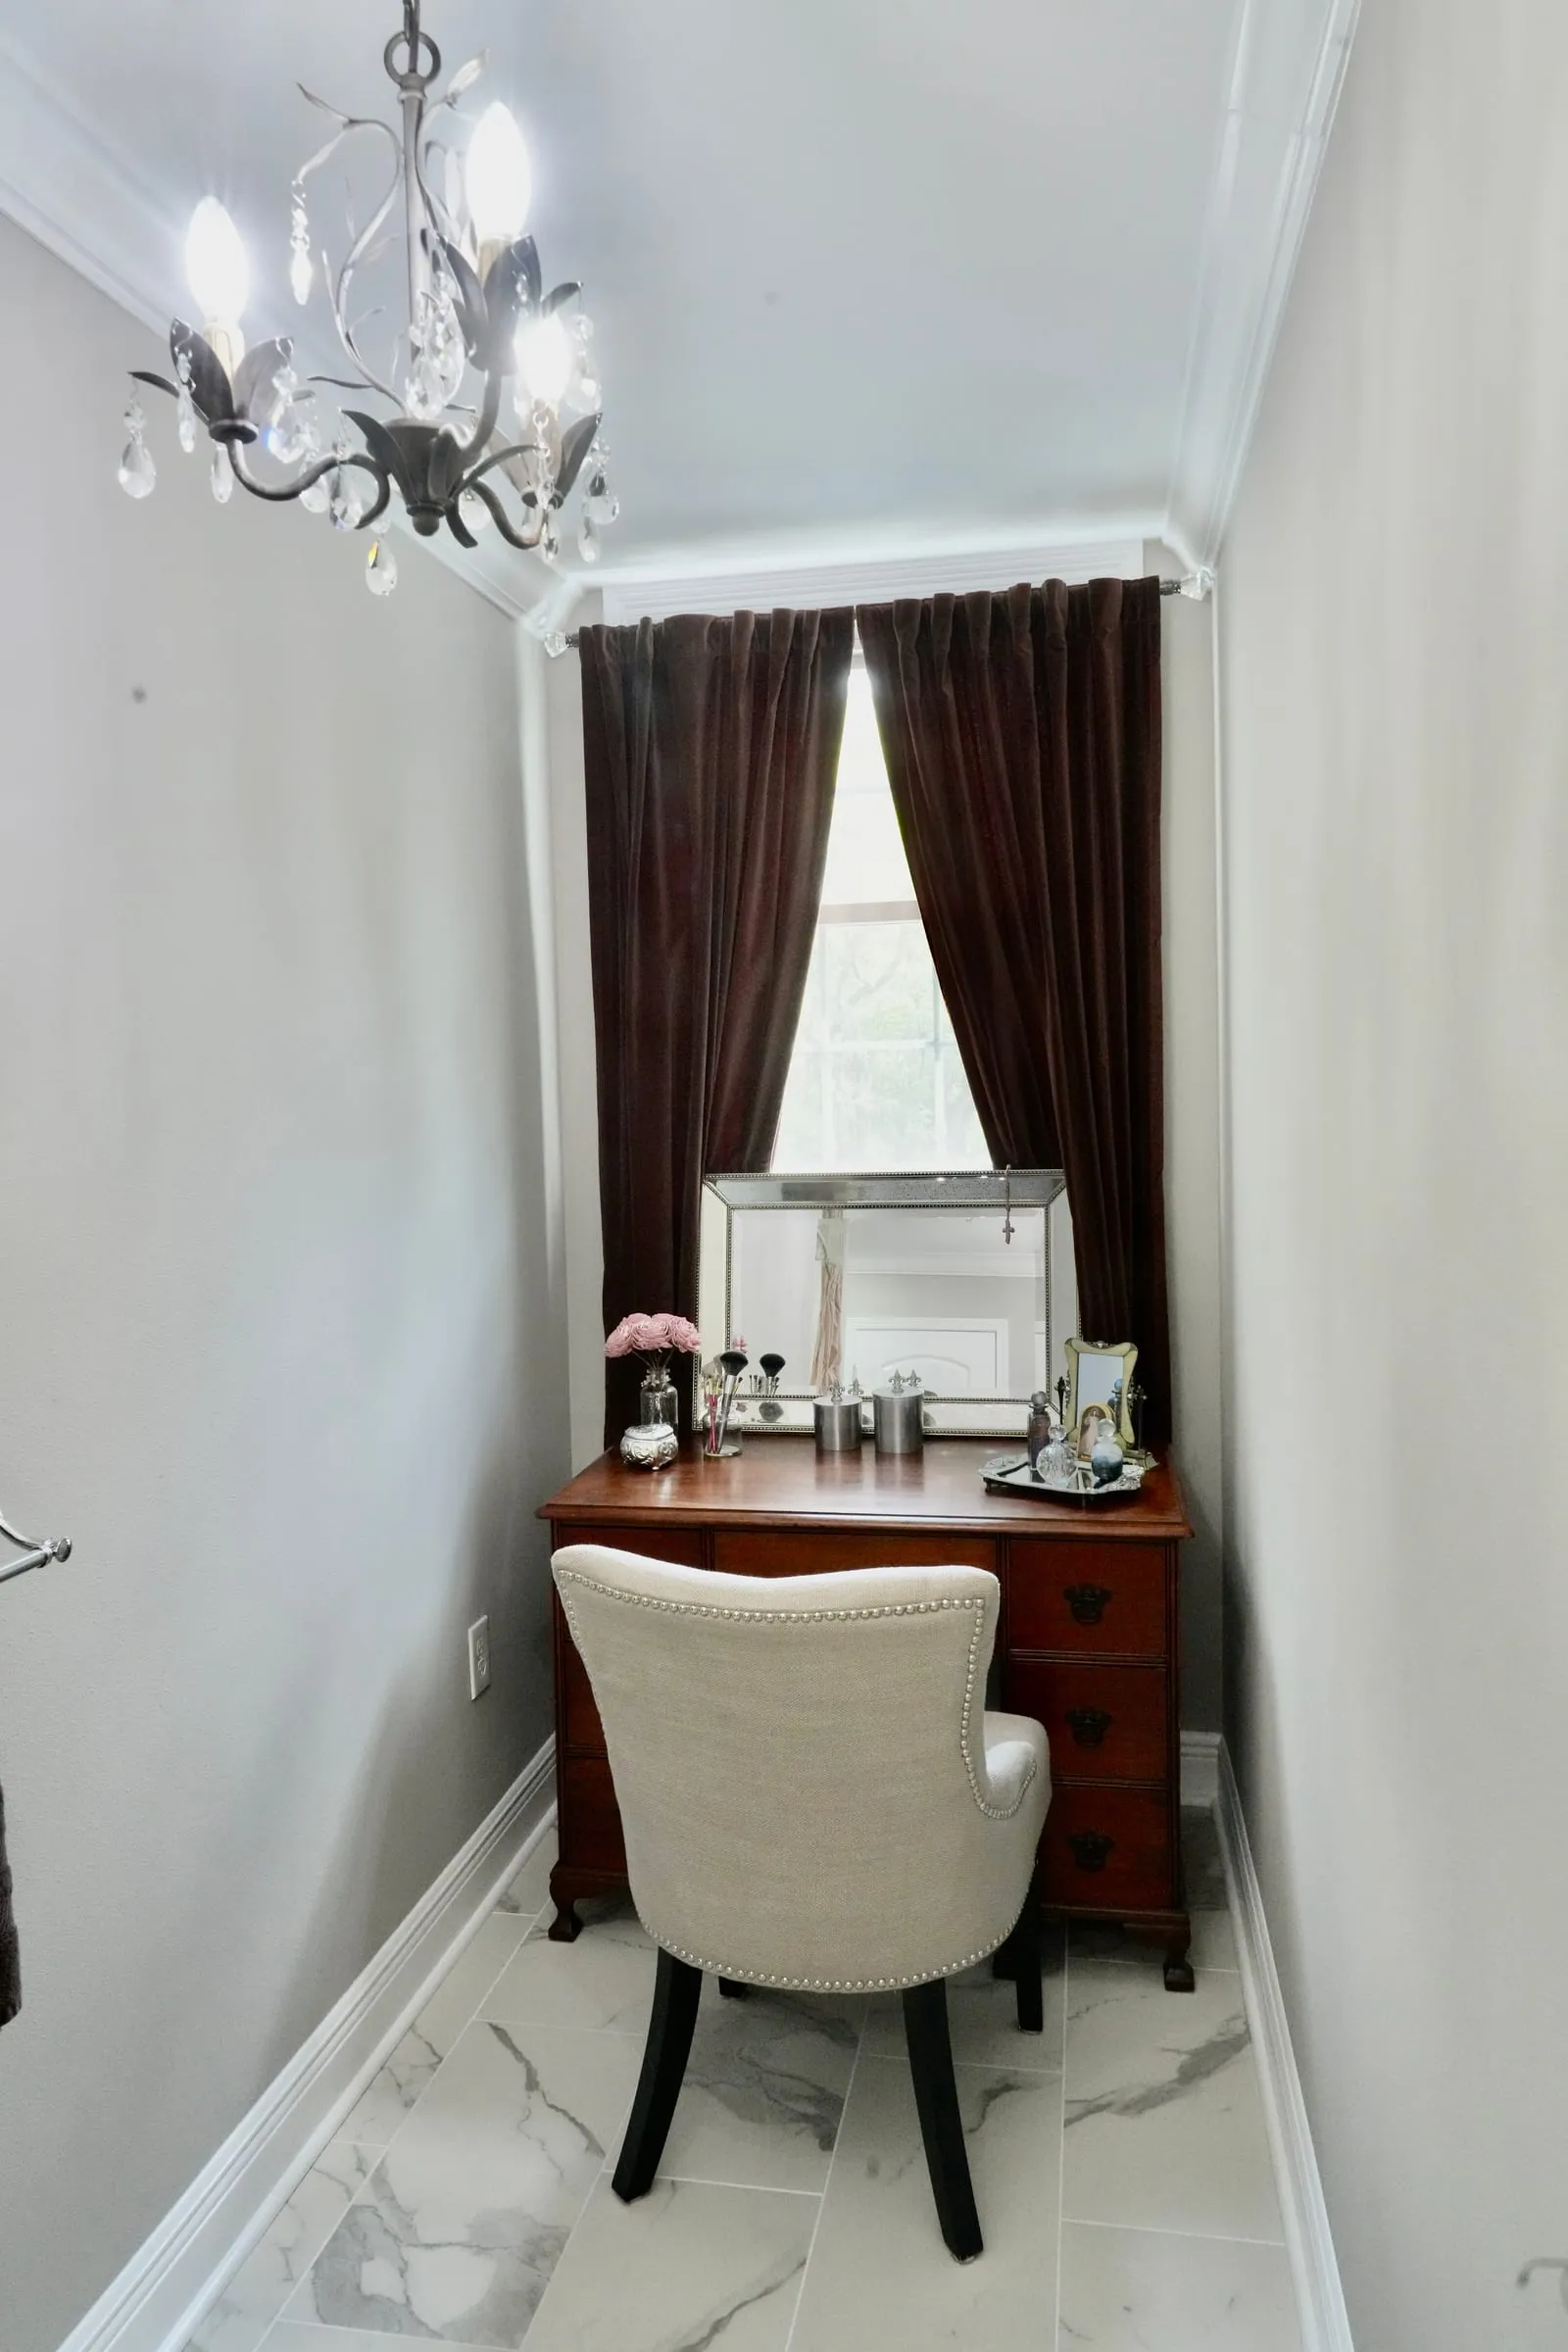
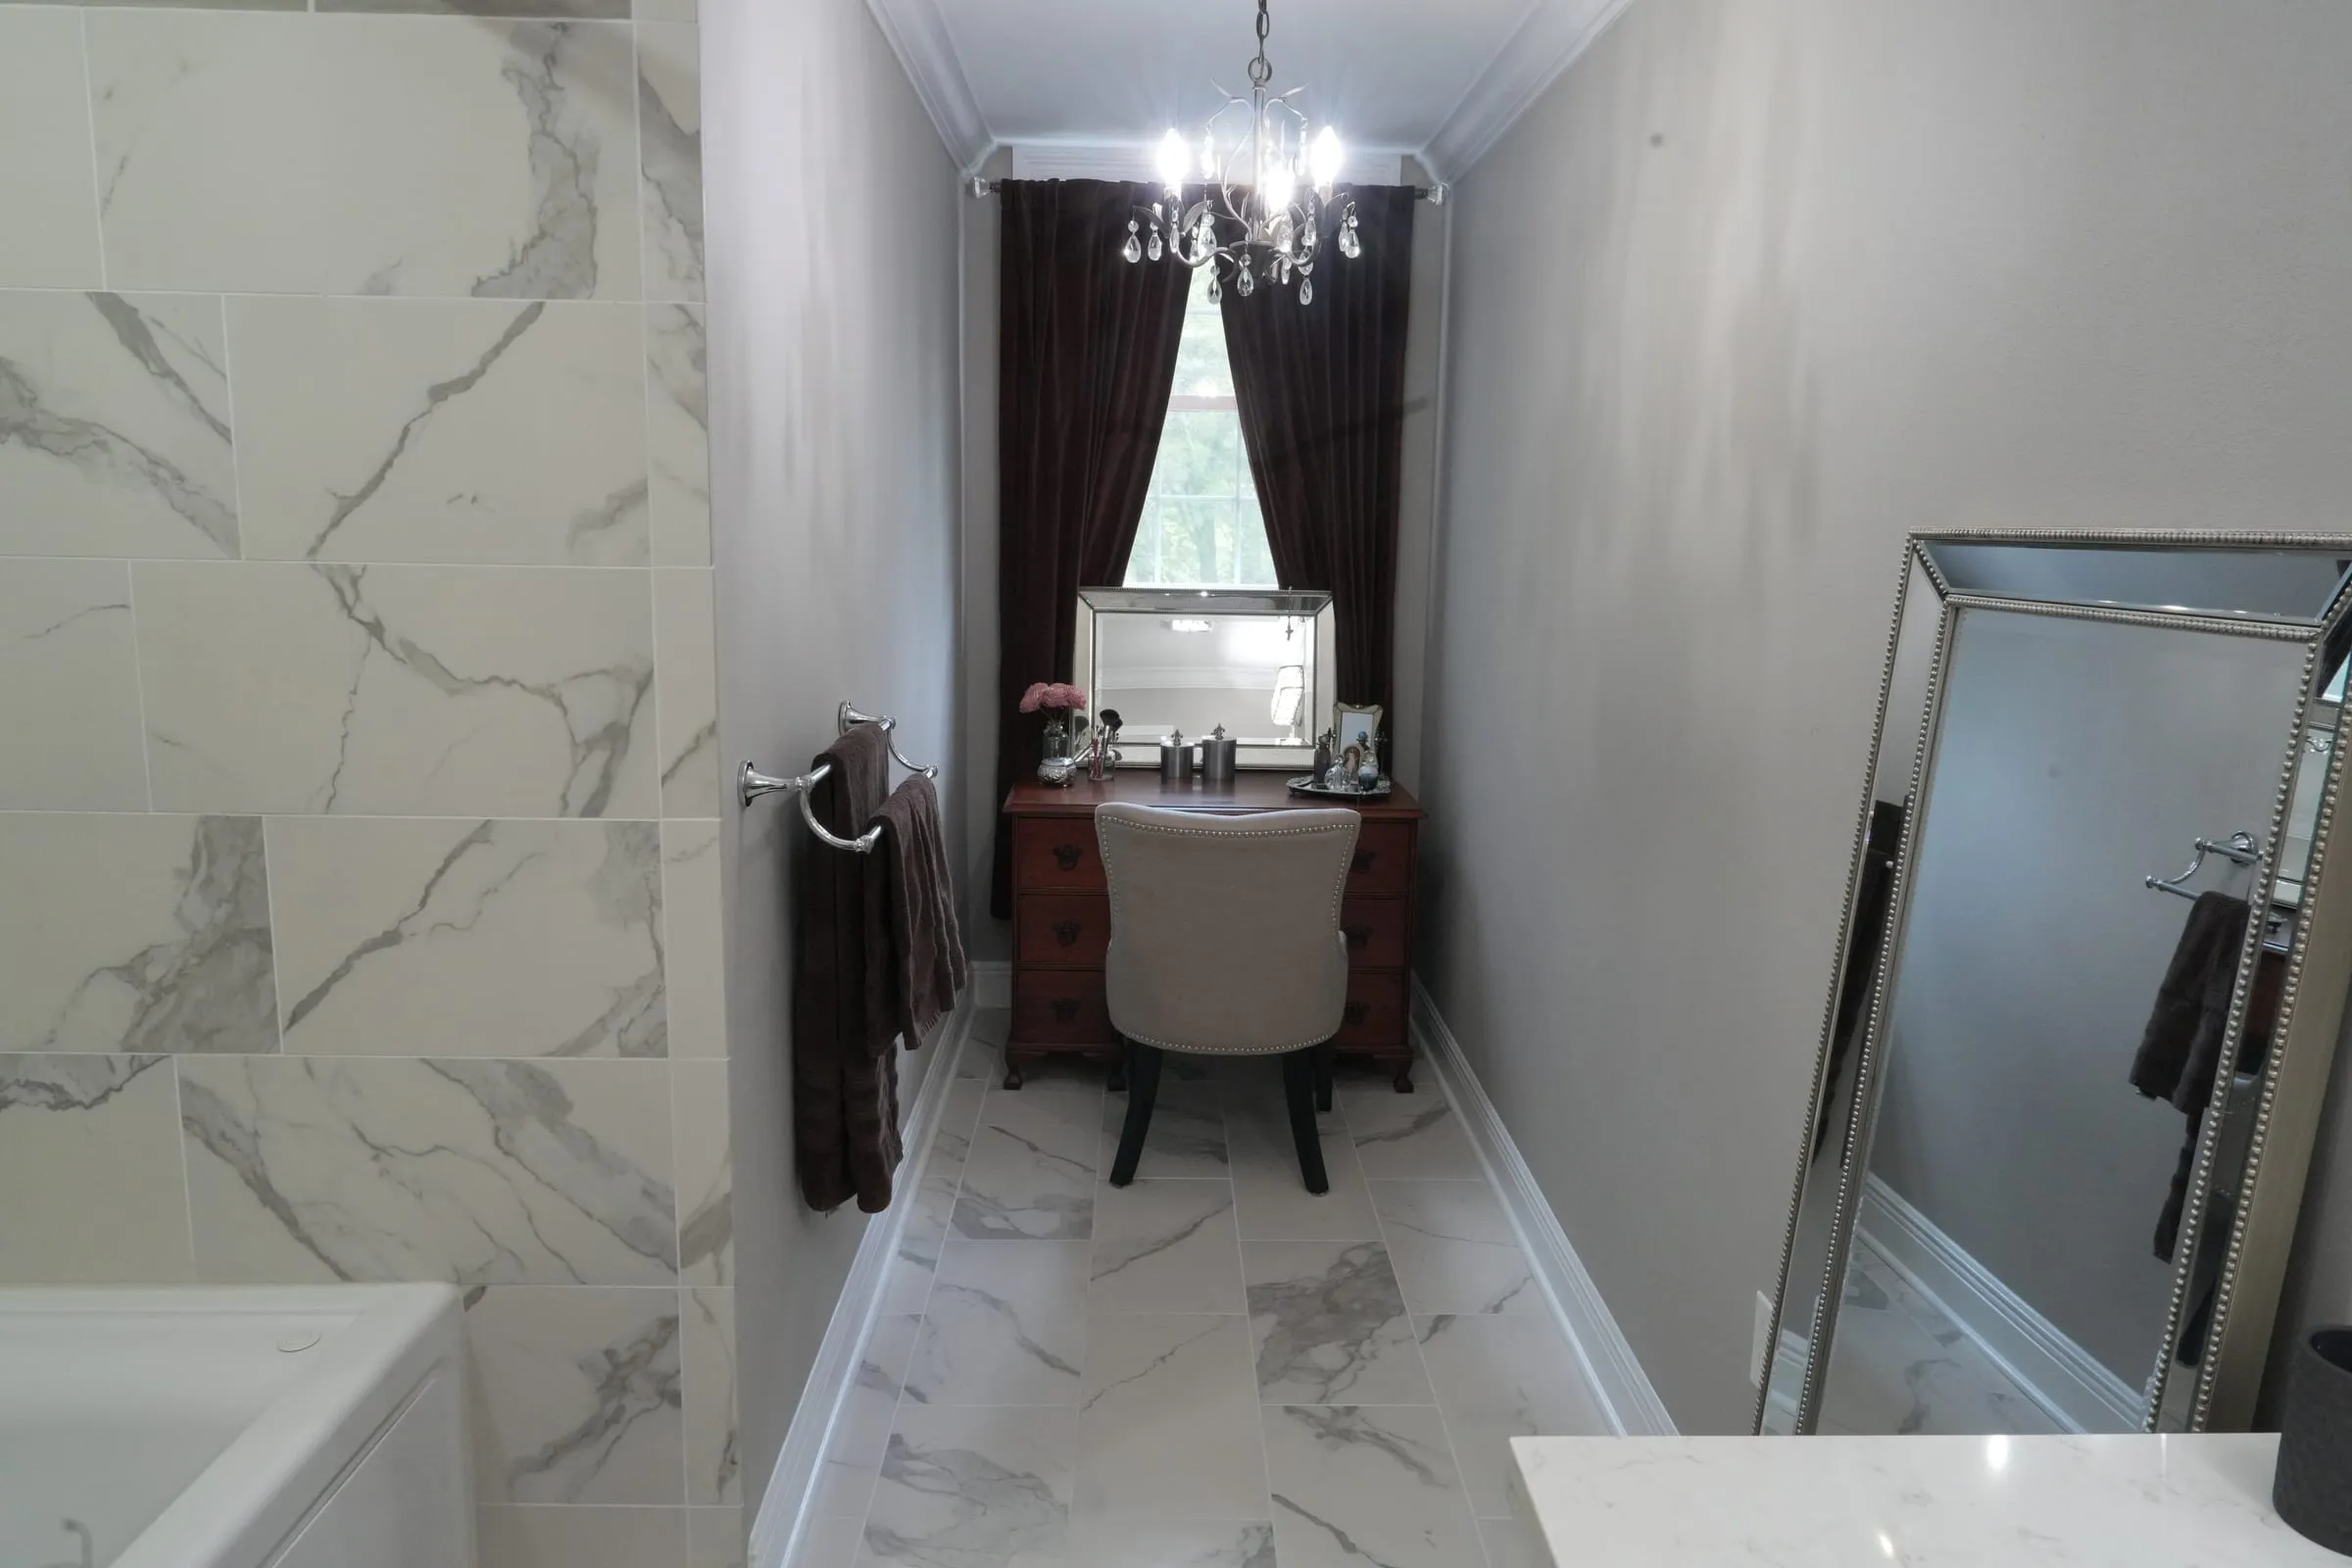
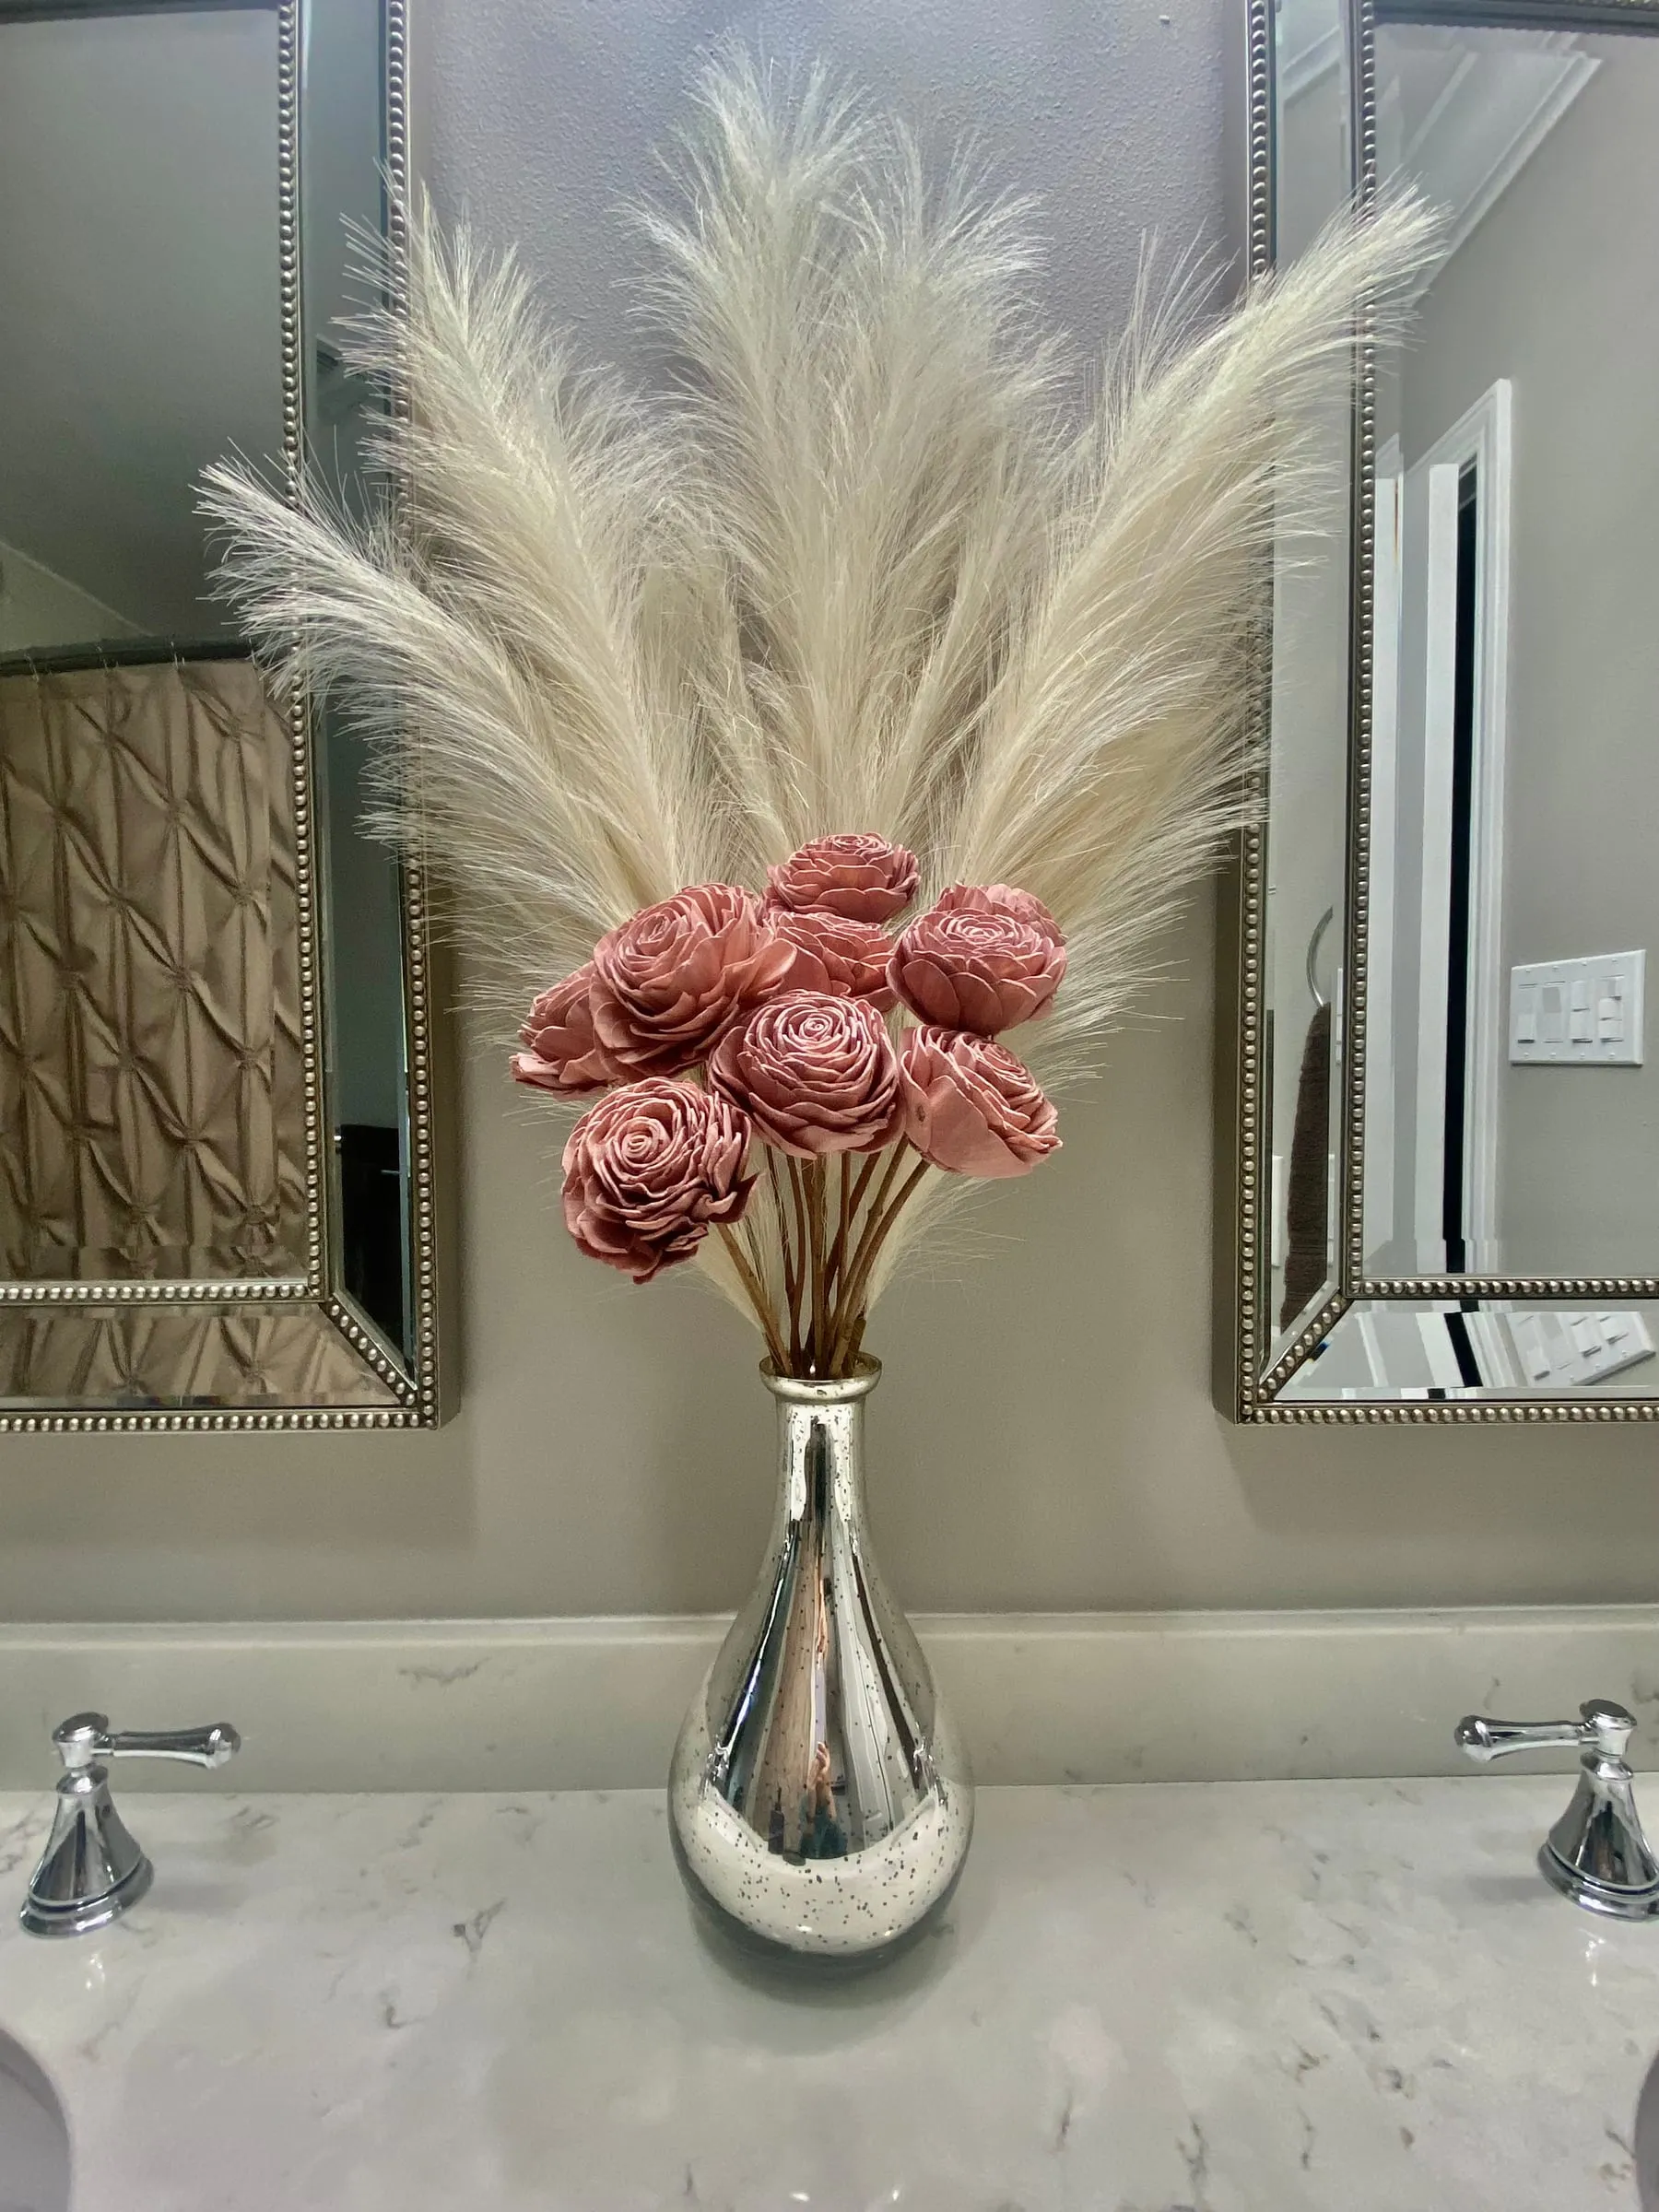
Moving on to the décor in the room, I purchased a few new items and used a few gifts that I had been given previously. Two simple floral arrangements with dusty pink wooden roses in mercury glass vases provide a pop of color in a relatively monochromatic color scheme. Other vanity top items give an air of sophistication in a silver or enameled finish. I also found a matching soap dish, toothbrush holder, and wastebasket in a deep bronze with honeycomb detail that adds some dimension and echoes the deep brown contrast color.
Project In the Works
Since the whole remodel took so much longer than expected (in my experience, they always do!), there are two item that haven’t been completed yet. The first was to reuse a cabinet from the primary bathroom as a linen closet. My initial idea was to place it directly on the wall as you enter, butted up next to the double vanity. Later I realized the only outlet in the sink area was on that wall, so we considered building it into the wall at the foot of the shower/tub combo. Se la vie! Maybe one day that project will be on the radar but until then, the combination of the double vanity storage, the over the toilet cabinet, and my dressing table has provided enough storage. I currently use a small dresser right outside the door in the landing for any overflow items.
The second task still on the list is to modify the curtains, which are too short. They sort of hide behind my makeup vanity so it’s not very noticeable. I decided that since I love the brown velvet, I’m going to keep them but extend them to the correct length for the window, hopefully with a pink accent. I’ll update this post when I’ve finished that project!
Have you redone your bathroom? I’d love to see some pictures if you have! Feel free to share them below.
Shop the look
Get the look
Love this transformation? Here are the exact fixtures, hardware, and décor used, so you can bring the same look home.
Affiliate disclosure: this post contains affiliate links. If you purchase through these links, I may earn a small commission at no extra cost to you. I only recommend products I genuinely use and love for my design projects.
- Floor and wall tile
- Style Selections Calacatta White #0854771 (Lowe’s)
- Accent tile
- Boutique #1351389, Greige, 13.78 in x 4.84 in, model #LWBOUT0514GRGE, distributed by Surfaces Southeast, Inc.
- Grout color
- PolyBlend Plus Sanded Grout in Snow White
- Countertops
- Carrera Cream Quartz
- Wall color
- Behr Perfect Taupe, 50% lighter
- Wall paint
- Benjamin Moore Aura Bath and Spa in Matte
- Trim paint
- Benjamin Moore Advance in Superwhite
- Cabinet color
- Modern Masters Smoke with wall color as basecoat
- Jetted tub
- American Standard Evolution 60x32
- Shower fixtures
- Delta Cassidy
- Sinks
- American Standard Ovalyn in White
- Toilet
- Toto Entrada
- Sink faucets
- Delta Cassidy in Chrome
- Cabinet knobs
- Liberty Faceted Acrylic in Satin Nickel
- Curtain rod
- (Similar) House of Hampton Aiesha 1” oil rubbed bronze rod with crystal finial
- Curtains
- Deep brown velvet curtains
- Shower curtain
- Madison Park Vivian in Taupe
- LED lighting
- Halo HLB6 (Home Depot) and Utilitech 6” (Lowe’s)
- Chandelier
- World Imports Bijoux 3 light chandelier
- Vanity light
- Bailey Street Home 6 light in Antique Bronze with Clear Strand Crystal
- Mirrors
- Deco Mirror 20x32 Framed Rectangular Beveled Edge Mirror in Champagne Silver
- Accent color
- A dusty rose
- Bathroom accessories
- zccz 6 piece bathroom accessory set in oil rubbed bronze (Amazon)
- Vase
- Mercury Glass Vase with Rhinestones (Tall) (Hobby Lobby)