HomeDesign & DIY Furniture Flips
Vanity Redoux
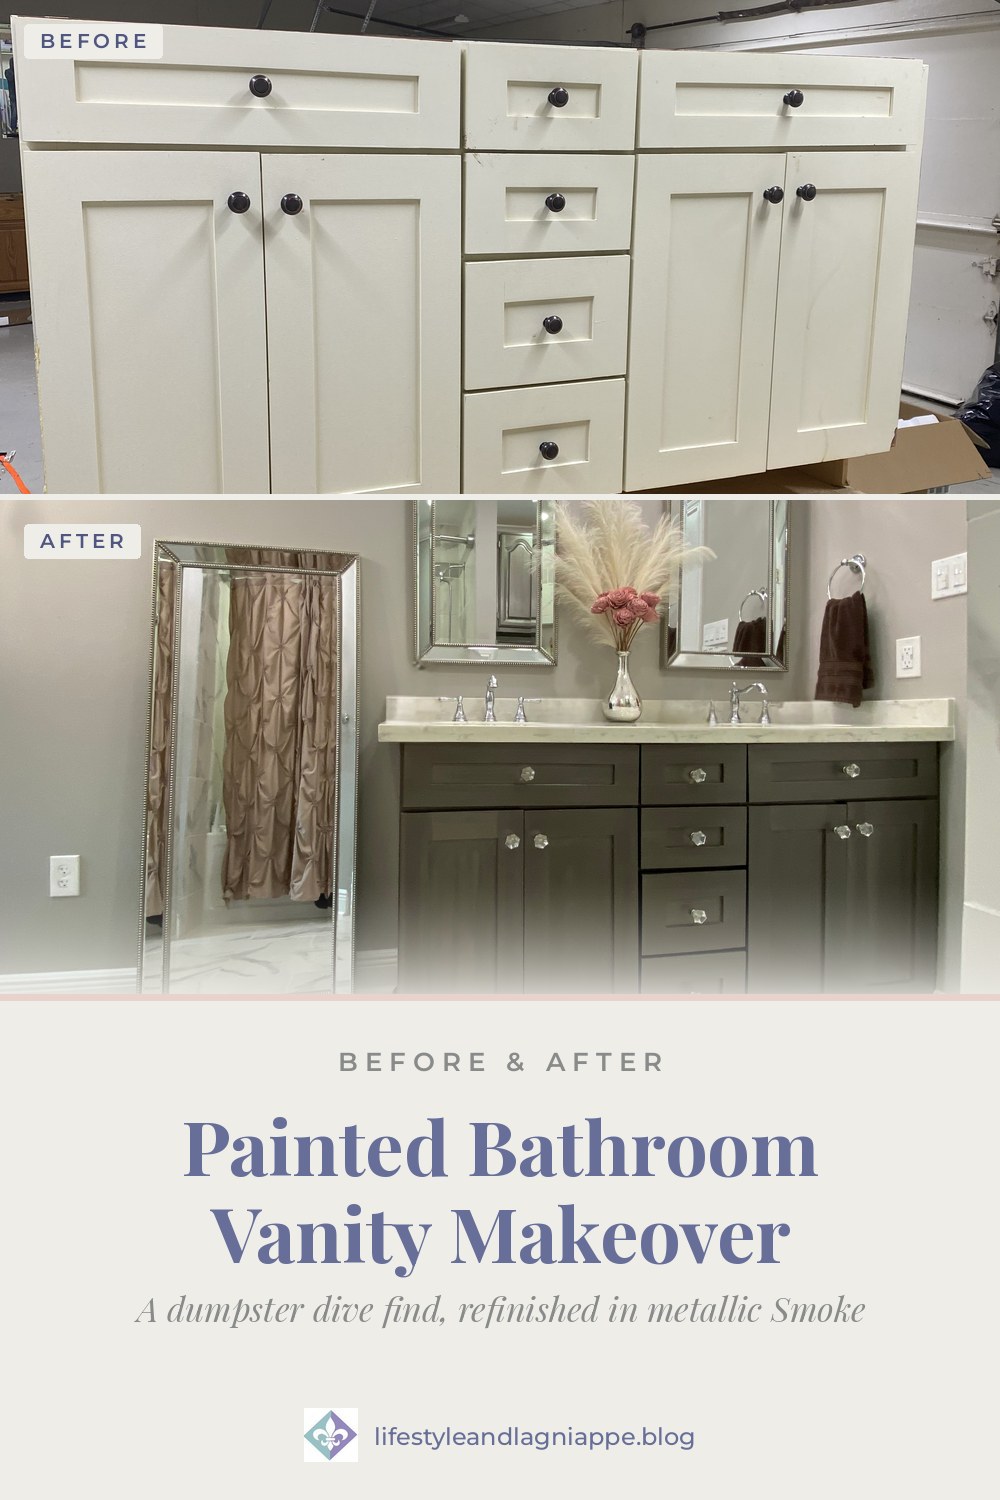
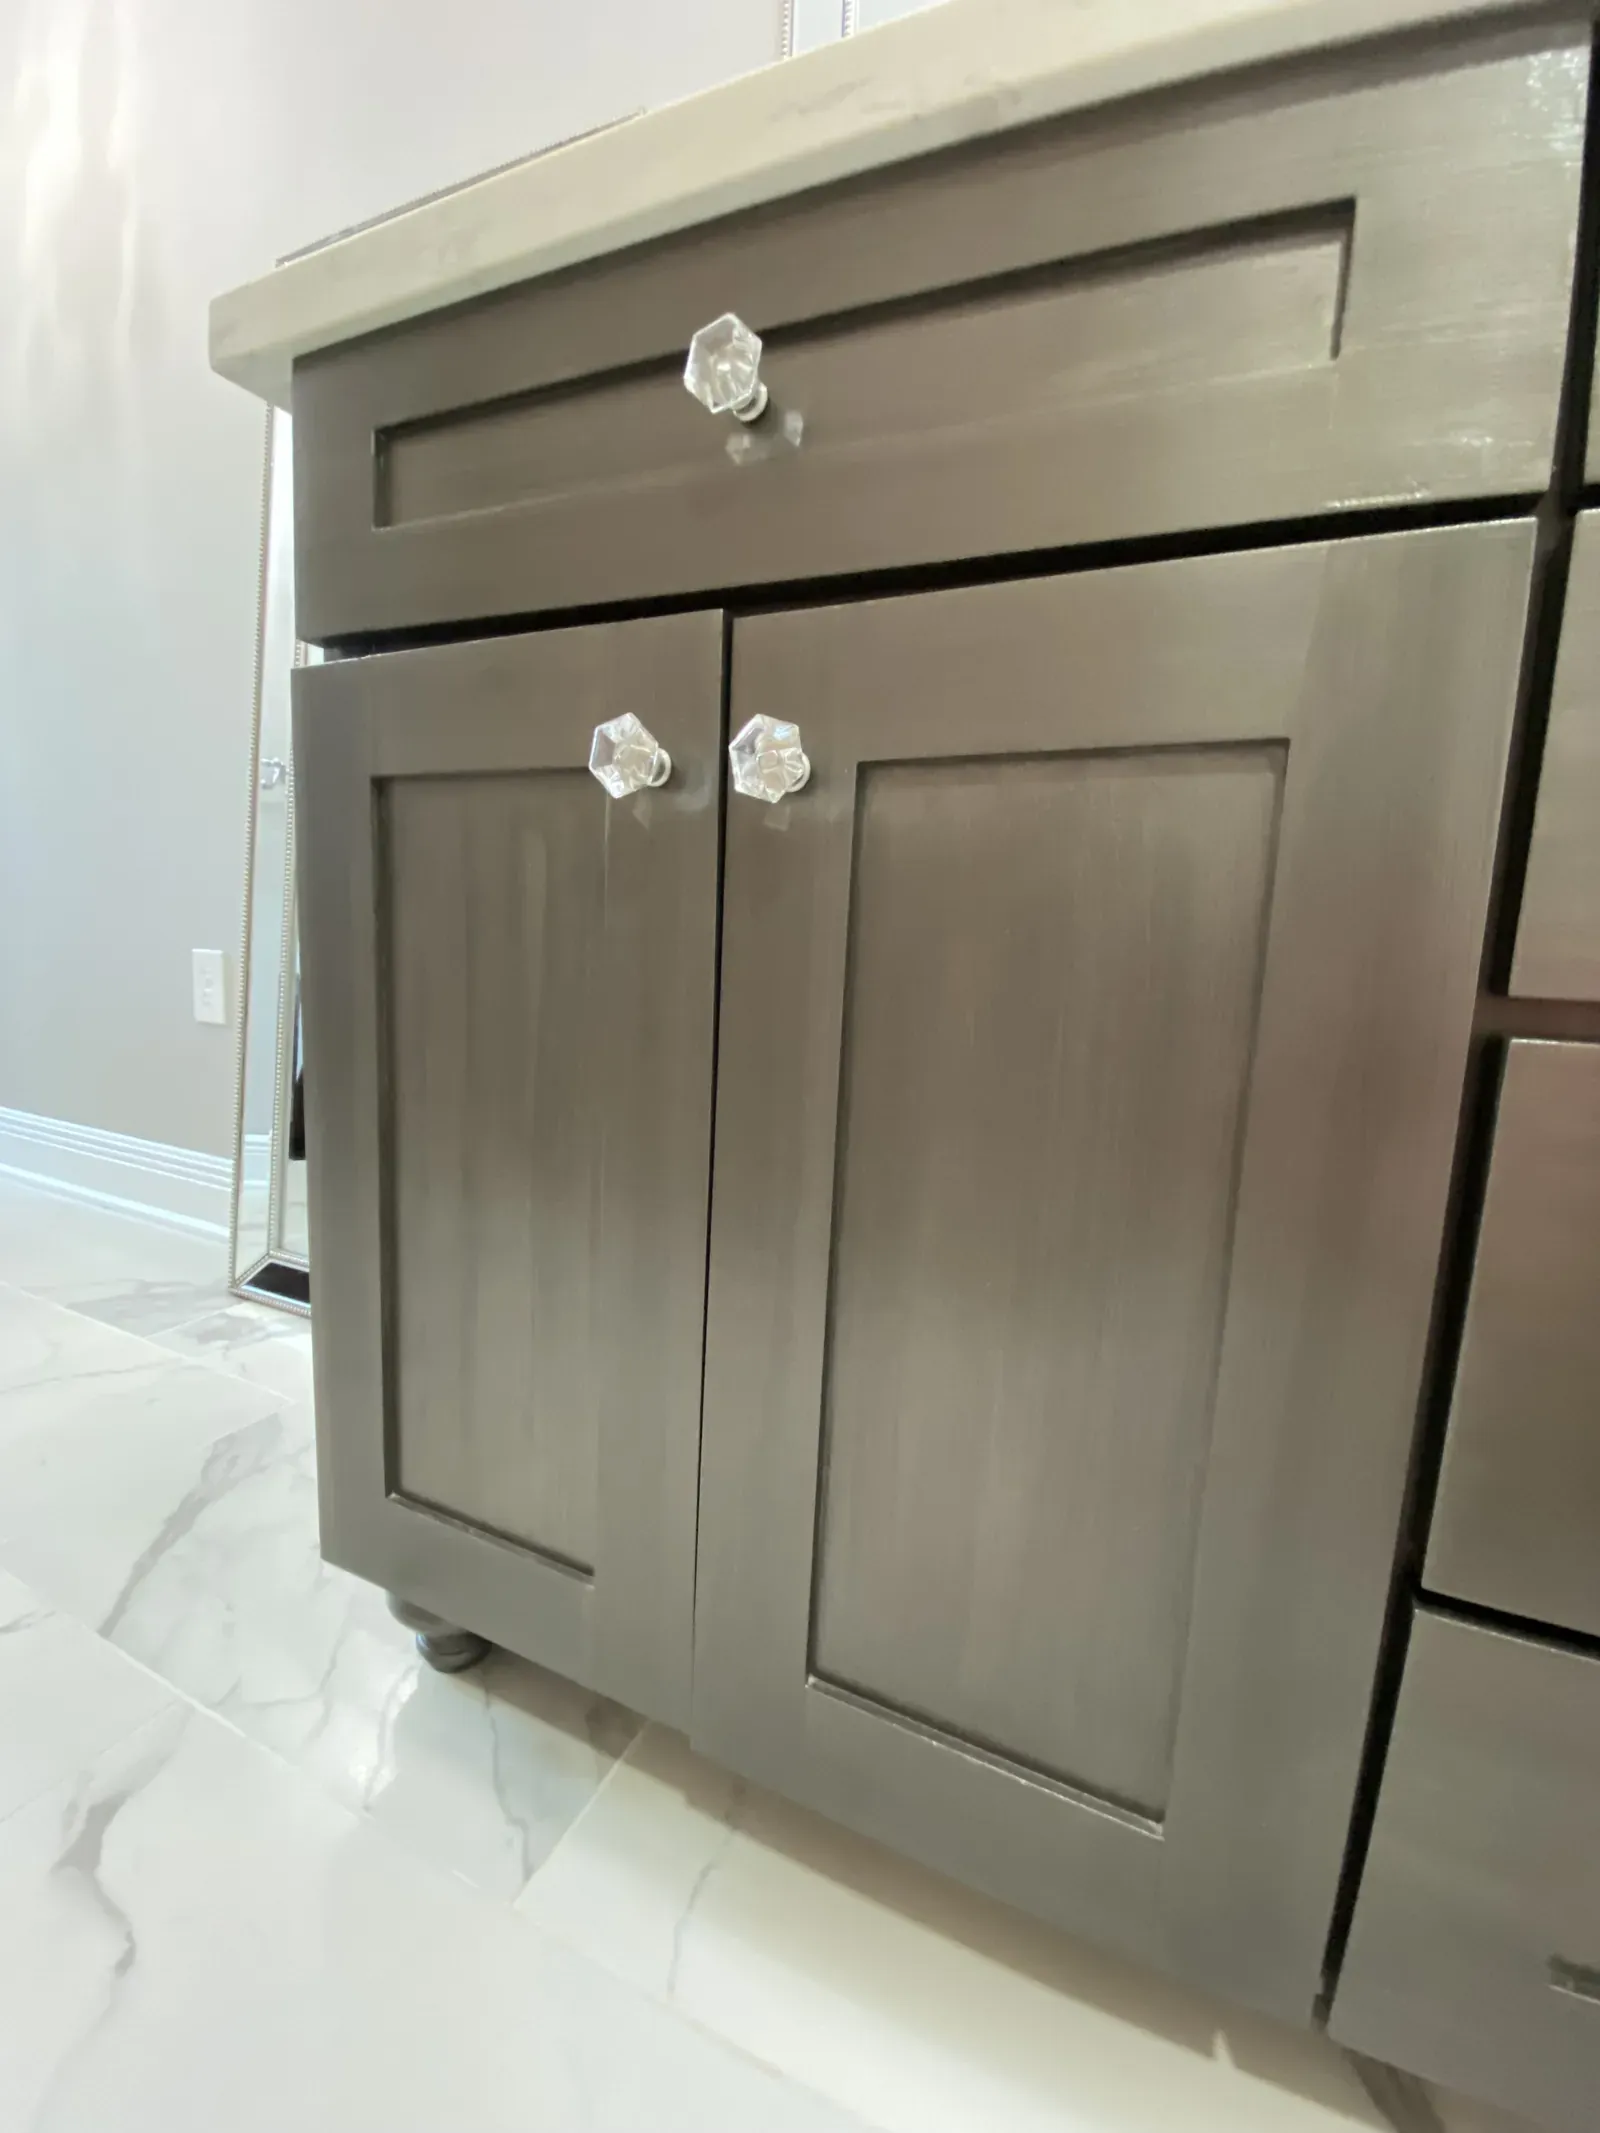
A solid wood double vanity headed for the dumpster becomes a furniture style piece in Modern Masters Smoke metallic paint, with turned legs and luxurious hardware.
Part of Domaine des Azalées, a whole-house renovation in Covington, Louisiana
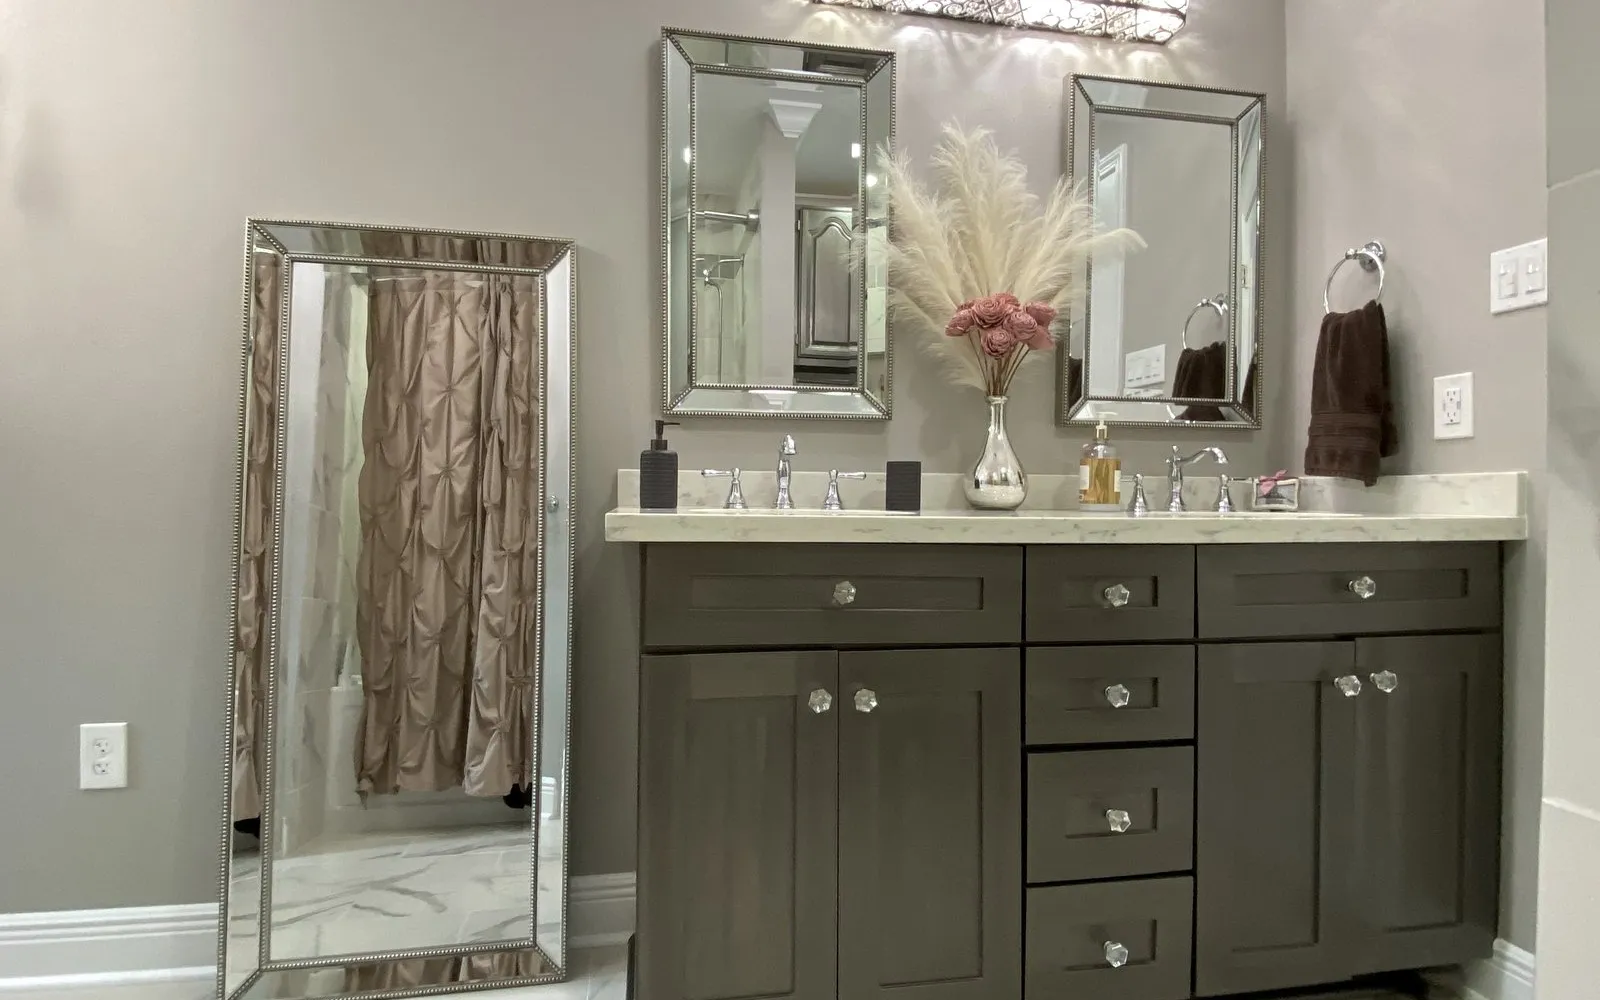
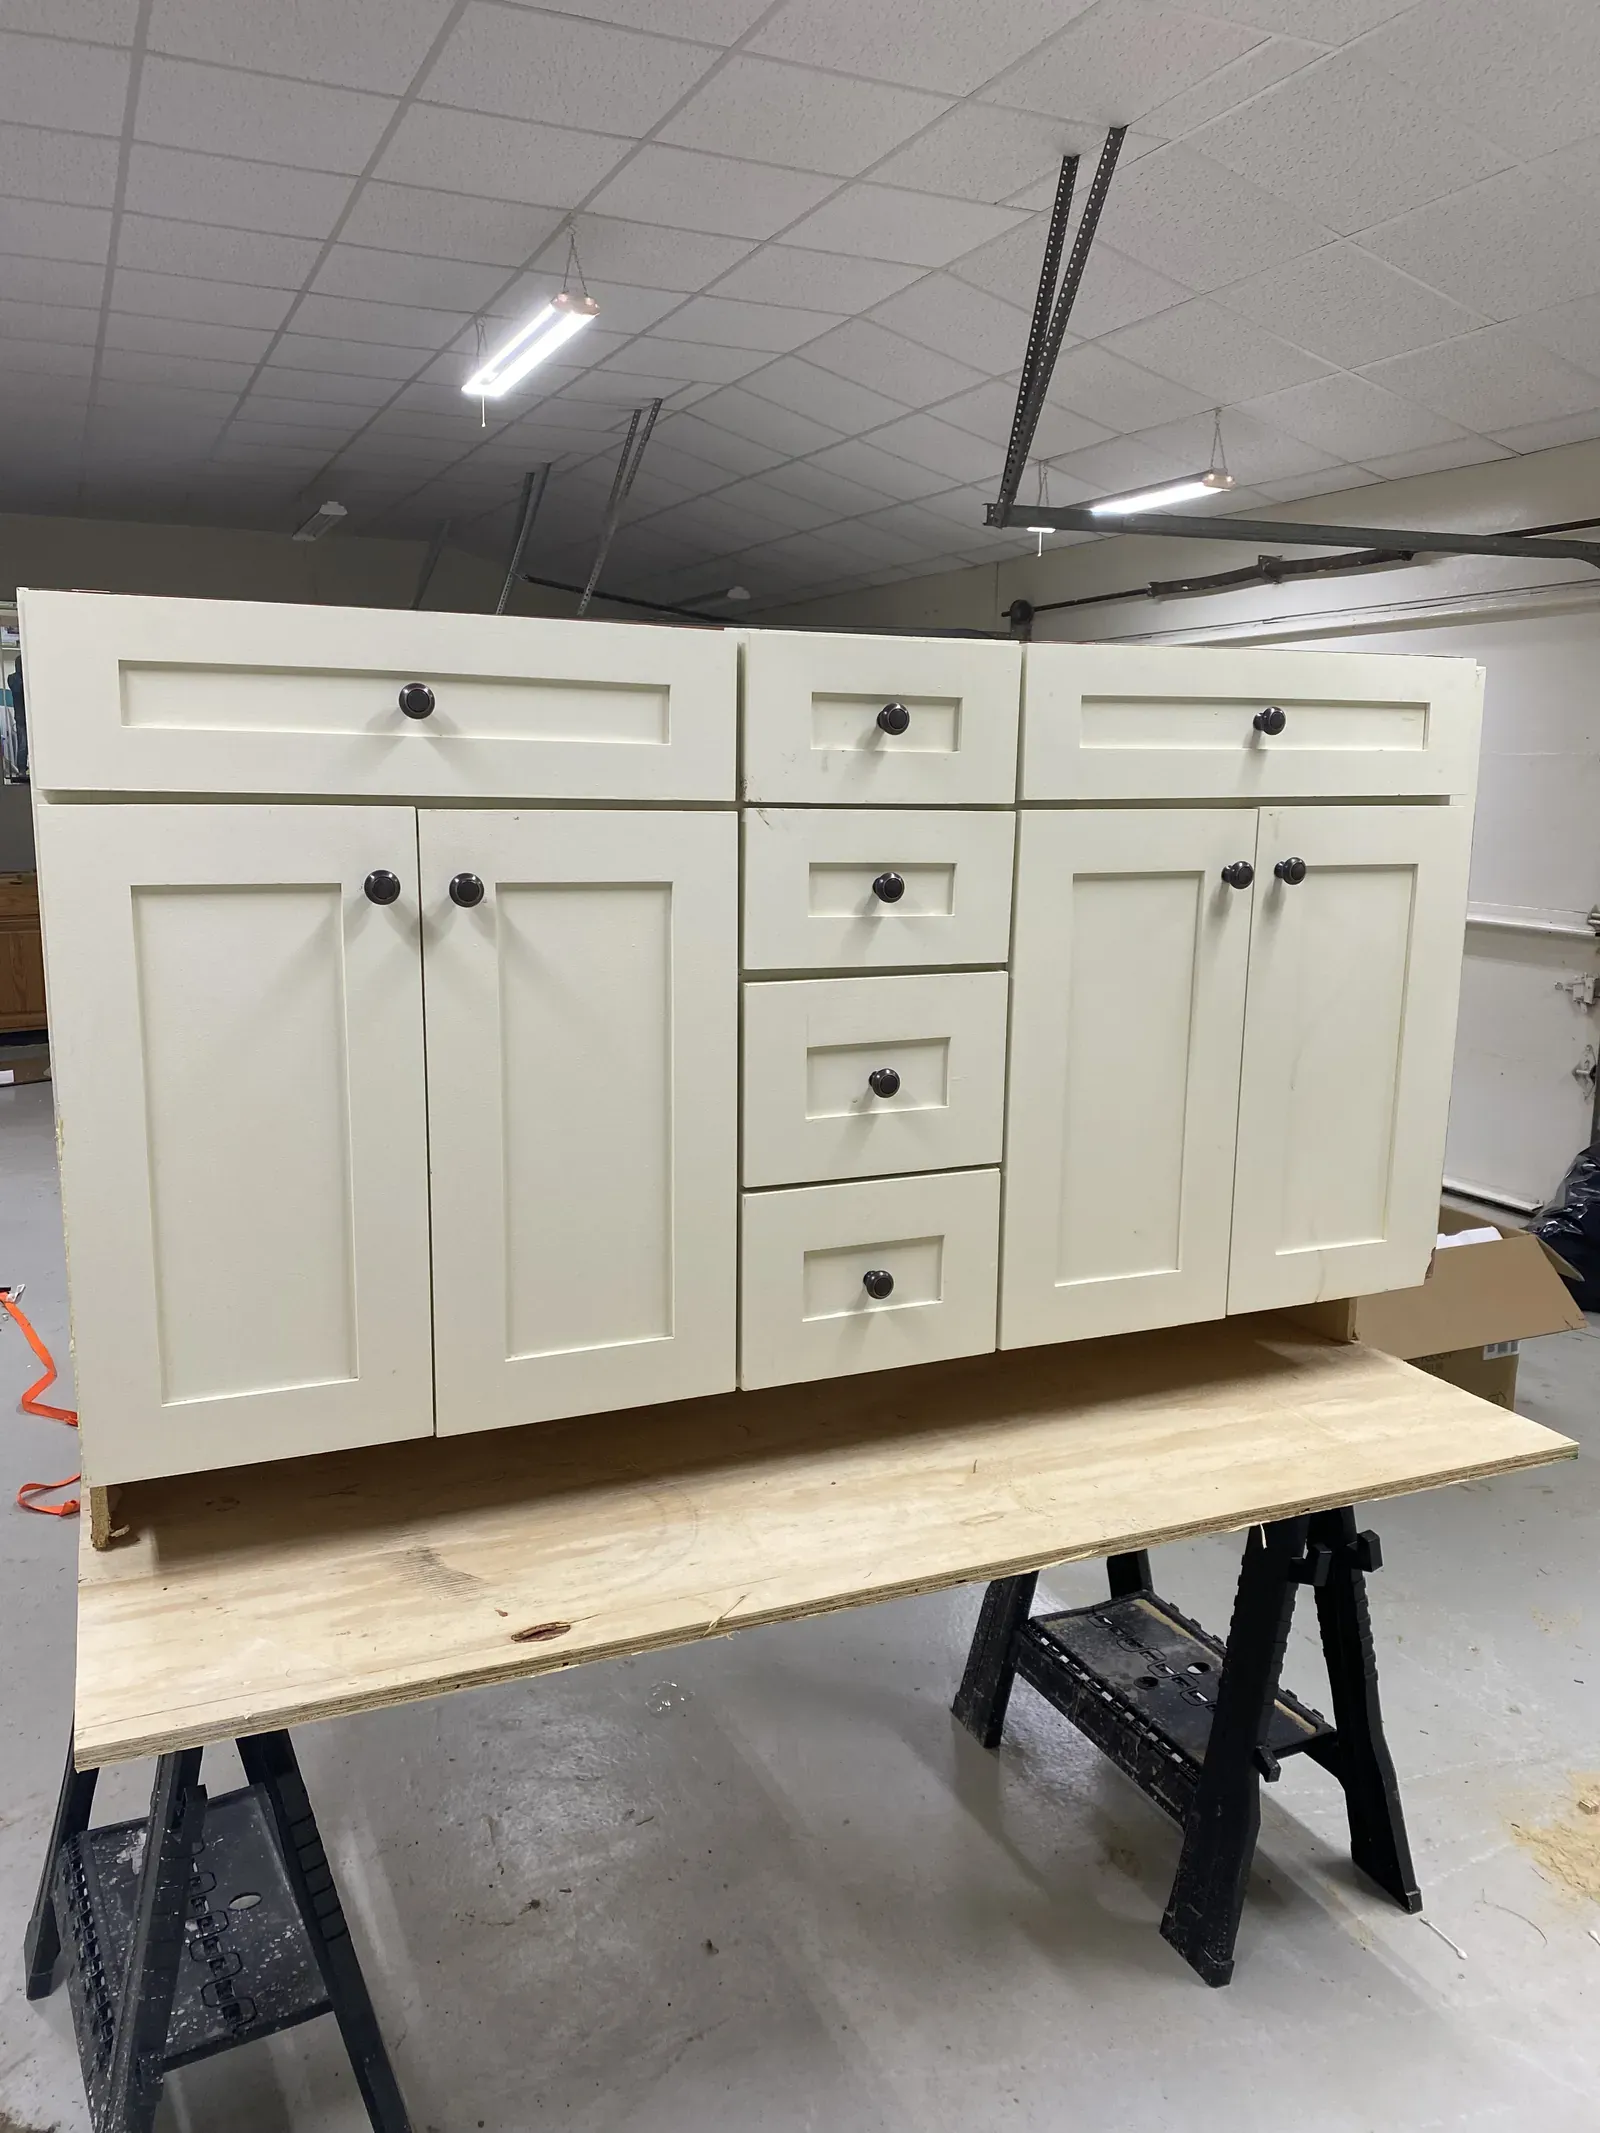
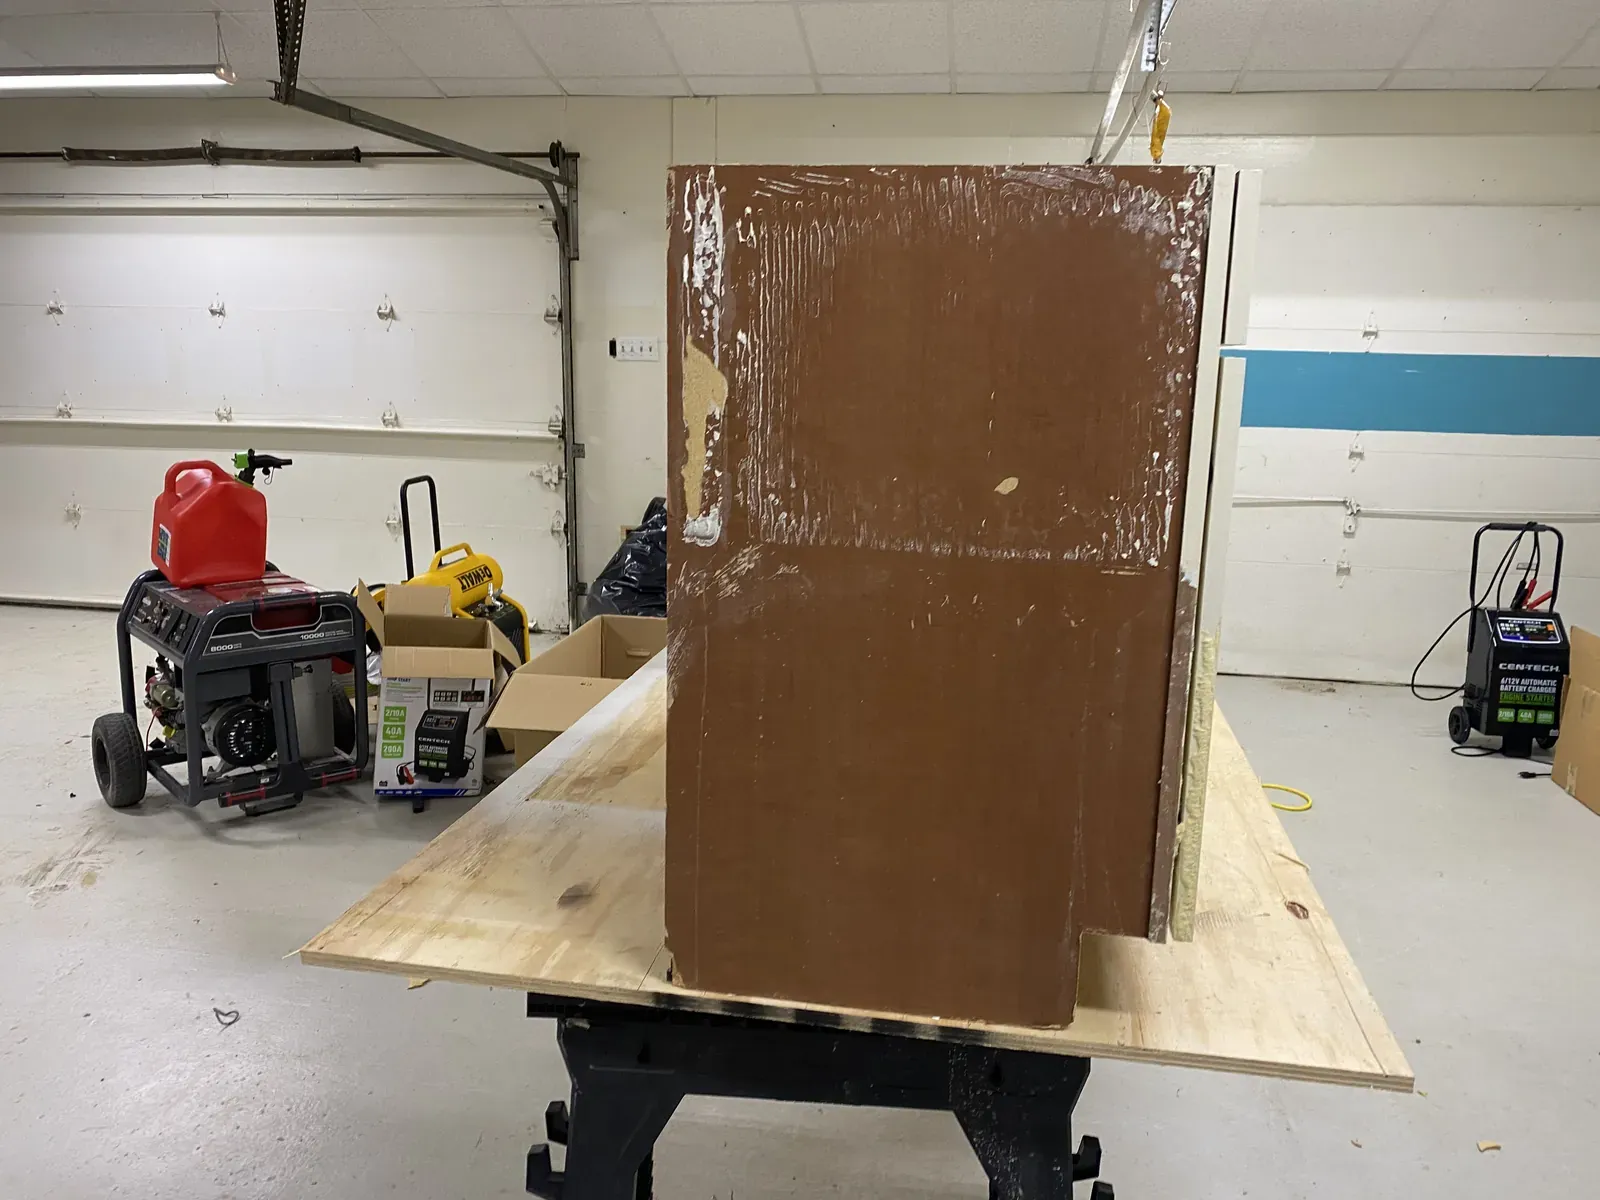
When we were remodeling the upstairs bathroom at Domaine des Azalées, we needed it to function more like a master bathroom than a hall bath. One of the upgrades we planned was adding a second sink, which would mean installing a double vanity. One day my fiancé sent me a picture of a 4 door, 4 drawer vanity. It was a dumpster dive item…literally. He was redoing a bathroom for some clients and his crew had just pulled it out of their bathroom on demo day. It caught his eye as they were bringing it to the dumpster. One side was damaged from being tossed around, but otherwise, it was solid wood, the right length, and in good shape. He asked if I wanted it. Hesitantly, I said yes. But when I got to see it in person, I knew it was a good find!
Just want the how-to? Jump to the steps.
The Plan
Since it would be the bathroom we used, double sinks were a must, and we also needed plenty of storage and more counter space. I love making cabinetry look like furniture, so the plan was to repair the damaged side, give the whole vanity a metallic finish, and add details that would lift it far above a standard builder grade cabinet.
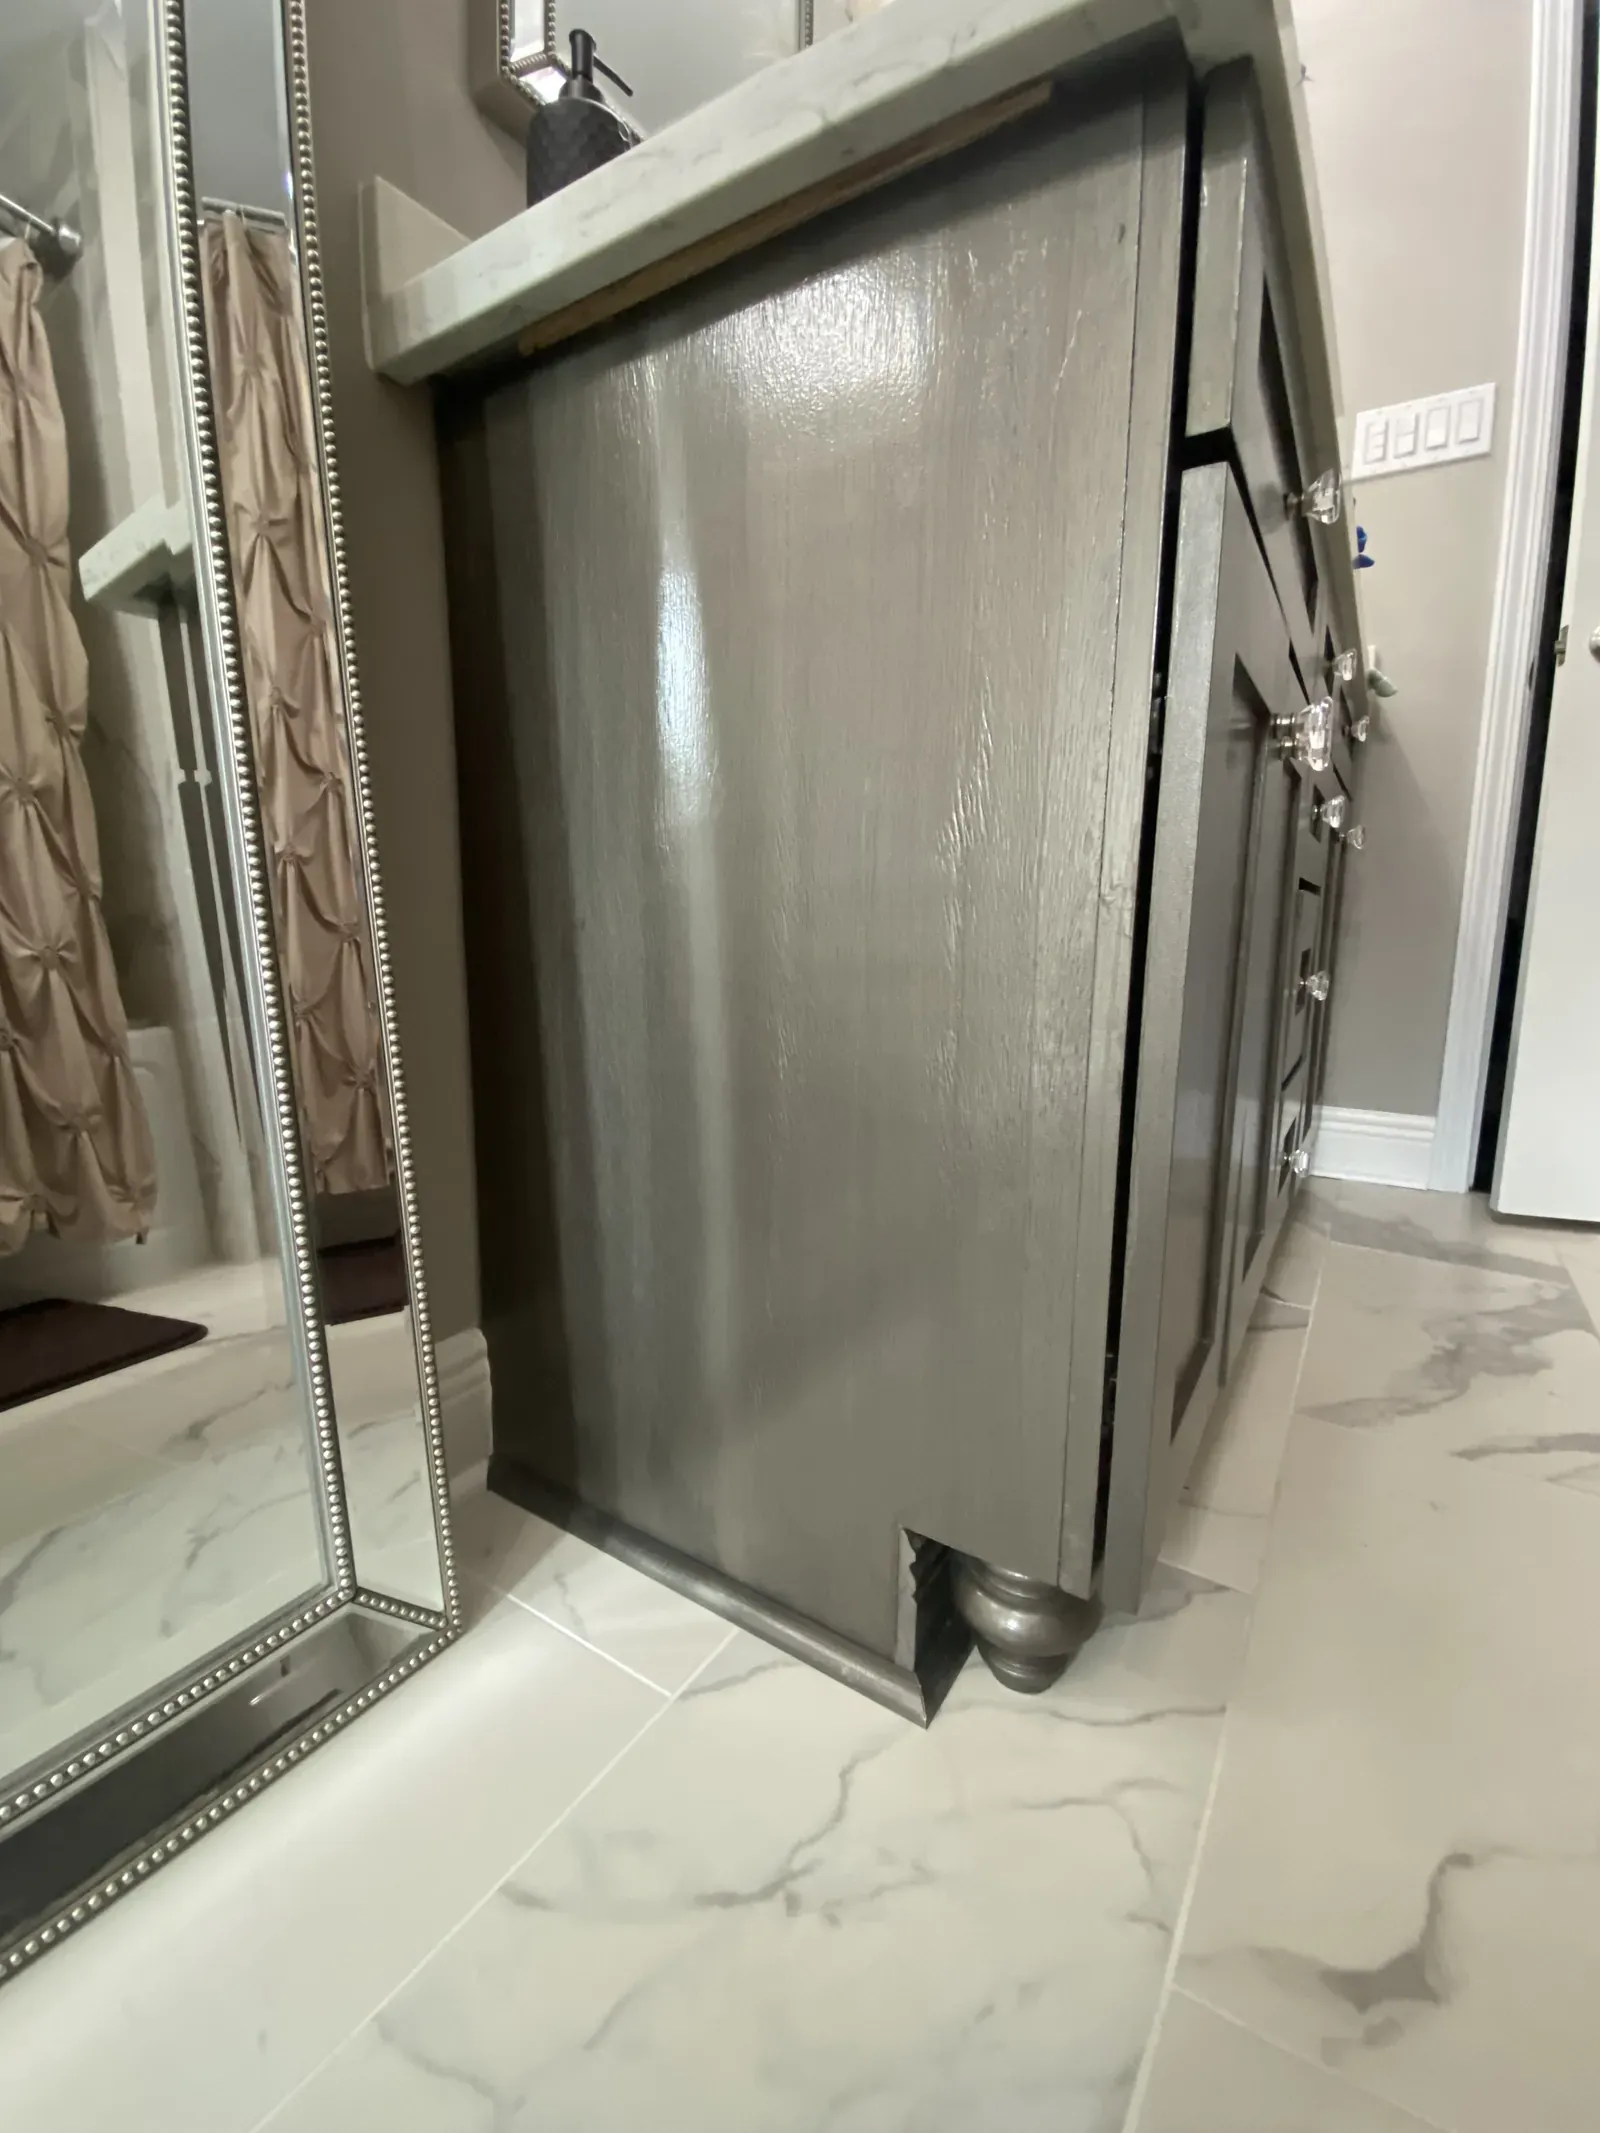
I chose Modern Masters Metallic Paint in Smoke, the same deep gray-brown metallic (or should we call it grown, lol?) used on my childhood Toybox Redoux. For this piece, I wanted the paint to show some depth and variation, so I planned to apply it in a strie pattern over a base coat in the wall color. To finish the furniture look, I would add two turned legs and quarter round along the front and left side.
The Process
It took some time, but I worked on refinishing this vanity while other work was going on in the house. Since I work two jobs and was doing this huge remodeling project, it took several weekends for me to complete.
The damaged side had to be fixed first, since it was the side that would show in our bathroom. We attached a sheet of unfinished maple wood veneer over it with glue.
We then added one top plate bracket on each corner of the front. The vanity had to be laid on its back to complete this part. The corner plate is triangular shaped, so it is screwed in on two of the three sides. For this project, that’s the front and side of the vanity.
Next, I removed all the drawers, doors, and hinges. After thoroughly cleaning the entire vanity, I sanded it to rough up the surface using 120 grit and then going over the whole piece with 220 grit. Then I cleaned it again, using tack cloth at the end to make sure all debris was removed. I used Zinsser Bulls Eye 1-2-3 primer on all the painted surfaces, which was the recommended primer at that time. I applied it using a 4 inch high density foam roller for doors and cabinets and a Wooster Pro 1” angled sash brush and allowed it to dry overnight. Modern Masters still recommends this primer, but they also have a primer of their own now and it comes in a cool or warm tone, depending on the color and effect you’re after. It is possible to skip this step on the already painted surfaces, but the new piece of veneer, the turned legs, and the quarter round needed to be primed. I usually prime everything to ensure the desired color is as true and uniform as possible. I used the roller and brush on the vanity and the roller on the quarter round. For the turned leg, I painted the top first with the brush and let it dry. Then I painted the rest of the leg with the brush. To dry, I poked a hole in some cardboard and turned the leg upside down, sticking the hanger bolt into the cardboard. I let all of this dry. A minimum of 1 hour is recommended.
Since Modern Masters metallic paint is somewhat transparent, I applied a base coat in the same color I planned to paint the walls, Behr Perfect Taupe mixed 50% lighter in Eggshell sheen. For the main piece, I used the same type of roller and brush that I used for the primer. The quarter round and turned legs were painted in the same manner as they were primed. If I had not used a base coat, it likely would have taken the recommended three coats of metallic paint instead of two.
Once the base coat was dry, I used a 3 inch trim and touch up painting tool to apply Modern Masters Smoke in a linear pattern, very similar to a strie finish. You can use a strie brush, which is a brush with bristles of different lengths used to create linear movement, which can be horizontal, vertical, or even a linen look if you work in both directions. You can also use a regular paintbrush, but it should be a straight, flat brush, not an angled brush. If the piece is totally flat, you can achieve an excellent finish with any of them. It just depends on your preference. Because this cabinet door had a center panel with rails and stiles (the “frame” around the center of the door), the spot where you lift your tool off at the end of each stroke looks different. After trial and error on a practice piece, I decided I liked the trim and touch up painting tool the best, and this “spot” blended in best.
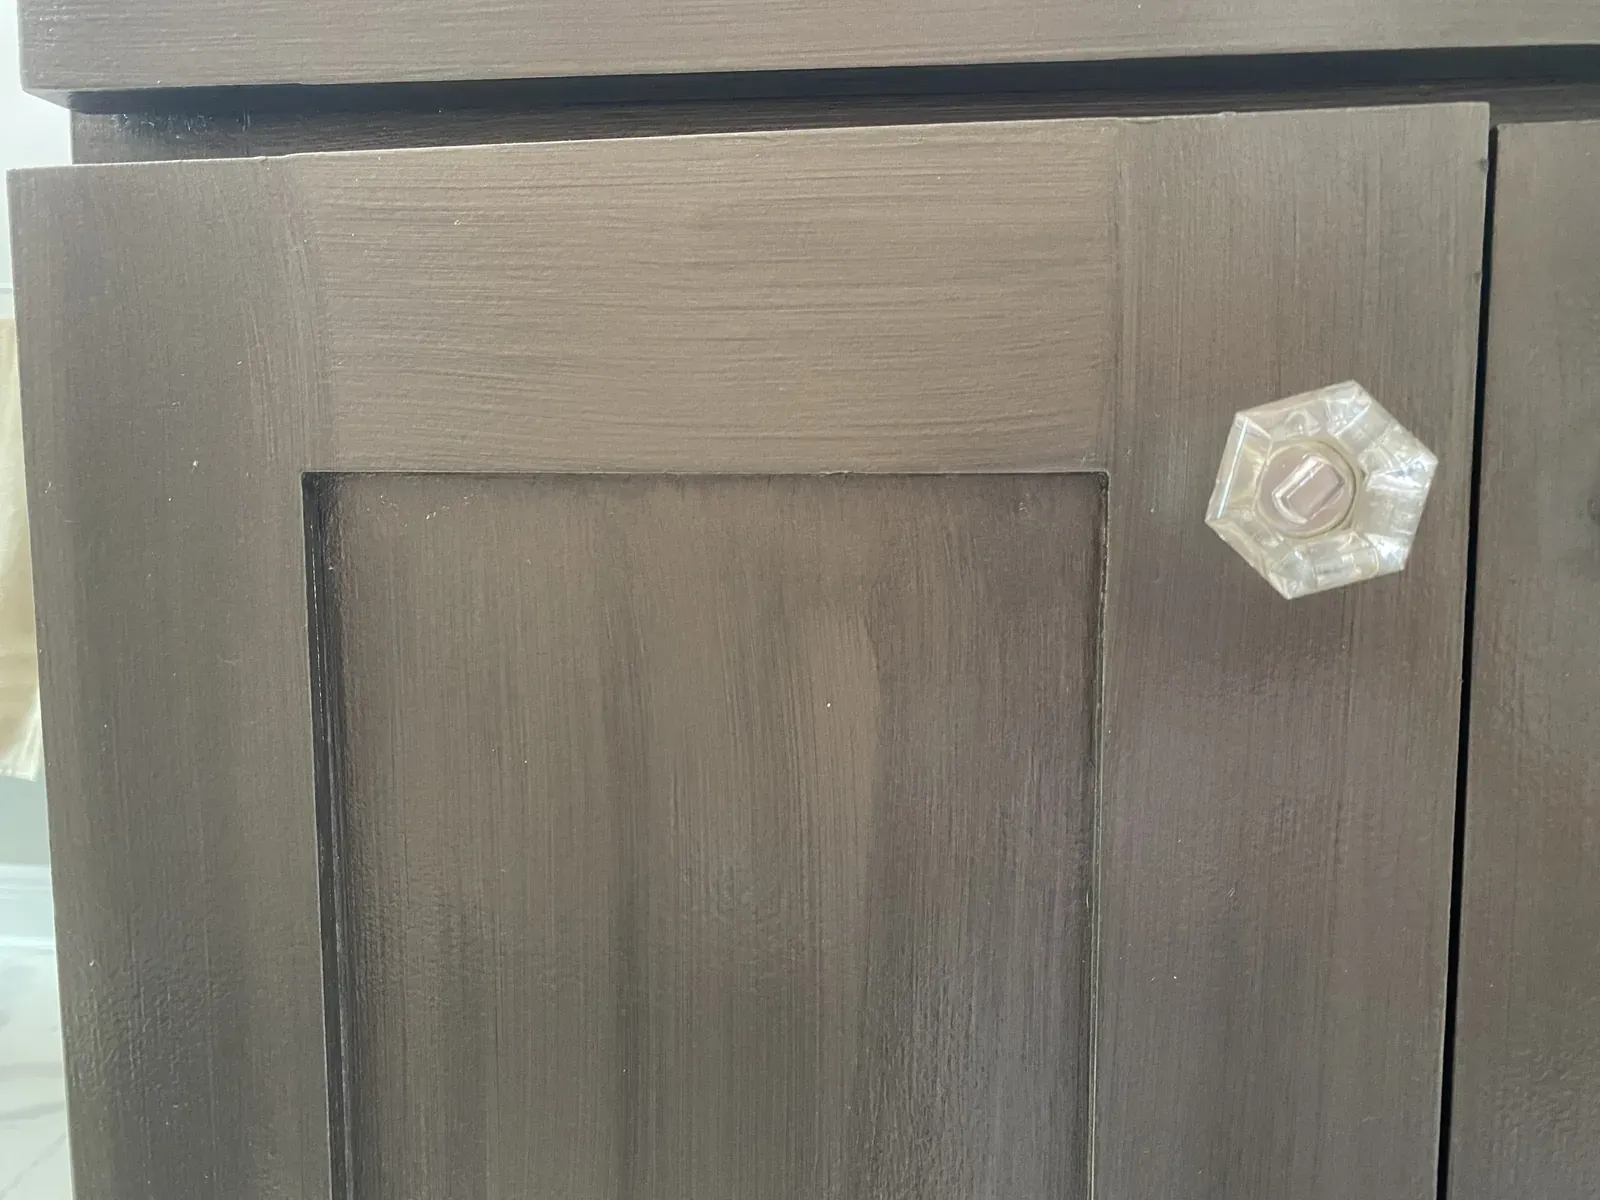
If the Modern Masters paint is only lightly mixed, it can be applied to show some variation in color, which, when combined with the strie finish, is a rich and sophisticated look. Two coats were required to get the coverage I wanted. I applied the second coat 2 hours later. For the center portion and stiles of the doors, I applied the strie pattern vertically. For the drawer fronts, quarter round, turned legs, and rails of the cabinet doors, I used the same technique but applied the strie finish horizontally.
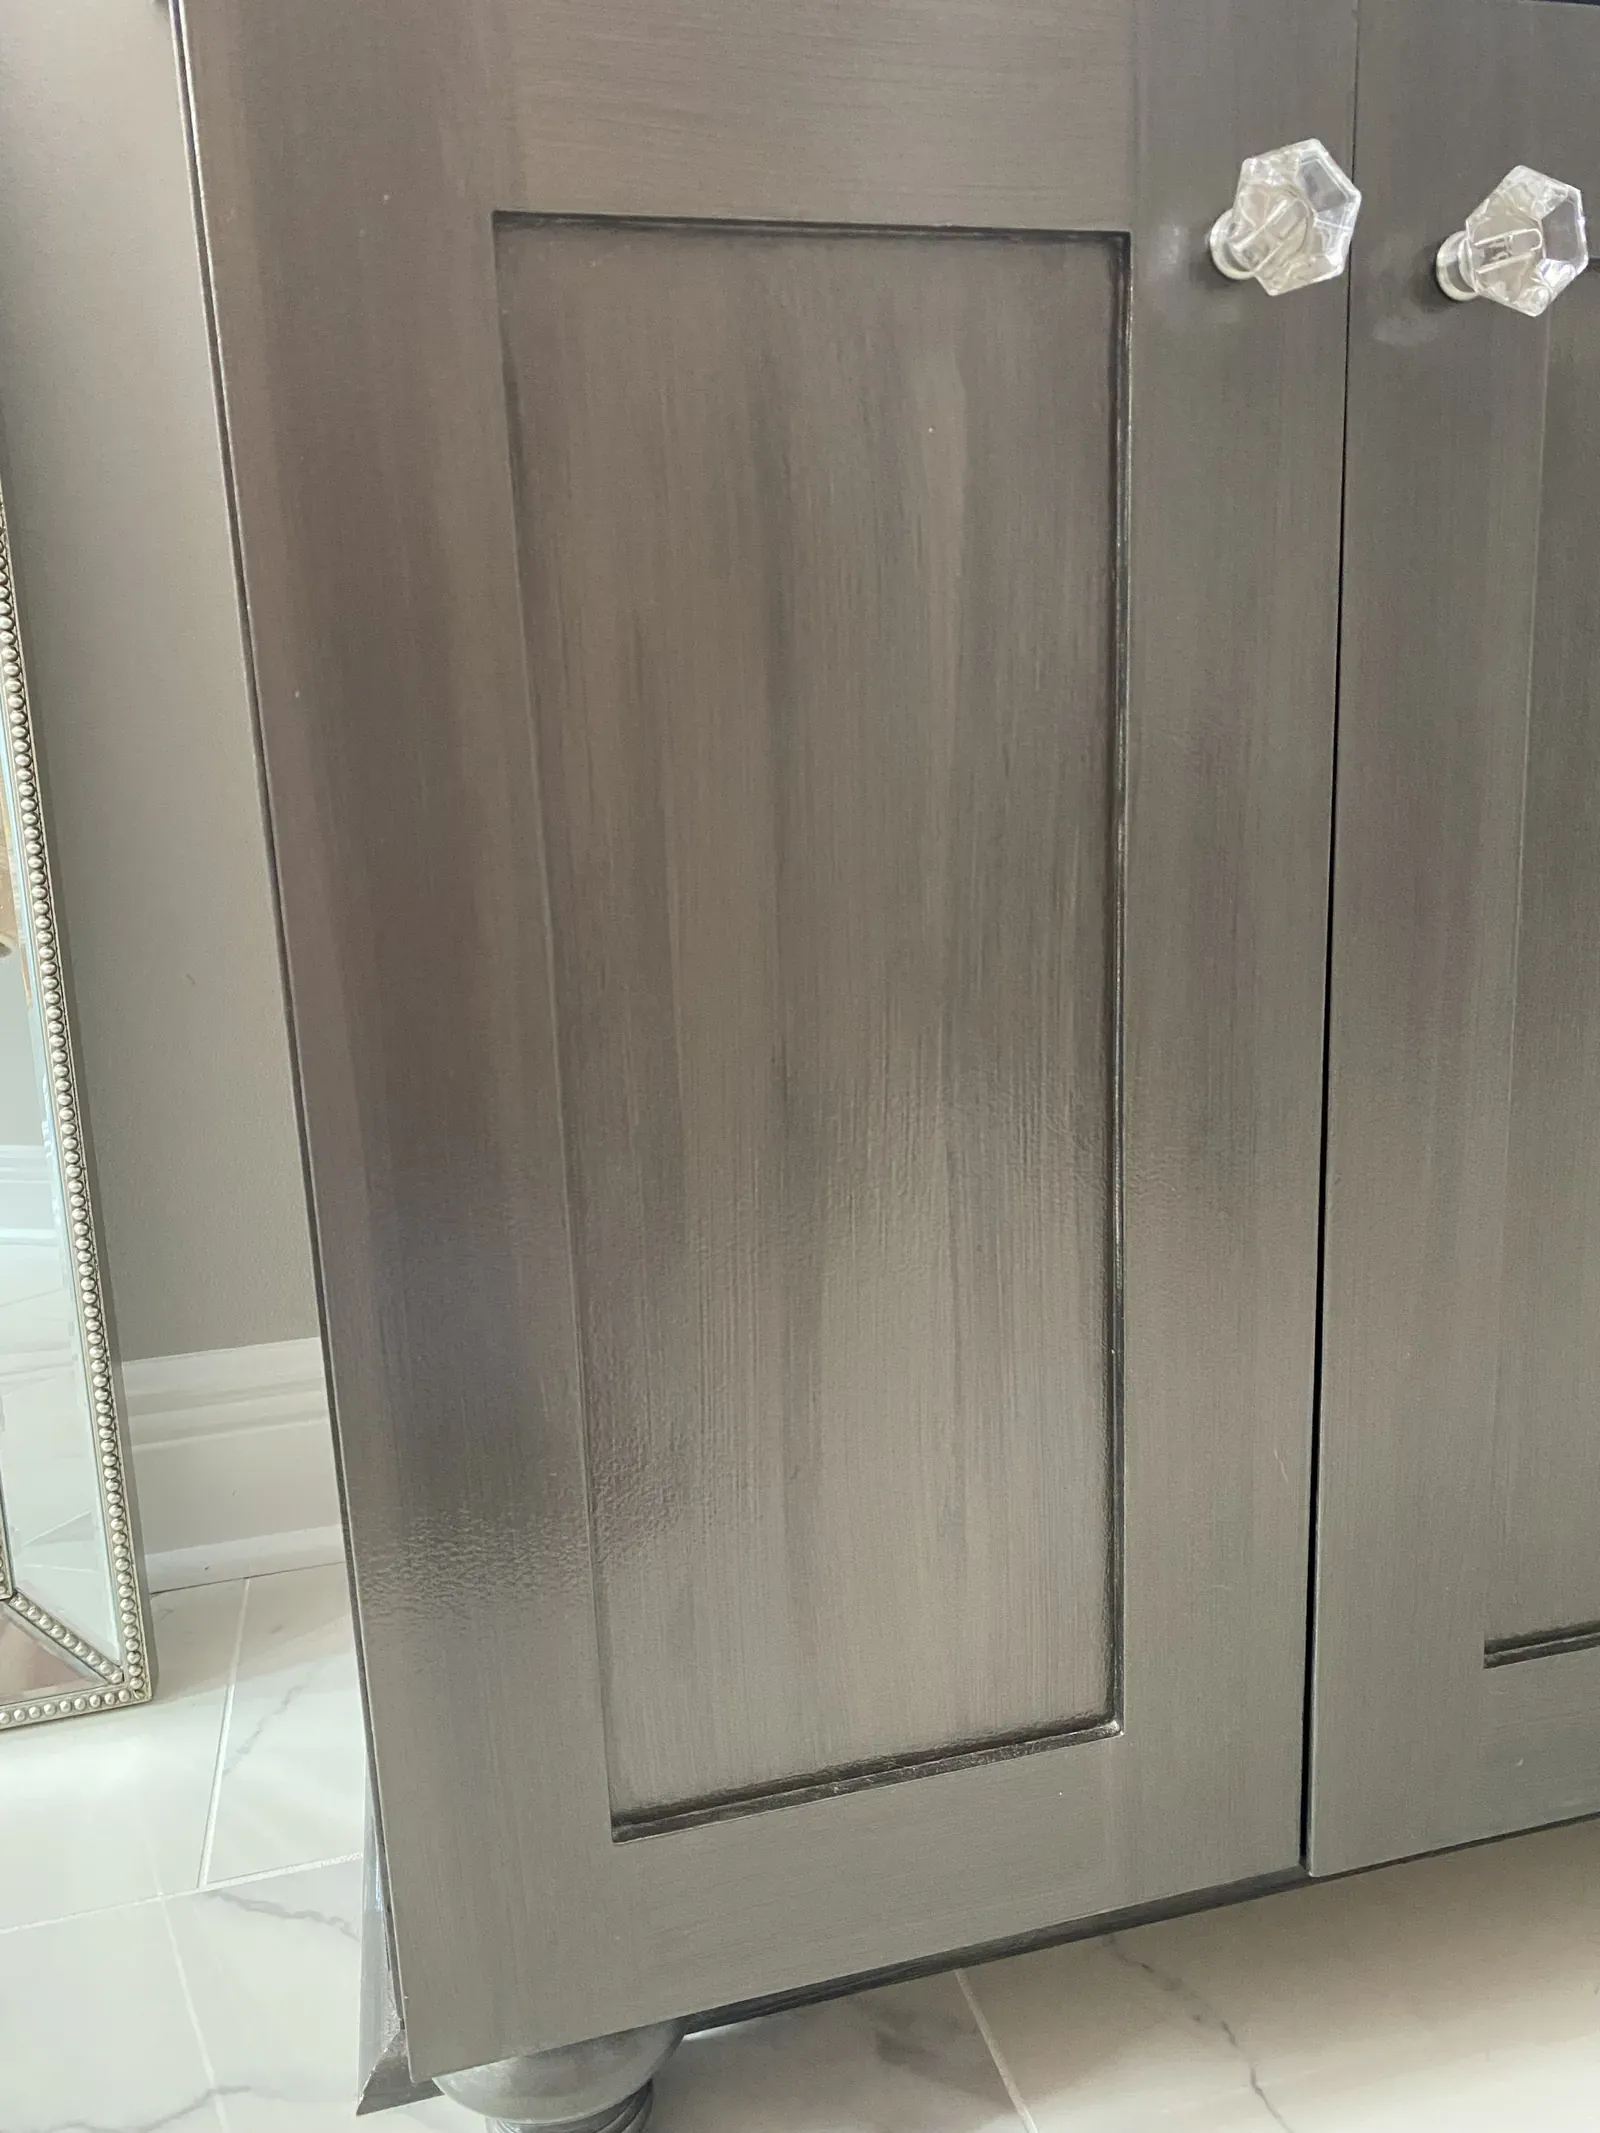
Once you’ve achieved the look you’re going for, Modern Masters recommends 24-48 hours of dry time before applying the finish coat. I ended up finishing it the following weekend, though. I wanted this piece to have maximum durability, so I applied three coats of Modern Masters MasterClear in the satin finish. MasterClear is a non-yellowing topcoat, which is important to me. There’s nothing worse than your finished piece turning yellow with time, resulting in a dingy appearance. Make sure to wait at least 2 hours between coats.
When the project is complete, you should wait the full cure time of 7 days to install and use your piece. This is the amount of time for the finish coats to fully harden and protect from scratches, moisture, and wear and tear. Our bathroom was not quite ready for the vanity to be installed, so the 7 days was not a problem.
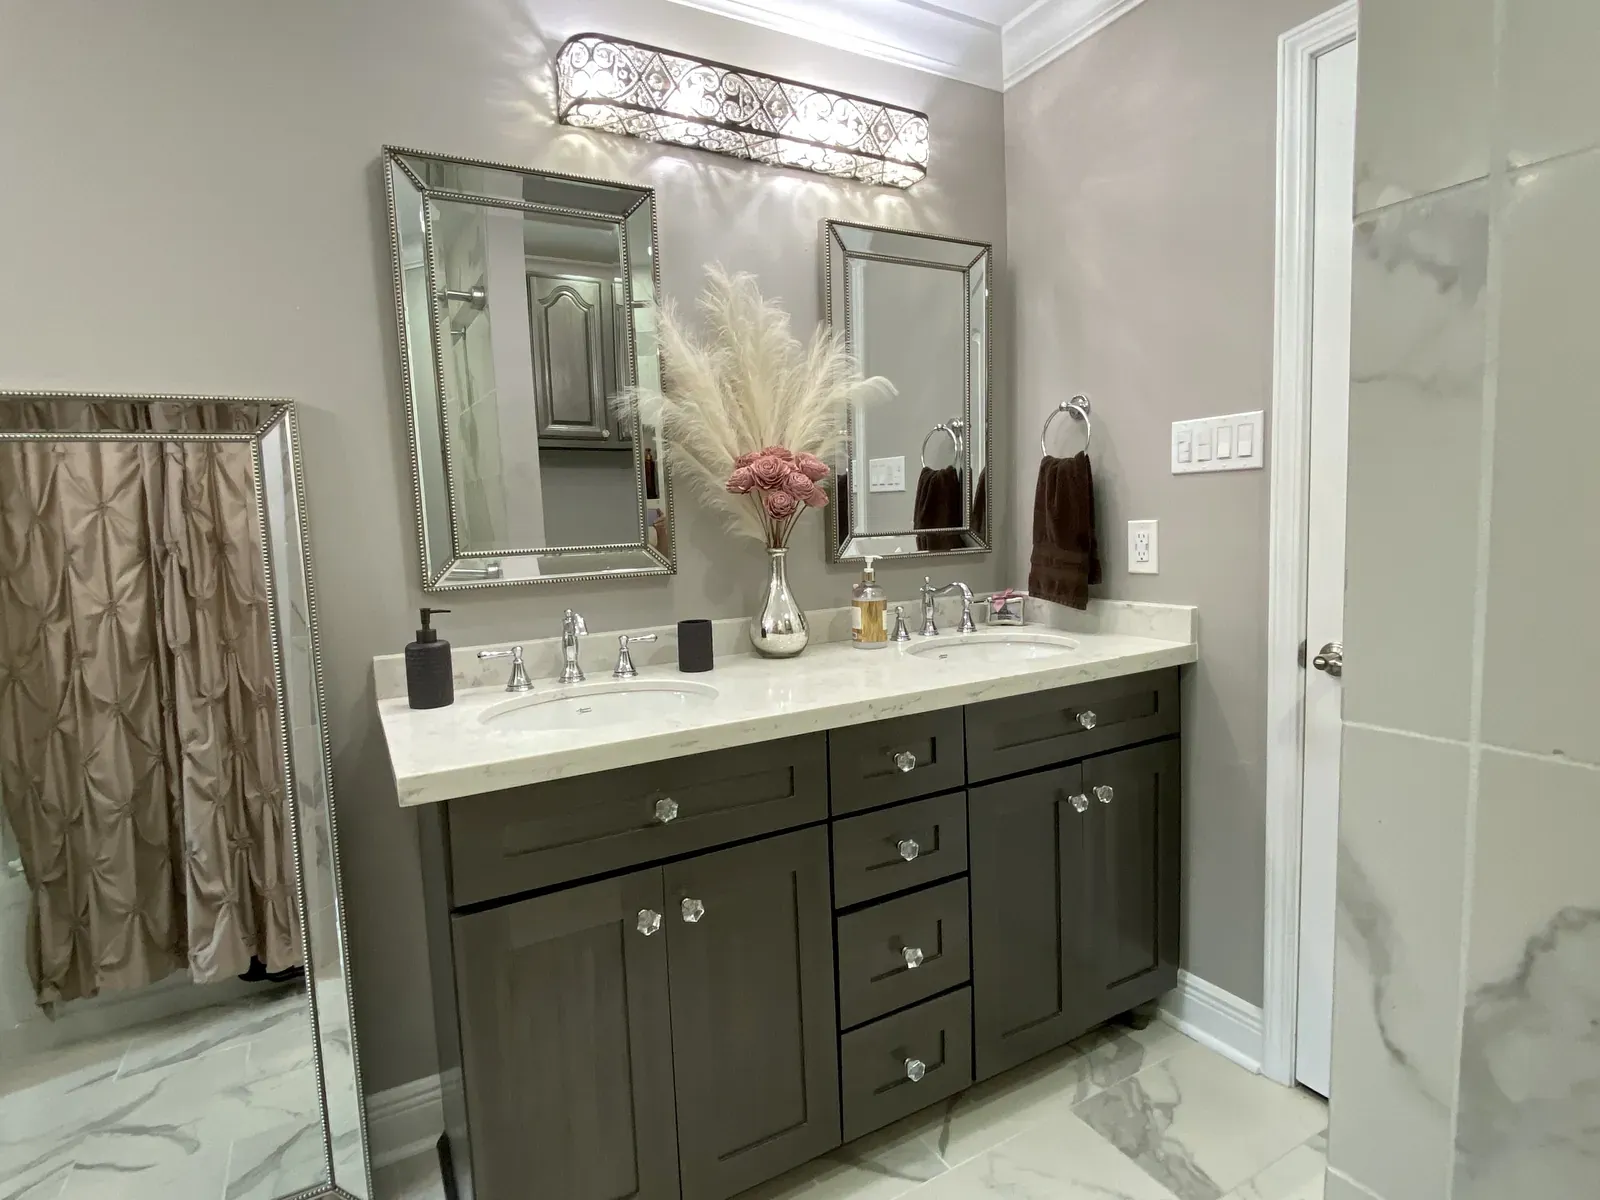
We screwed the hanger bolt on the turned legs into the hole in the top plate on each front corner and then installed the vanity. To finish it off, we used a nail gun to attach the quarter round to the front and left side.
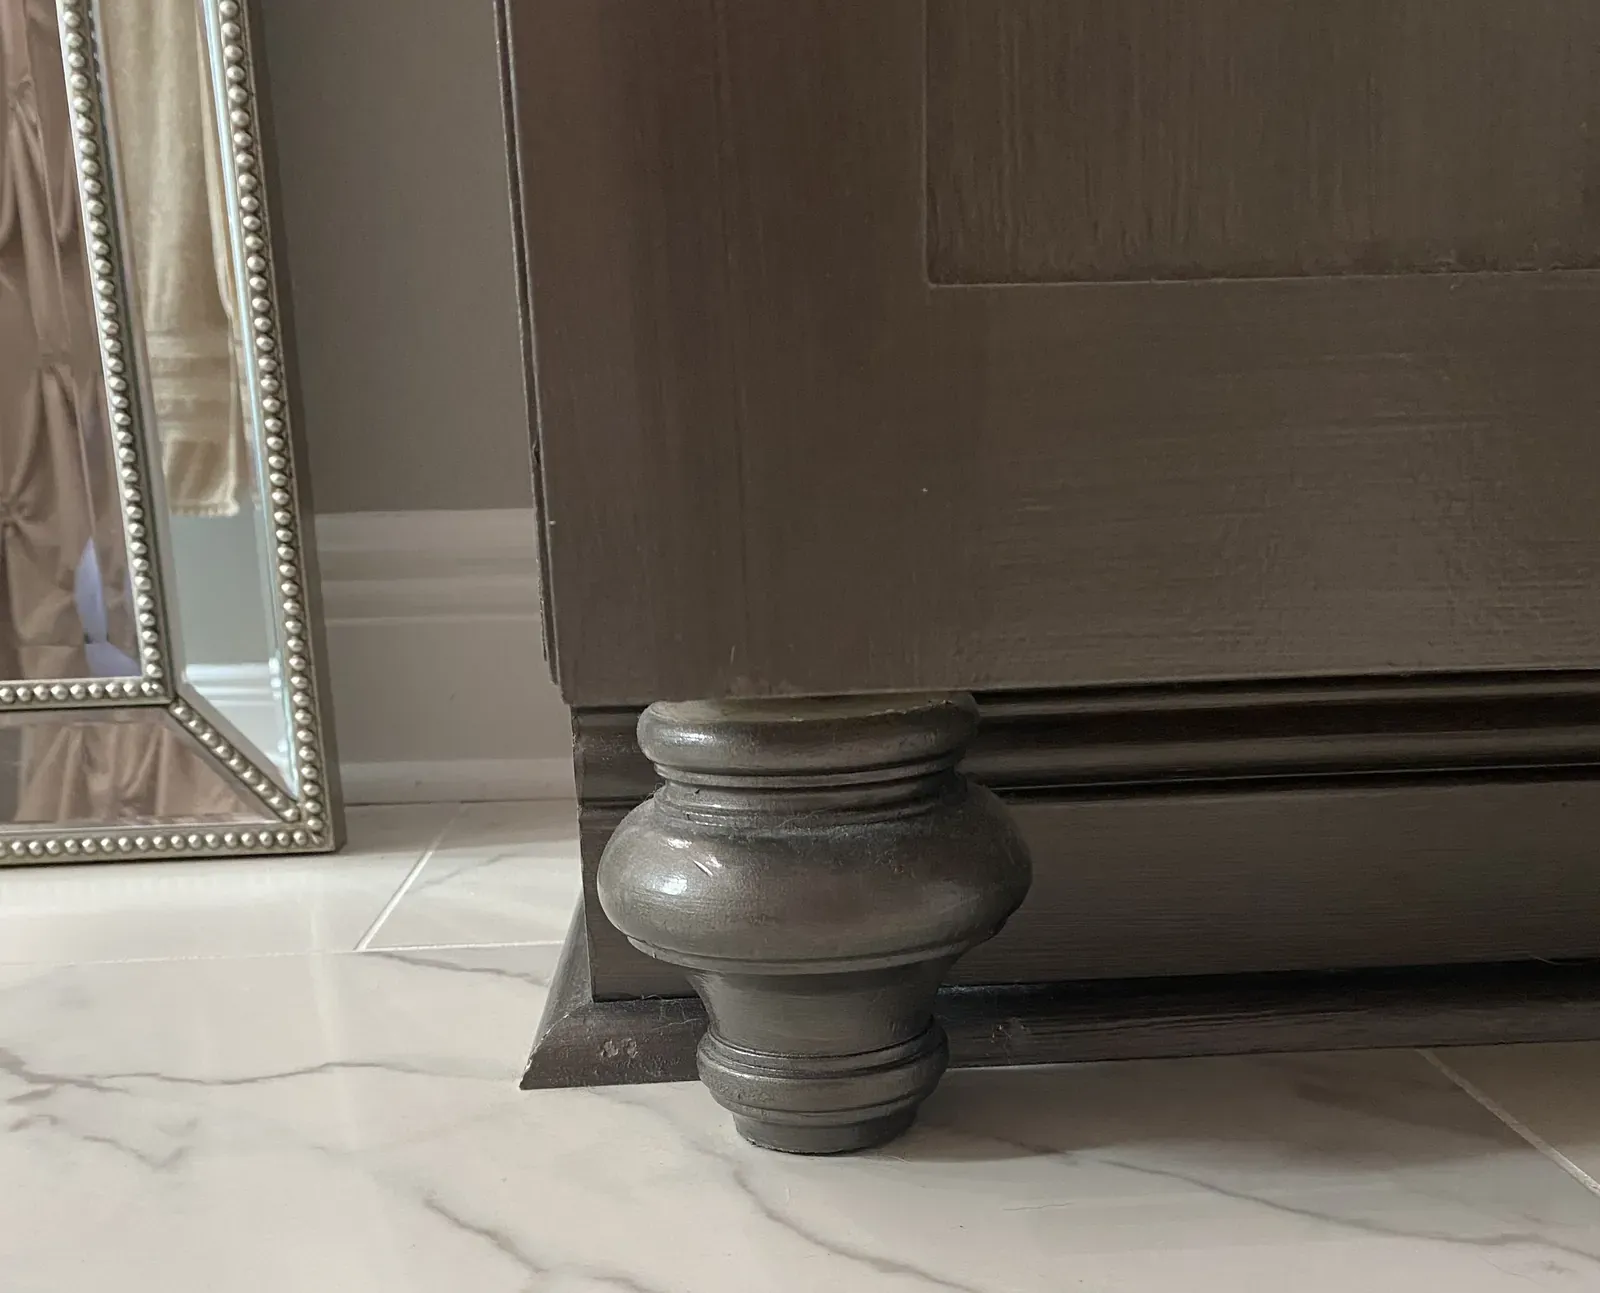
The hinges and doors were installed, but I was never able to get them perfectly straight. Jason tried and couldn’t either. After all that work! C’est la vie! It’s on my list to try to switch the doors one more time to make sure I didn’t mismark them.
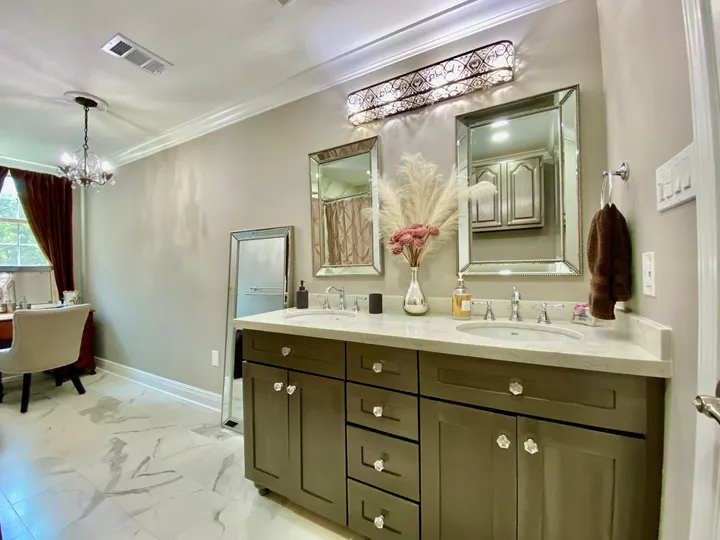
Finally, it was time for the American Standard Ovalyn sinks, the Carrara Cream quartz top, and Delta Cassidy widespread faucets in chrome to go in.
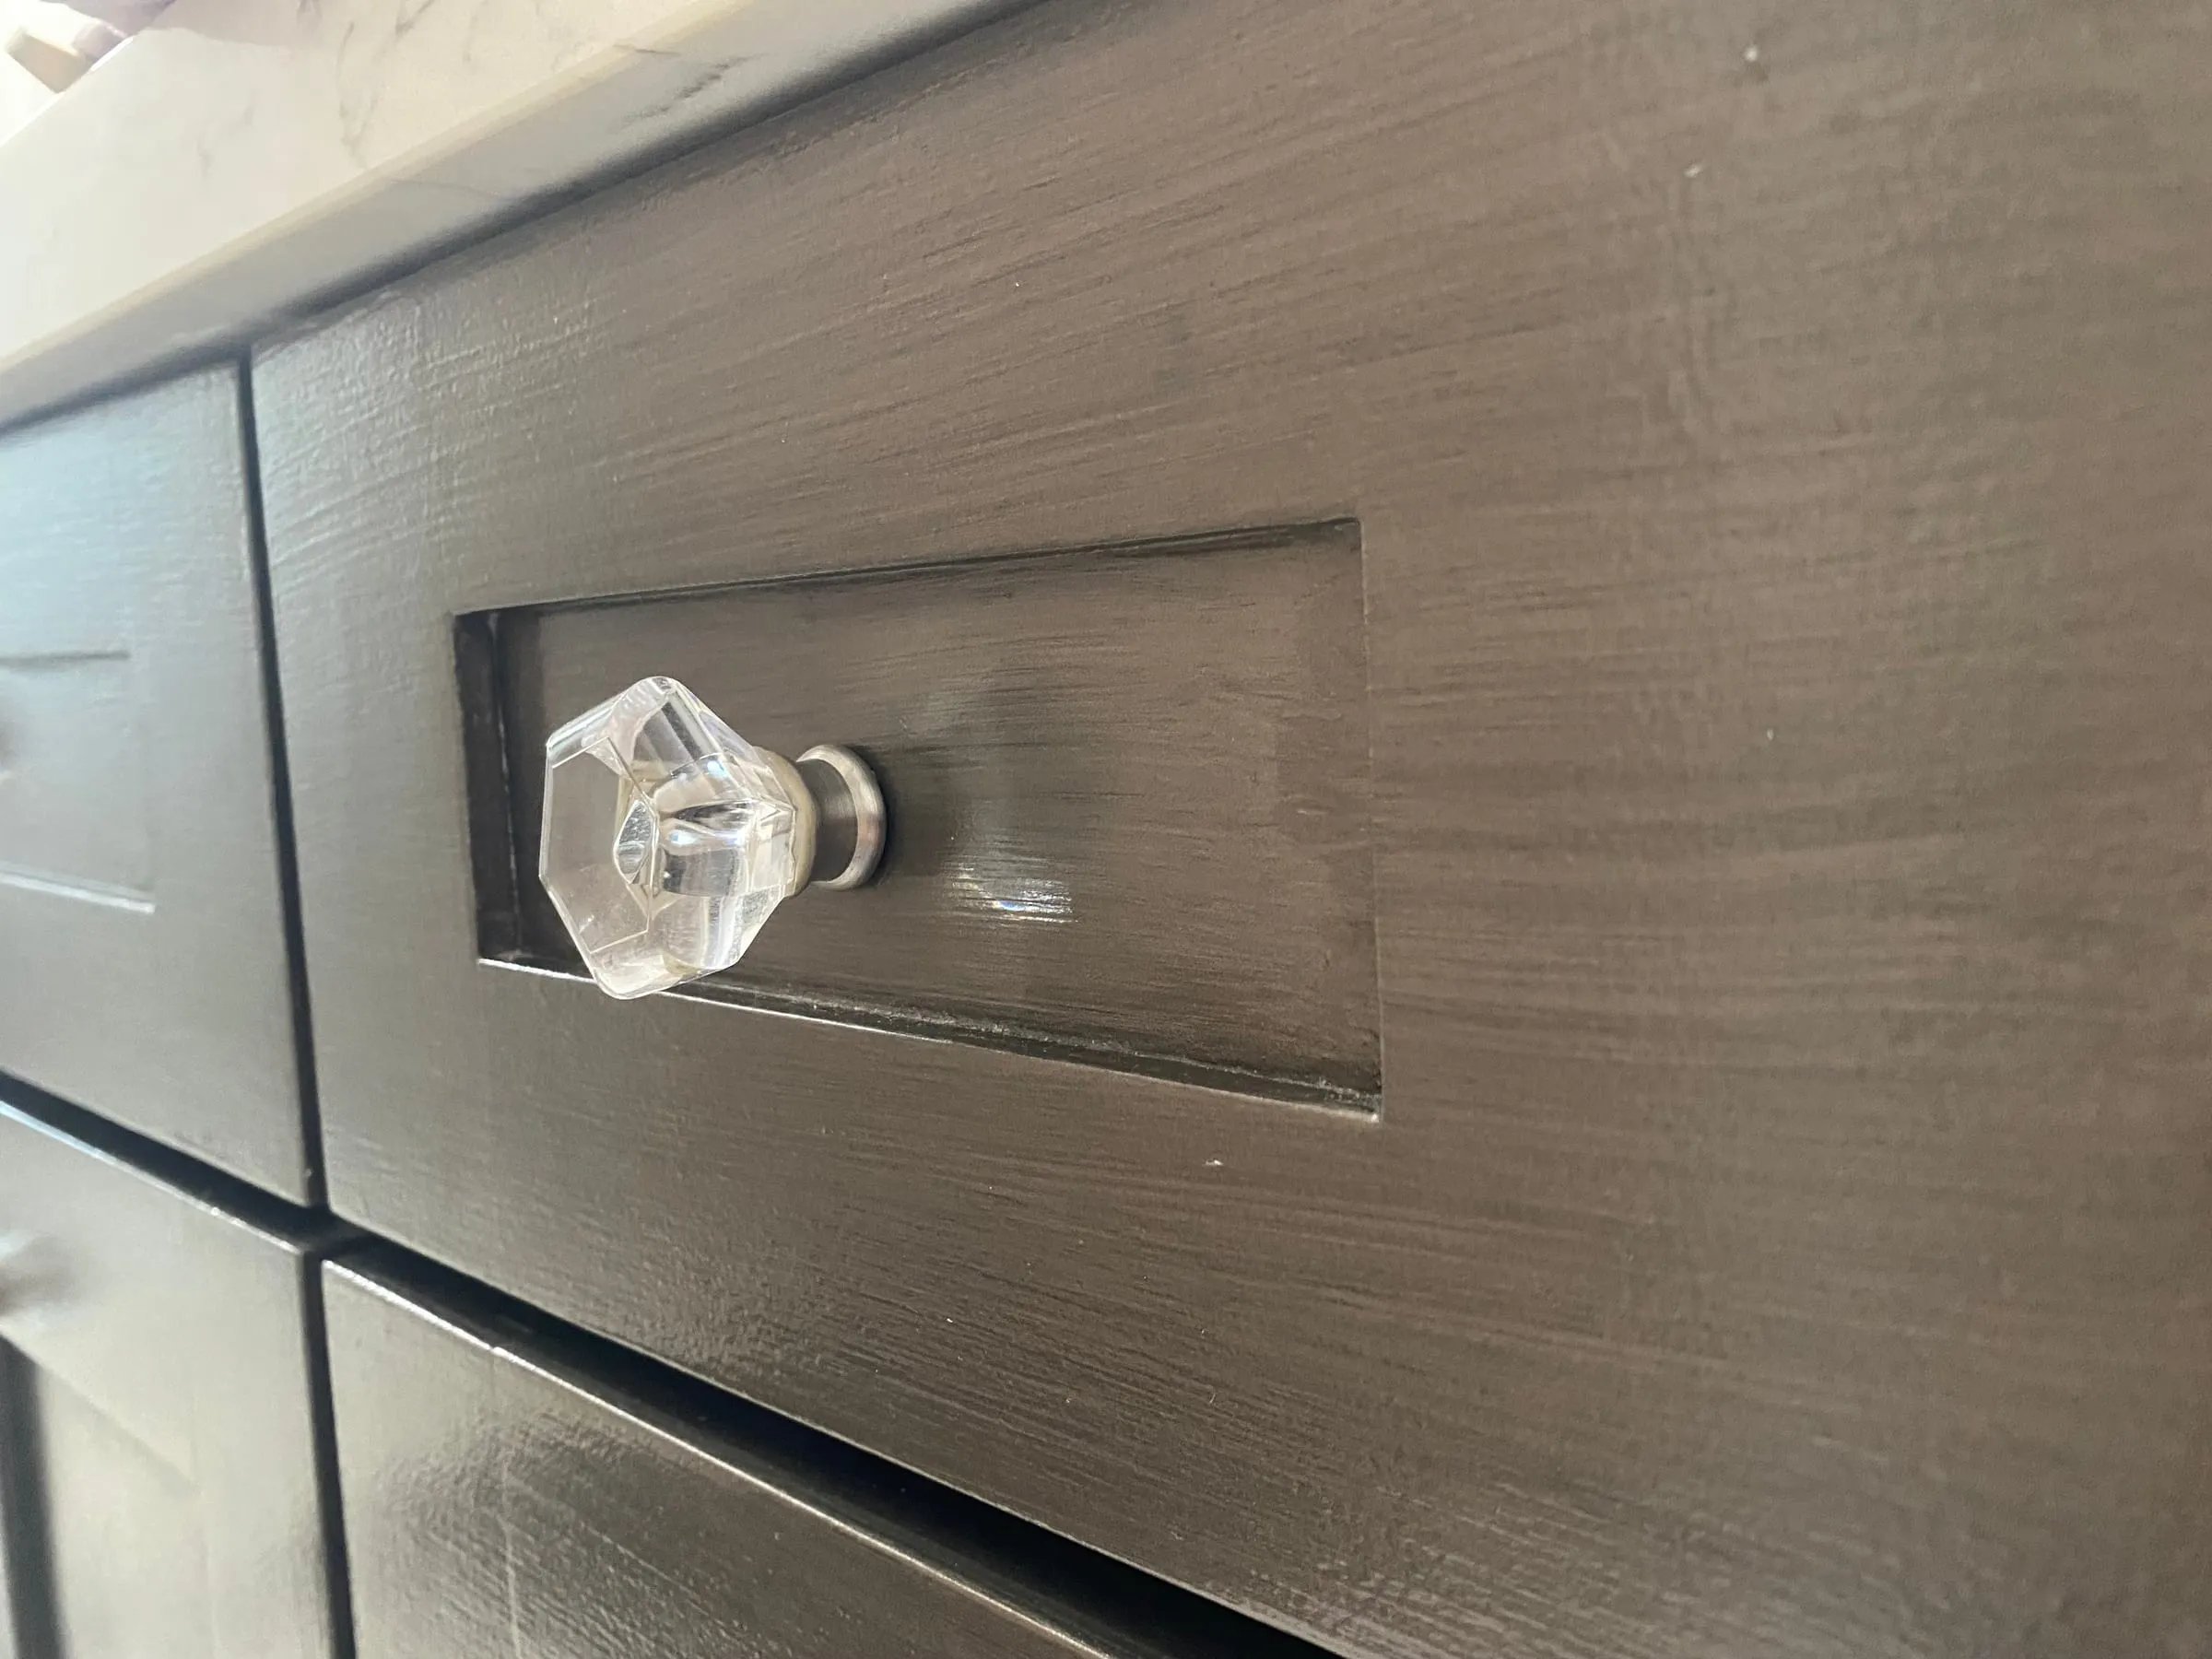
The finishing touch was to install the fabulous Shabby Restore mercury glass knobs that I bought from Amazon. But lo and behold, they were a little too large and the contrast was a bit over the top. I went back to the drawing board but didn’t find any I really liked. Looking now, there are a ton of other options. In the end, I tried them in the master bathroom in the Maison du Lac house and they looked great! And the Liberty faceted acrylic knobs from the other house were perfect for this cabinet. They had an air of sophistication but weren’t too much bling like the mercury glass knobs. The simple switch elevated both spaces.
The Matching Wall Cabinet
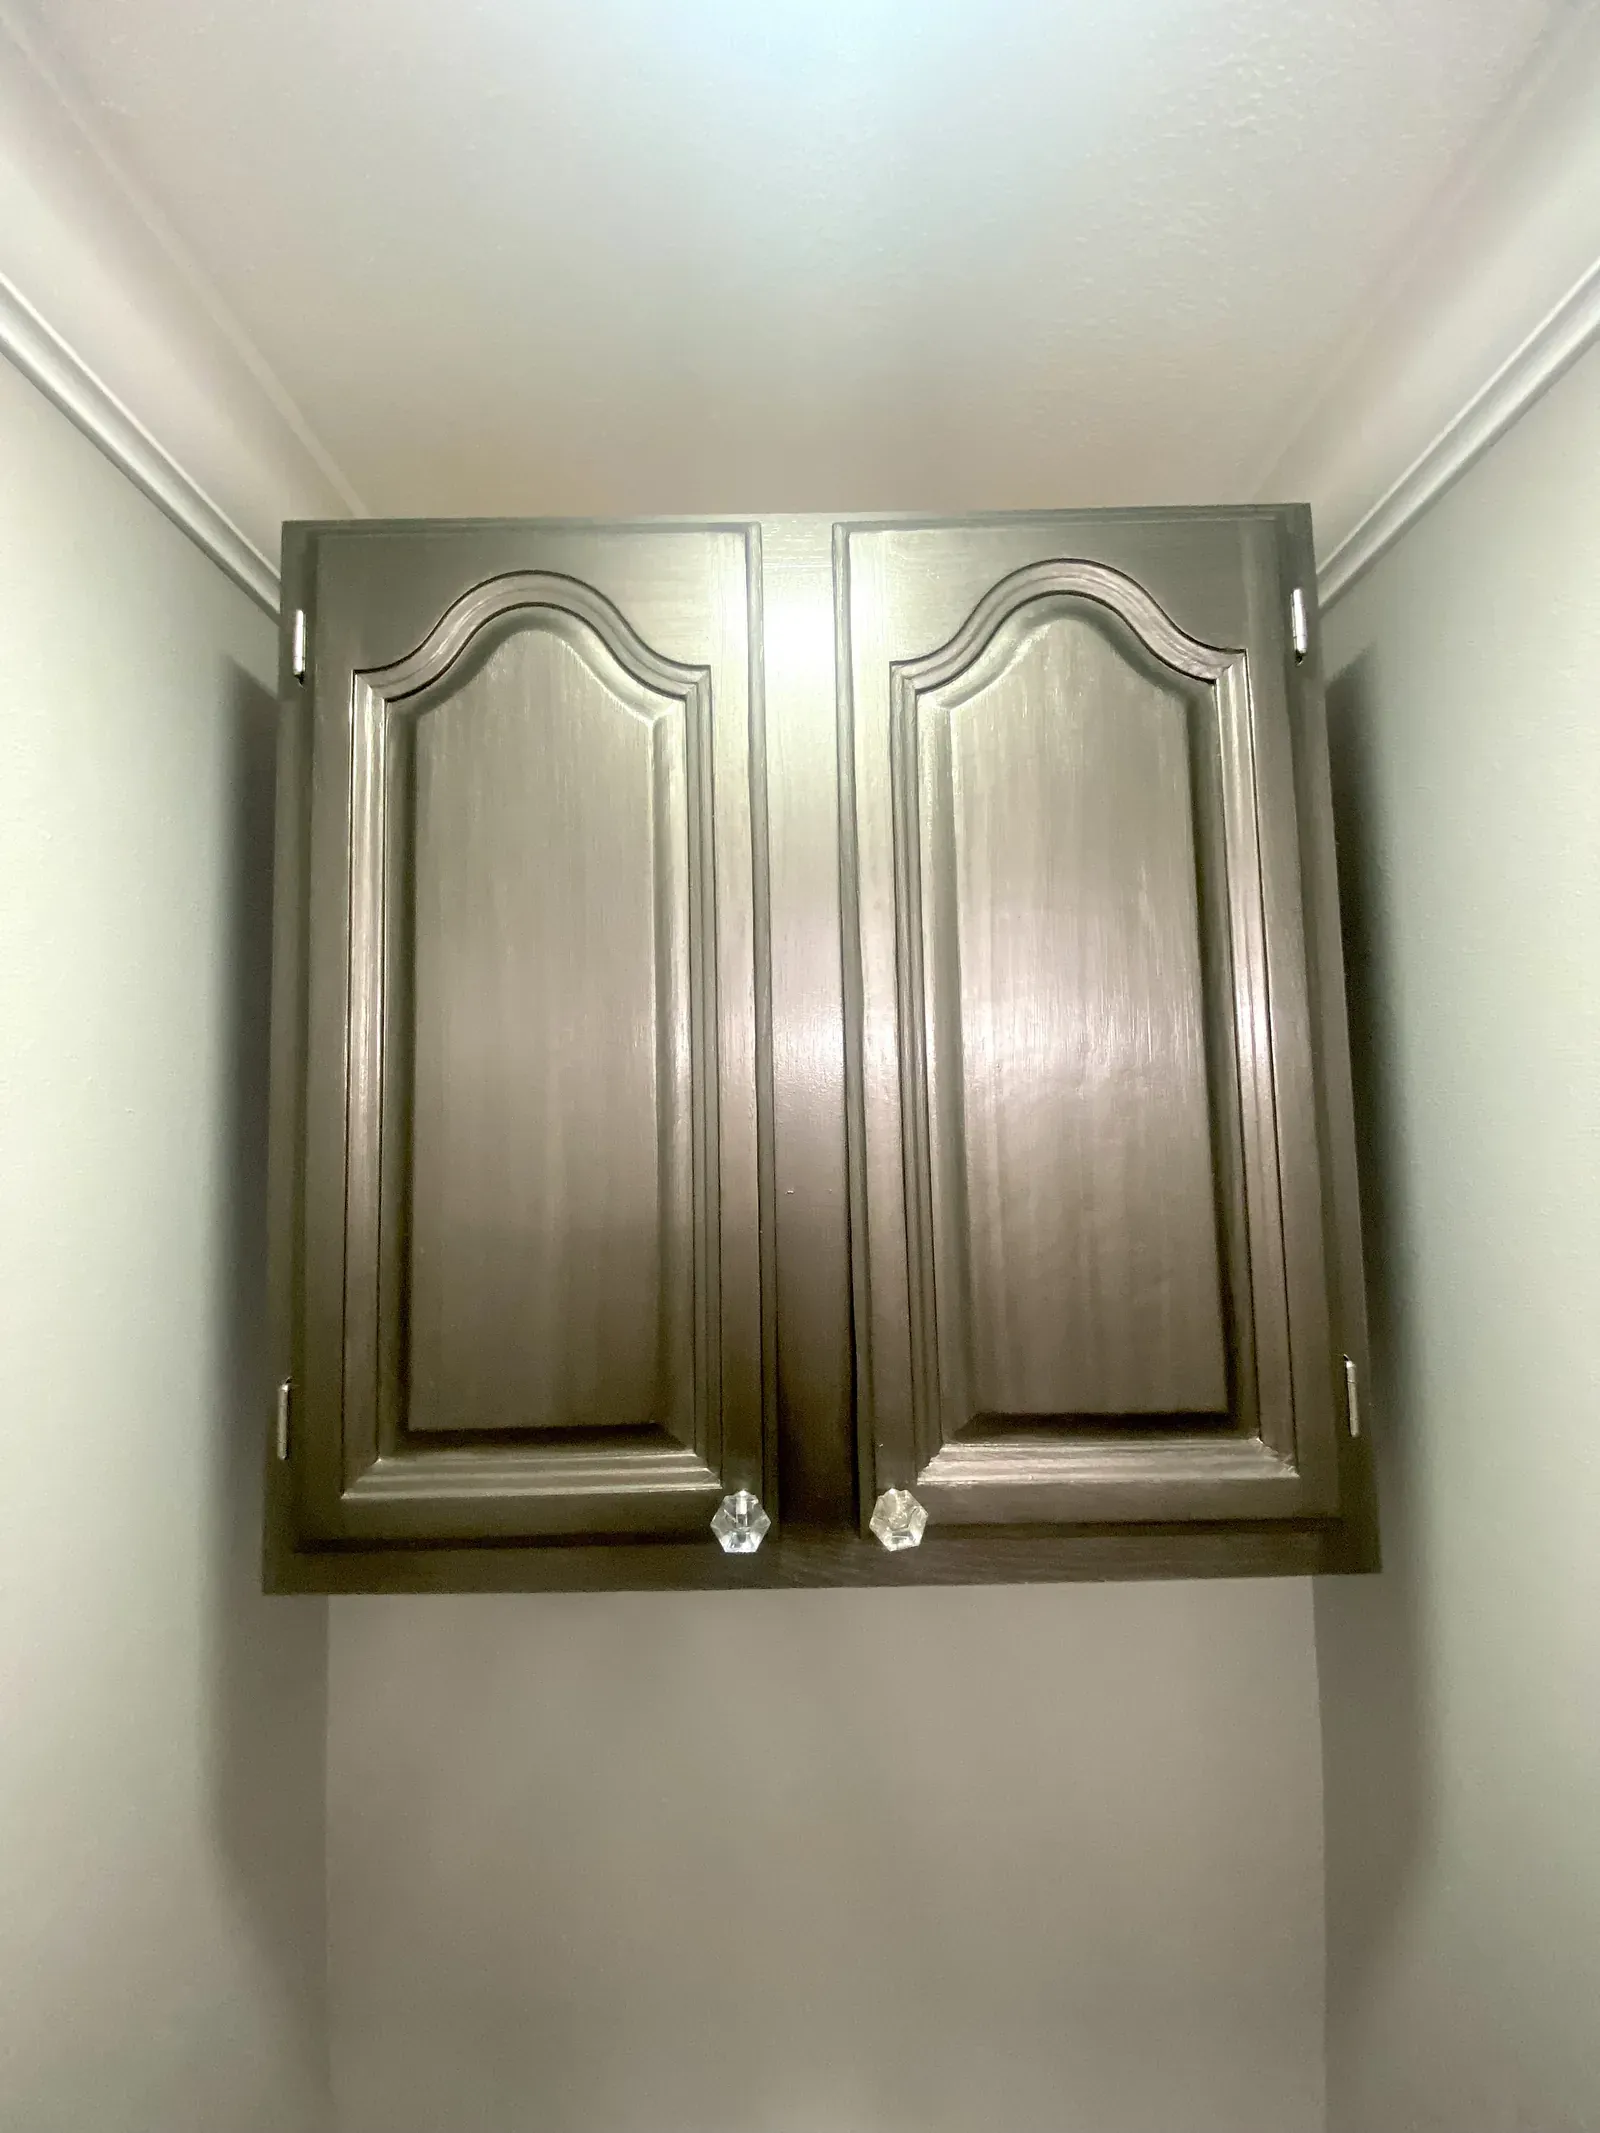
A kitchen wall cabinet was repurposed over the toilet for additional storage, and it was refinished the same way as the vanity. I planned on adding crown molding to the cabinet, but there was not enough room between the top of the doors and the top of the cabinet. We could have lowered the doors ever so slightly had I realized this before repainting it, but I did not want to make new holes so late in the process. Make a mental note to check this first if you want crown on top of your wall cabinet.
The Result
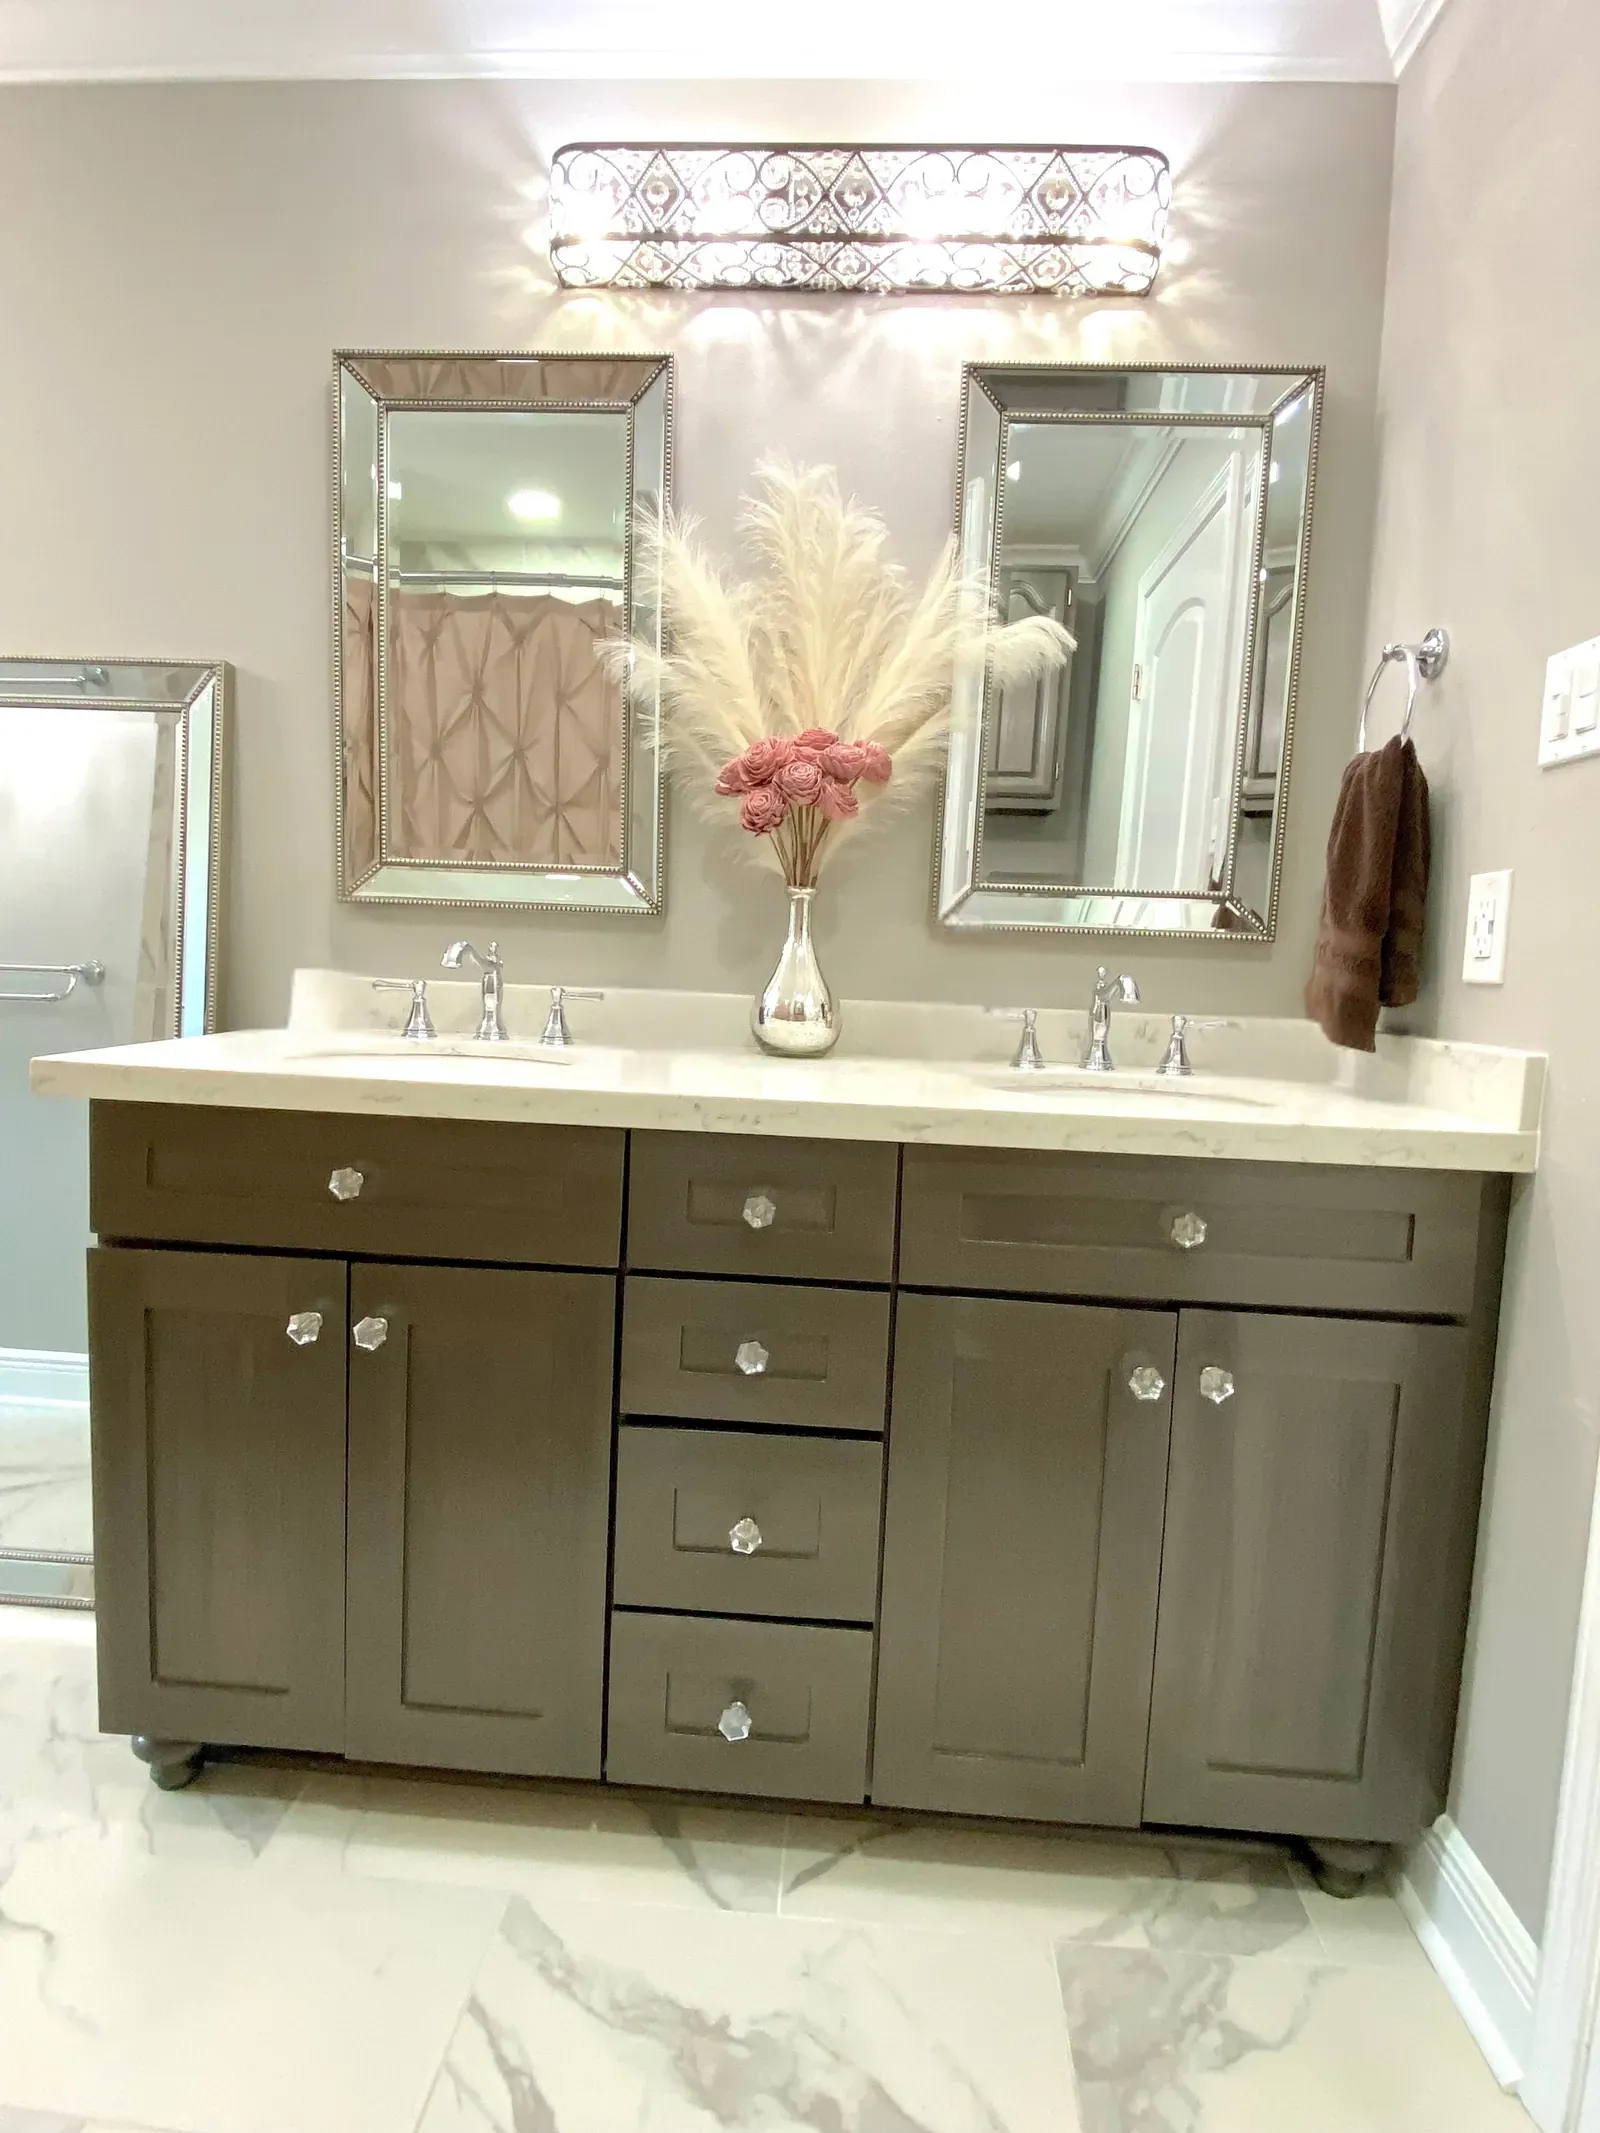
A vanity that was headed for the landfill now anchors the bathroom. The Smoke metallic over the Perfect Taupe base gives it a soft metallic sheen, the variation from the strie technique adds richness to the piece, and the turned legs and quarter round elevate it to a piece of furniture rather than a cabinet. Paired with the Carrara Cream quartz and the Delta Cassidy faucets, it looks like it was made for the room.
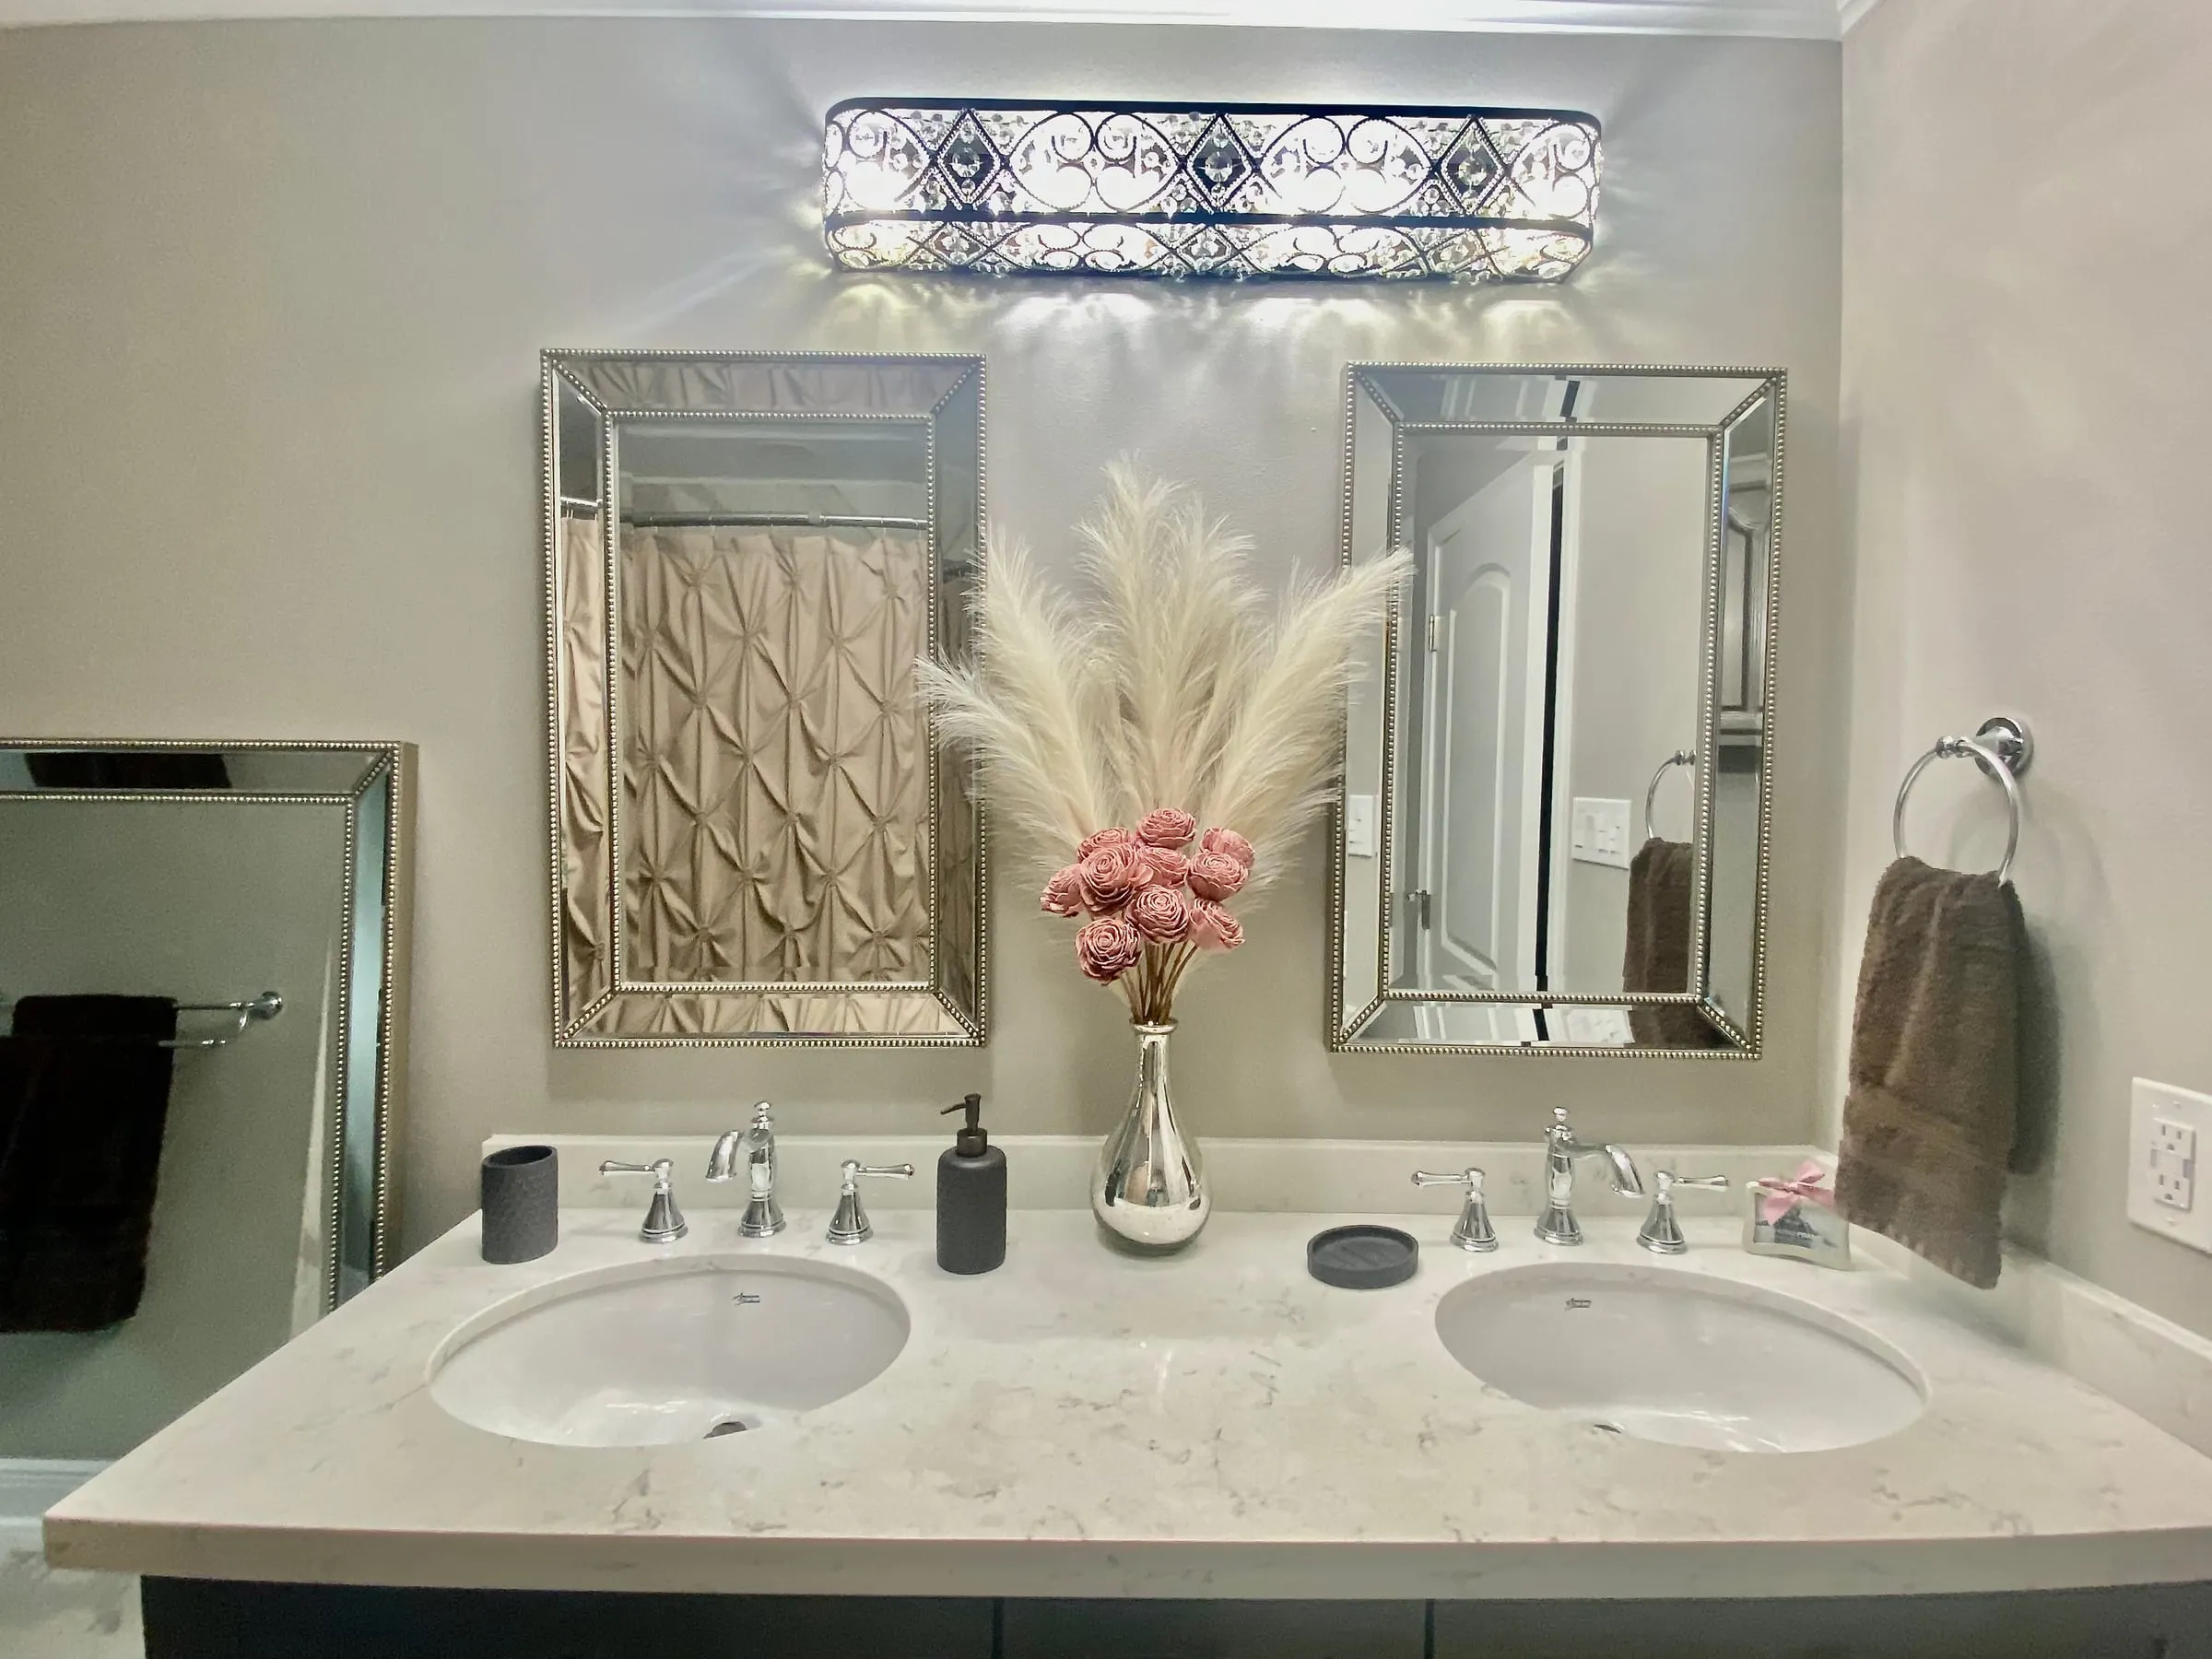
I’ve used this vanity since spring 2022 and it has held up extremely well. There are no chips in the finish at all. It is easy to clean and just as beautiful as the day it was finished. I have never regretted doing this finish or upcycling this piece. I would do it again without hesitation!
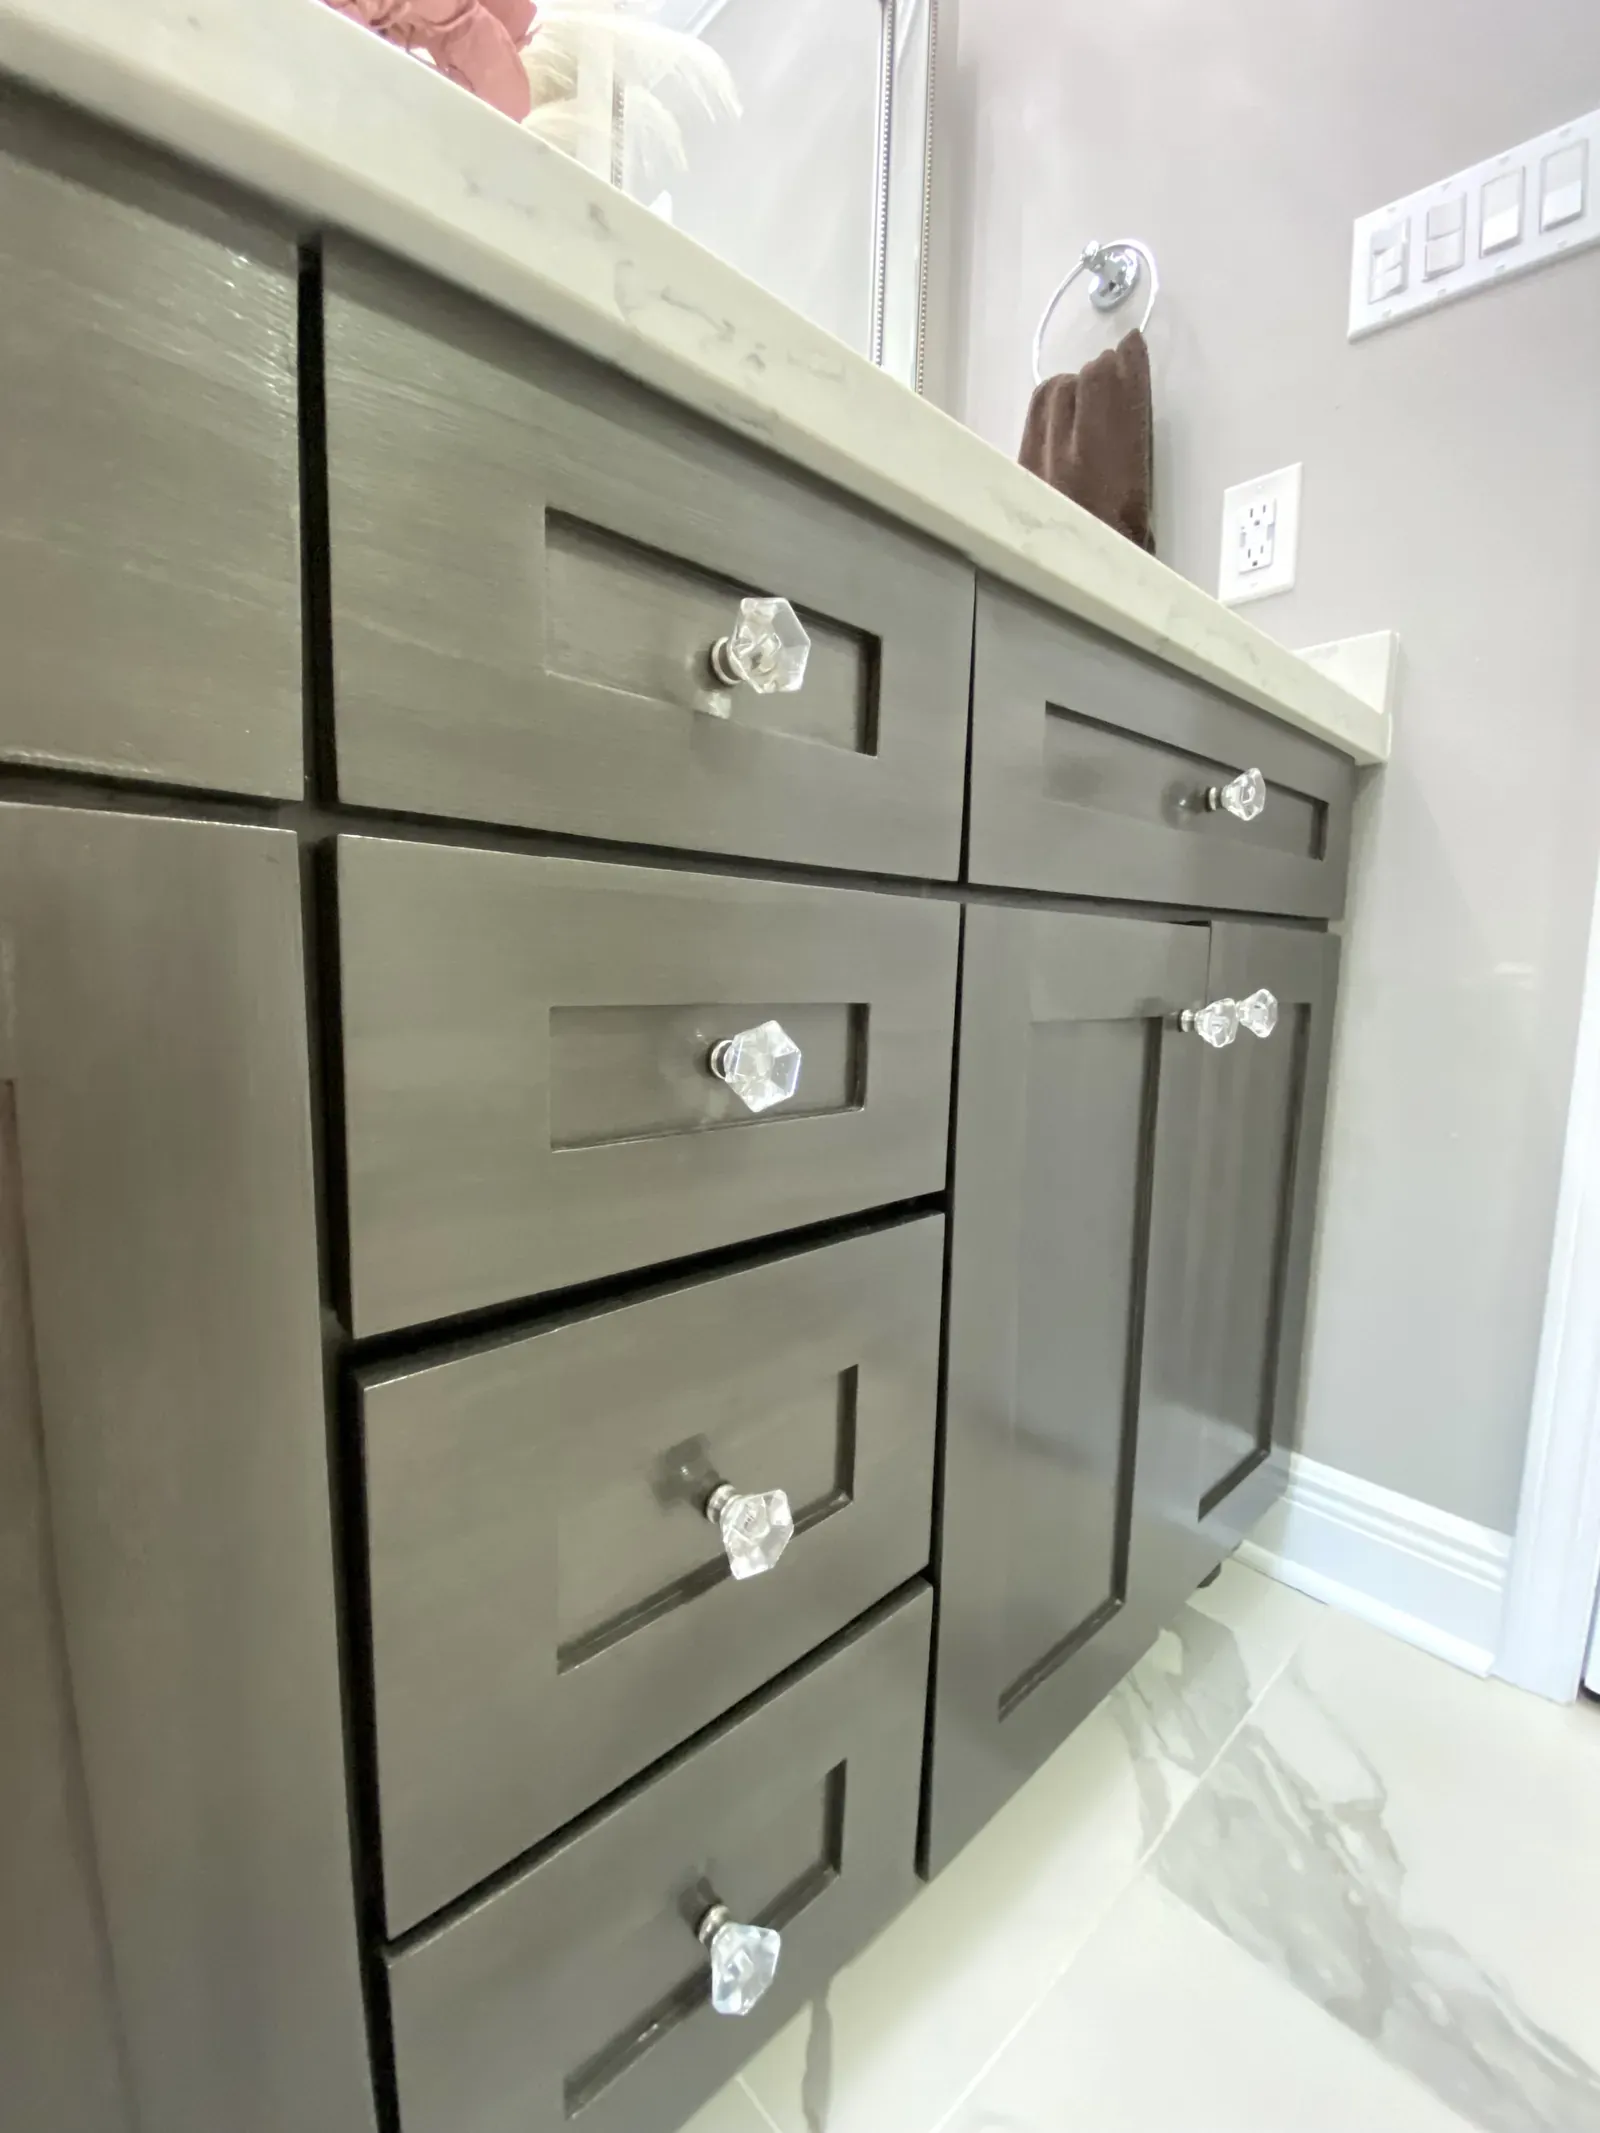
To see how the vanity fits into the rest of the bathroom, read From Lackluster to Luxe: A Bathroom Remodel.
If you’ve rescued a piece like this or want to try this finish, I’d love to see your before and after photos!
Steps to Refinish a Vanity With Modern Masters Metallic Paint
The lesson: a base coat in your wall color saves a coat of metallic paint and warms up the finish. Without it, Smoke would likely have needed three coats instead of two.
-
Repair any damage. I covered the damaged side with a sheet of wood veneer. You may have gouges or deep scratches to fix.
-
Take it apart. Remove the drawers, doors, and hinges. Mark everything so you know which door and drawer goes where, which hinges go to each door, etc.
-
Clean, sand, and clean again. Sand just enough to rough up the surface; you don’t need to reach bare wood. I use tack cloth after cleaning to make sure I’ve gotten all debris.
-
Prime. Prime the painted surfaces. New veneer and the unfinished turned legs and quarter round always need primer; already painted surfaces may not, but prime all of it to ensure the desired color is uniform throughout the piece.
-
Base coat. Paint the vanity in your desired base coat color. I used Behr Perfect Taupe at 50% lighter. Let it dry.
-
Metallic paint in a strie pattern. Lightly mix Modern Masters Metallic Paint in Smoke so it shows some color variation, and drag it on with a 3 inch trim and touch up painting tool. Smoke is meant to take three coats, but mine took two because I did a base coat. Let it dry.
-
Apply clear coat. I used Modern Masters MasterClear in Satin. To ensure maximum durability, I did 3 coats.
-
Let it cure. Wait the full 7 days before installing or using the vanity.
-
Install the vanity. Screw the hanger bolt on each turned leg into the top plate at the front corners, then set the vanity in place. Add the painted quarter round to the front and left side using a nail gun.
-
Rehang the doors. Make sure each component stayed with the right door and location.
-
Install the sinks, countertops, and faucets.
-
Add the hardware. The knobs go on last.
-
Admire your handiwork. You worked hard to upcycle this beautiful piece. Enjoy it!
Shop the look
What I Used
The paint, finish, and hardware behind this rescued vanity, including the trim and touch up tool that gave me the strie finish. Items marked Similar are close matches, not the exact piece I used.
Paint and Finish
- Primer
- Zinsser Bulls Eye 1-2-3 (Home Depot)
- Base Coat
- Behr Perfect Taupe, 50% lighter, in Eggshell (Home Depot)
- Metallic Paint
- Modern Masters Metallic Paint in Smoke (ThePaintStore.com)
- Clear Coat
- Modern Masters MasterClear in Satin (ThePaintStore.com)
Repair and Prep
- Wood Veneer Sheet
- PureEdge White Maple Real Wood VeneerSimilar (Home Depot)
- Sandpaper
- Diablo 120 grit and 220 grit (Home Depot)
- Tack Cloth
- HDX 18 in. x 36 in. Tack Cloths (3-Pack) (Home Depot)
- Trim and Touch Up Painting Tool
- Behr 3" Trim and Touch Up PainterSimilar (Home Depot)
- Paint Brush
- Wooster 1 in. Pro Nylon/Polyester Thin Angle Sash Brush (Home Depot)
- Roller
- 4 in. High-Density Foam Mini Paint Roller with Frame and Refills (Home Depot)
Trim and Hardware
- Turned Legs (2)
- Waddell Turned Bun Foot with Hanger Bolt (Home Depot)
- Mounting Hardware
- Waddell Heavy Duty Top Plate (Home Depot)
- Quarter Round Molding
- Unfinished Pine (Home Depot)
- Cabinet Hardware
- Liberty Faceted Acrylic in Satin Nickel (Home Depot)
On Top
- Countertop
- Carrara Cream quartz (Local Fabricator)
- Sinks
- American Standard Ovalyn in White (Home Depot)
- Faucets
- Delta Cassidy Widespread in Chrome (Home Depot)
Save it for later