HomeDesign & DIY Room Makeovers
A Master Bathroom Worth the Wait
An 80s master bath with spindles, carpet, and a cultured marble tub becomes a bright retreat: a new layout, a freestanding soaking tub, a separate shower, and a water closet.
Part of Maison du Lac, a whole-house renovation in South Louisiana
The Before
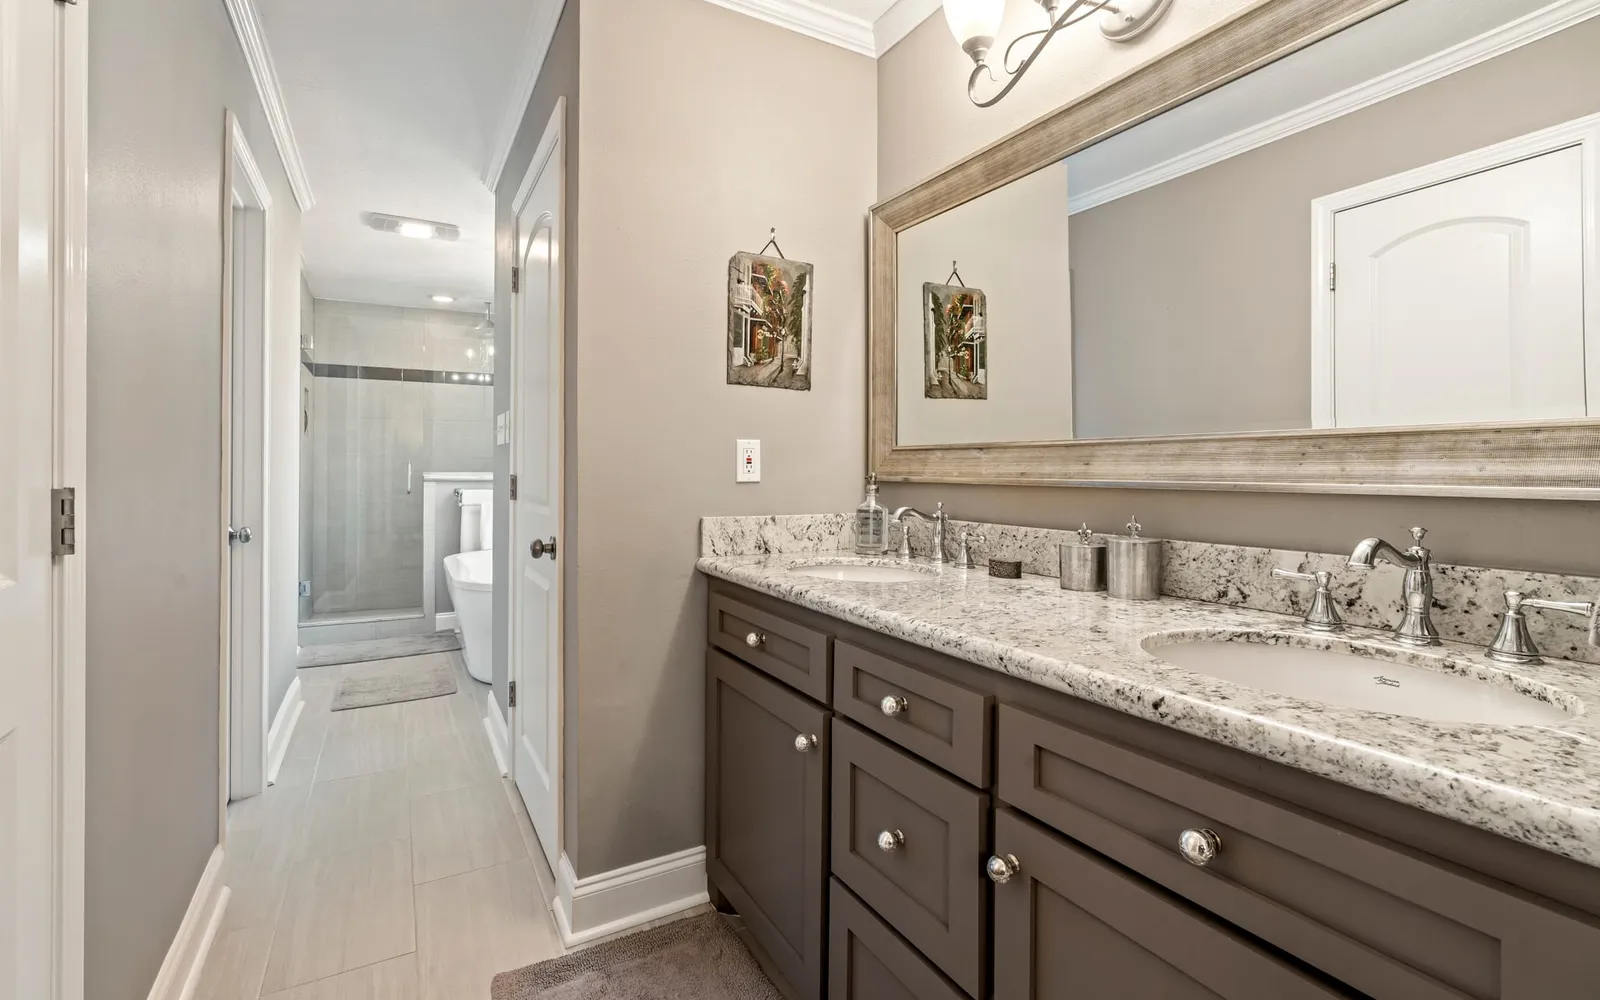
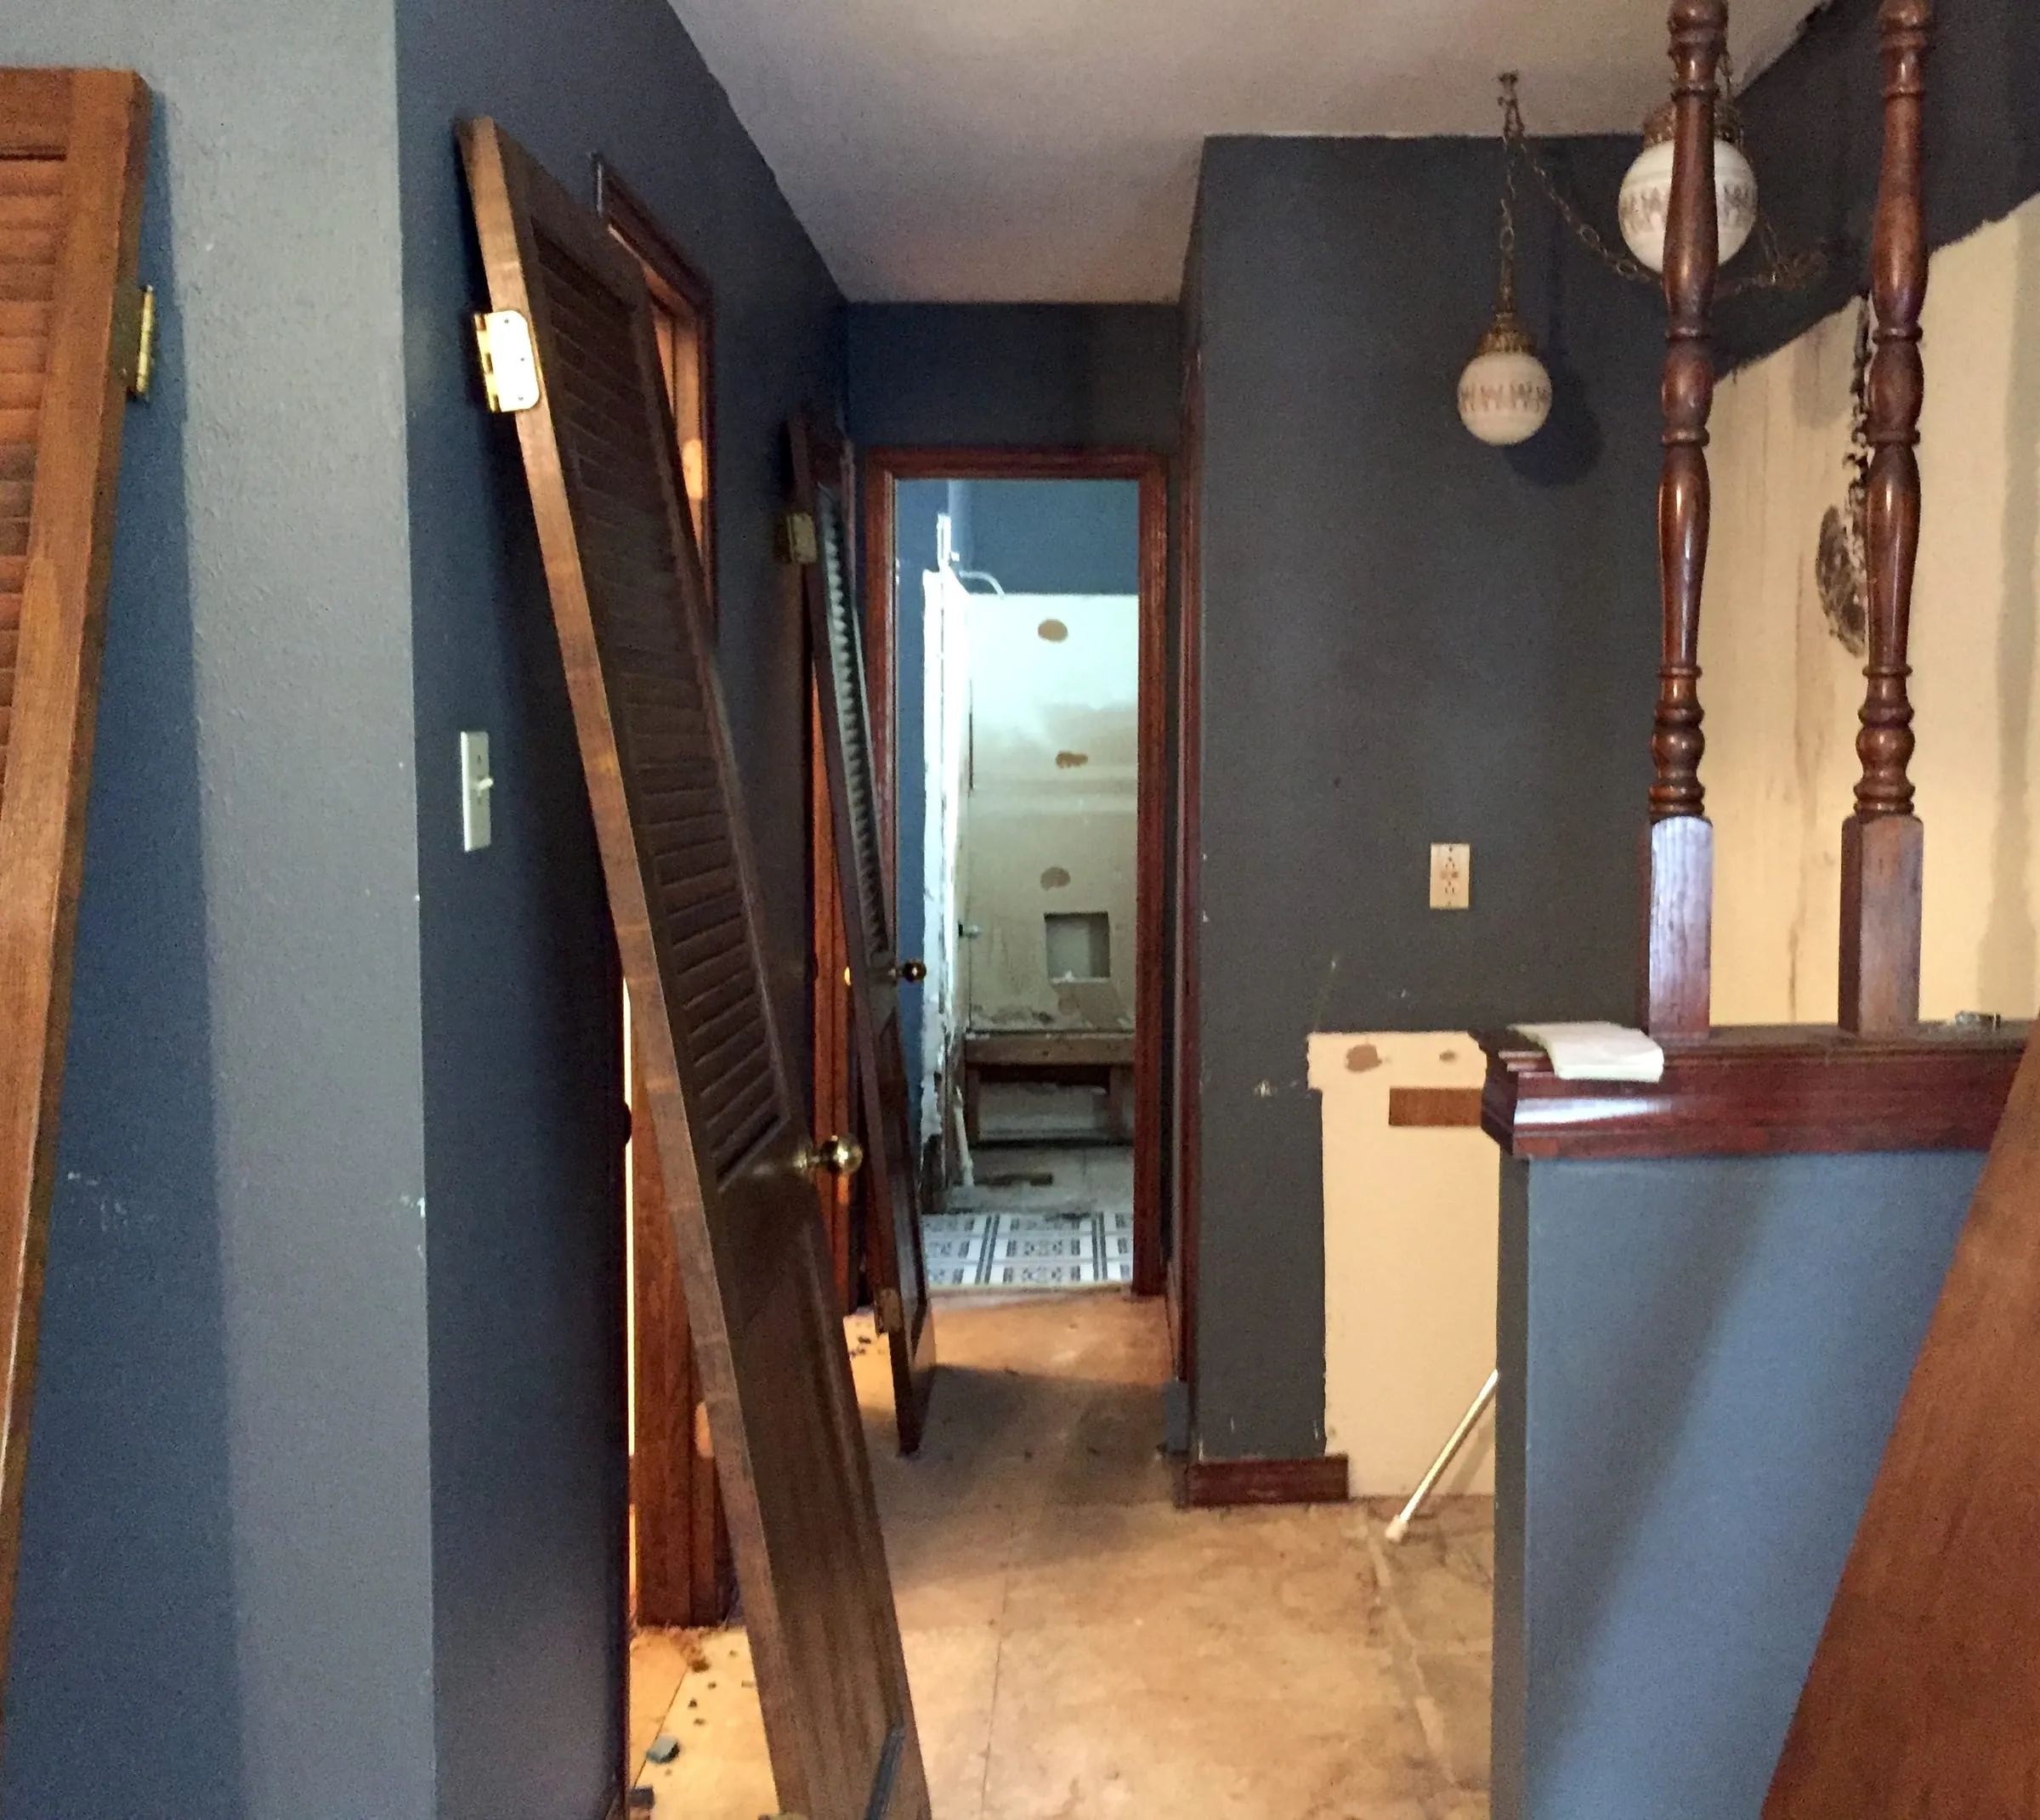
Kitchens and baths sell houses. Since this home was supposed to be my first flip, I knew this bathroom had to make a statement. It had to do three jobs. The layout had to function well, it needed to have enough storage space, and it had to be a showstopper. What I started with was a dark and dated room with an 80s floor plan. The sink area was open to the bedroom, with the carpet continuing into the area. There was no door, just a half wall adorned with wooden spindles stretching from shoulder height to the ceiling. The vanity was along the right wall as you entered, with double sinks, a builder grade mirror, and a double swag lamp above. Just beyond the vanity was a small linen closet with several shelves. The left wall held two doors to walk in closets. Past the linen closet, a door provided privacy to the rest of the space that had linoleum flooring. When you walked through, the toilet was positioned on the right behind the linen closet, facing a huge cultured marble tub. Overall, the space was a bit tight, and none of the elements would be kept.
Reimagining the Layout
Since open dressing areas are a thing of the past, I planned to add a door to close off the bathroom from the bedroom. I hoped to have a large soaking tub but also wanted a separate shower. Enclosing the toilet in a separate small room, called a water closet, was also on my list of things I wanted to change, but there wasn’t space to do all these things.
The rest of the vision came together while I was figuring out how to handle the strangely shaped room in the middle of the home. It had a door to a small laundry room that had just enough room for the washer, dryer, and water heater. This is also where the electrical panel was located. I eventually decided to relocate the laundry room to the oddly shaped room. It would be more spacious and make doing laundry easier. That would make the current laundry room a large closet, but the oddly shaped room already had a closet near the second entrance to the room. In addition, there was a linen closet just outside of the room at the end of the hall. The current laundry room was behind the linen closet, which is why you had to enter the other room to access it.
After much deliberation, I decided to nix the linen closet at the end of the hall. This allowed me to close off the door in the new laundry room and access the old laundry room from the hall. This changed everything! Why did this matter so much? Well, because I gained space for a shower for the primary bathroom. The old laundry room backed up to the master bath. To make this work, I had to move the water heater to the attic. The old laundry room was larger than I needed for a shower, so the rest of it became a utility closet, with access from the hall. This use of the spaces made so much more sense and gave the area a better flow.
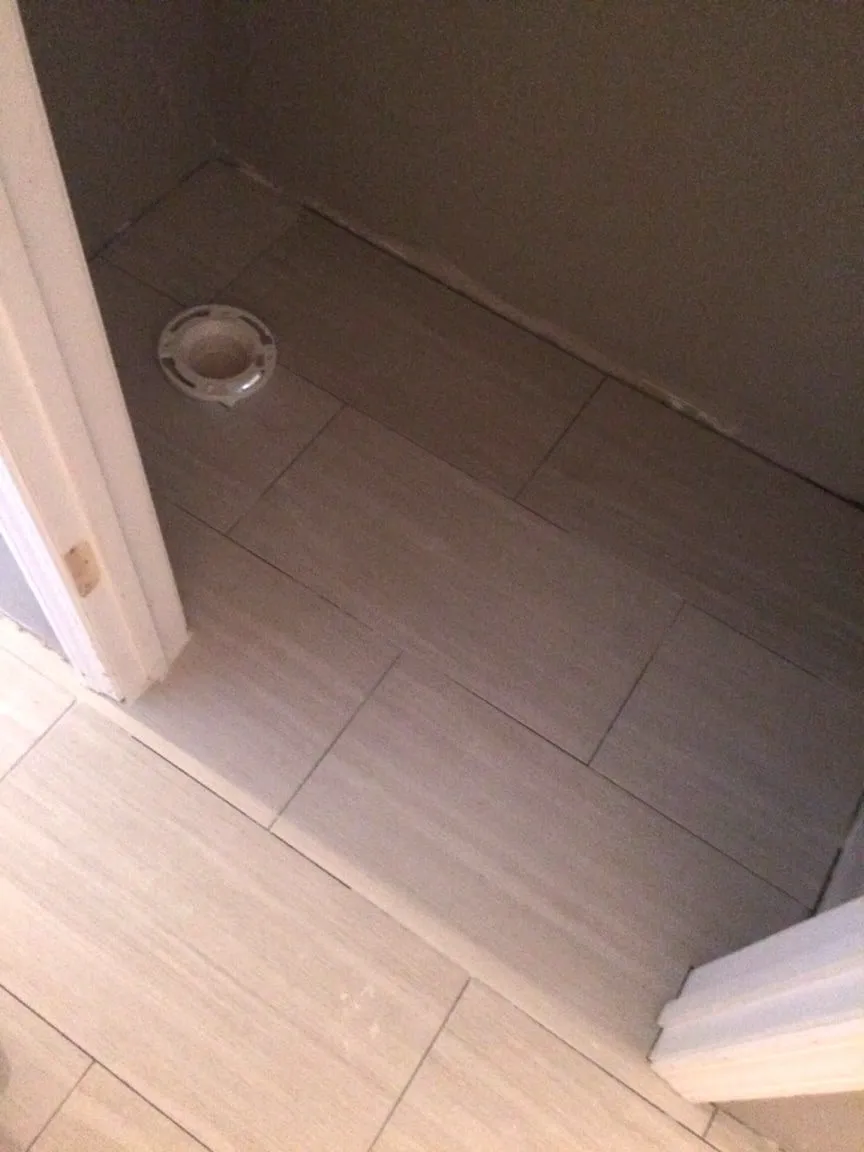
Once this decision was made, the rest of the room fell into place. If I moved the toilet slightly, I could now position a large soaking tub lengthwise in the room. Turning the tub sideways created the area to access both the tub and the shower. Since the house was raised, I knew I could move plumbing around with relative ease. But then it came to me! I could turn the toilet 180 degrees without changing any of the plumbing for it. By incorporating the space from the linen closet, we now had a separate water closet, which is standard in newer homes. Voila! This accomplished all my must haves with a minimum of plumbing adjustments.
The Design Process
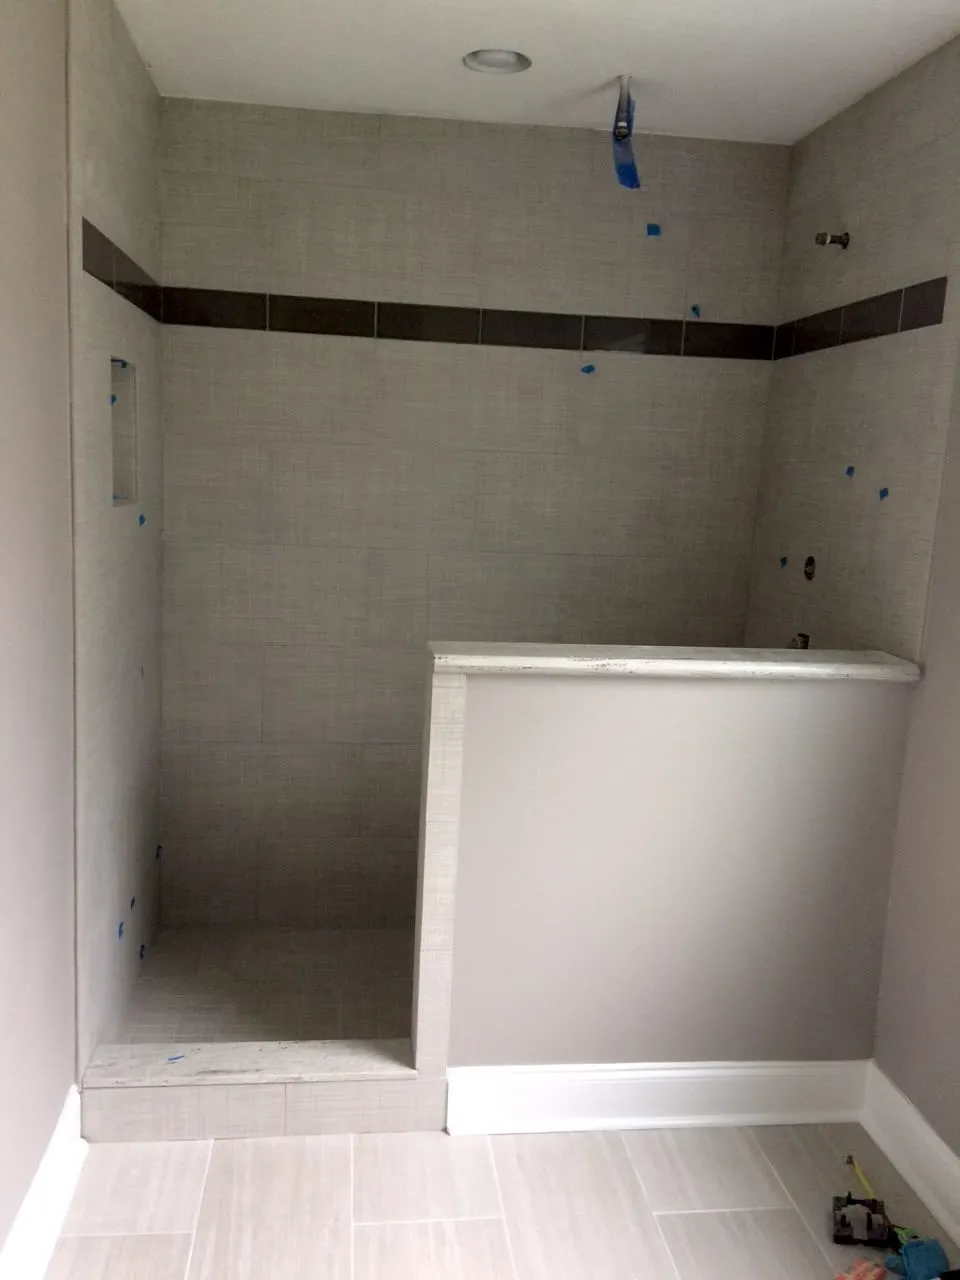
I could now focus on the aesthetic design aspects. Like most of the house, the walls were painted a deep, dark blue and all of the trim, doors, and woodwork were stained a dark walnut. I wanted the space to be bright, stylish, and a place to escape at the end of a long day. I planned to use the MSI Classico Blanco tile in this bathroom, but they did not have matching small tiles for the shower floor. Daltile’s Meier Park in Silver Strand did. The colors looked great together and I decided to use the Classico Blanco just on the floors. The Silver Strand 12x24 tiles were used on the walls, with a gray accent tile in a stripe about ¾ of the way up to the ceiling. This adds an extra design element and catches your eye. For the shower floor, I used the 12x12 mosaic, and the 3x12 bullnose to finish the wall edges. The tiles were a beautiful complement to each other, and it worked very well using both in the same room. As for paint colors, I had already chosen Behr’s Amazon Stone for the cabinet color throughout the house. For the master bedroom walls, I chose Behr’s Fashion Gray, but had it mixed 50% lighter. I carried the color into the master bath as well. White Cloud granite was the plan for the countertops throughout the house.
Demo Day
Demo began with tearing out the carpet and linoleum, then the spindles, the toilet, and the tub. The back walls of the bathroom and linen closet were torn out. The old vanity, sinks, and faucets were pulled out, and the trim and door frames were removed piece by piece. The doors throughout the house were solid wood on the bottom and louvers on the top. They were beautiful doors and are still used in a lot of homes in tropical areas. It would have been nice to sell them, but between working full time with an hour commute and doing this project, I decided to donate them.
Choosing the Sinks, Tub, and Fixtures
A trip to Coburn’s, a local supply store, solved the dilemma of which fixtures to choose, though Home Depot also carries them. In just a few short hours, I had almost everything picked out not only for this bathroom, but also for the whole house. Many of the items I chose for this remodel have become my go to choices. I replicated many of them in my new home and recommended them for projects I’ve designed for others. Since I ended up living in this house for a few years before selling it, I used everything I picked out. If I was pleased with the function and performance, I stuck with it.
For this bathroom, I got a great deal on a soaker tub, around $500 for a $1,500 tub. A contractor had ordered it but never picked it up, so the store slashed the price to move it. As life would have it, I’d say this was the one and only “deal” I got during the entire remodel. I didn’t know that yet, of course, but was thrilled to save some money and it was perfect for the space!
The Remodel Begins
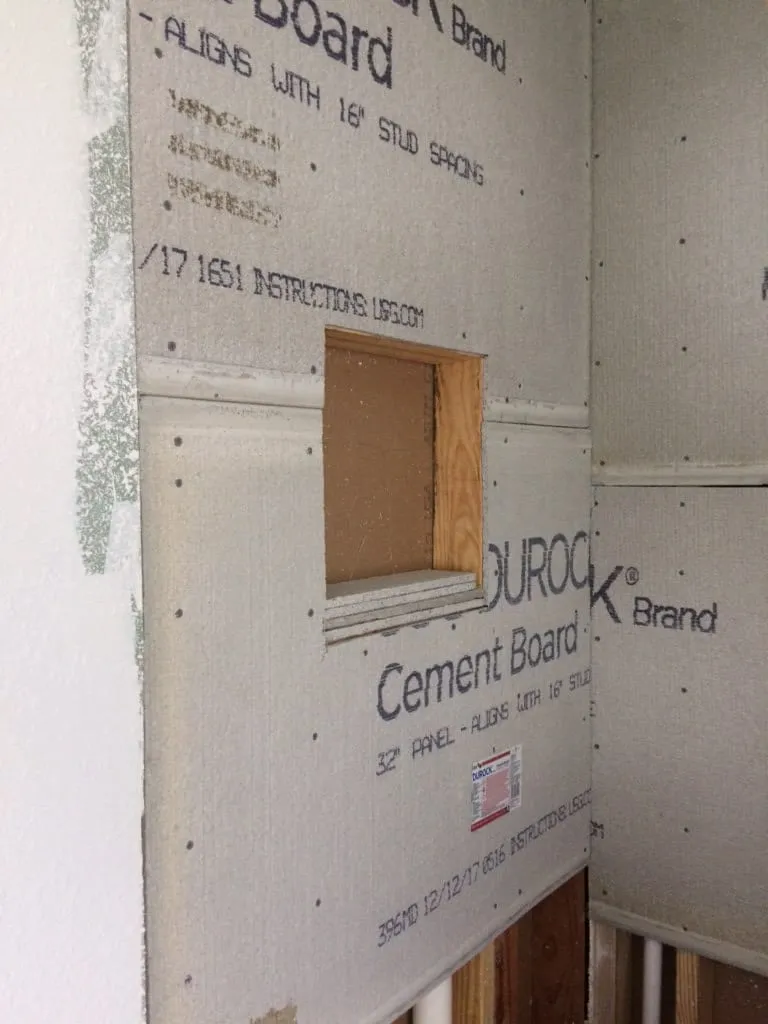
With all the choices made and demo completed, the remodeling work began. Remember how I had the contractor pull down the whole wall between the bathroom and the old laundry room? Once I was further into the project, I decided it should have a partial wall on the right front side of the shower. This gave me wall space to put a towel bar behind the tub. So, a half wall had to be rebuilt when it could have been salvaged during demo. Lesson learned! A niche to store shampoo and soap was framed out. I planned on placing shower glass above the half wall and installing a frameless glass door to the left of it. We also closed in the half wall by the bedroom and added a door to ensure the entire bathroom had privacy.
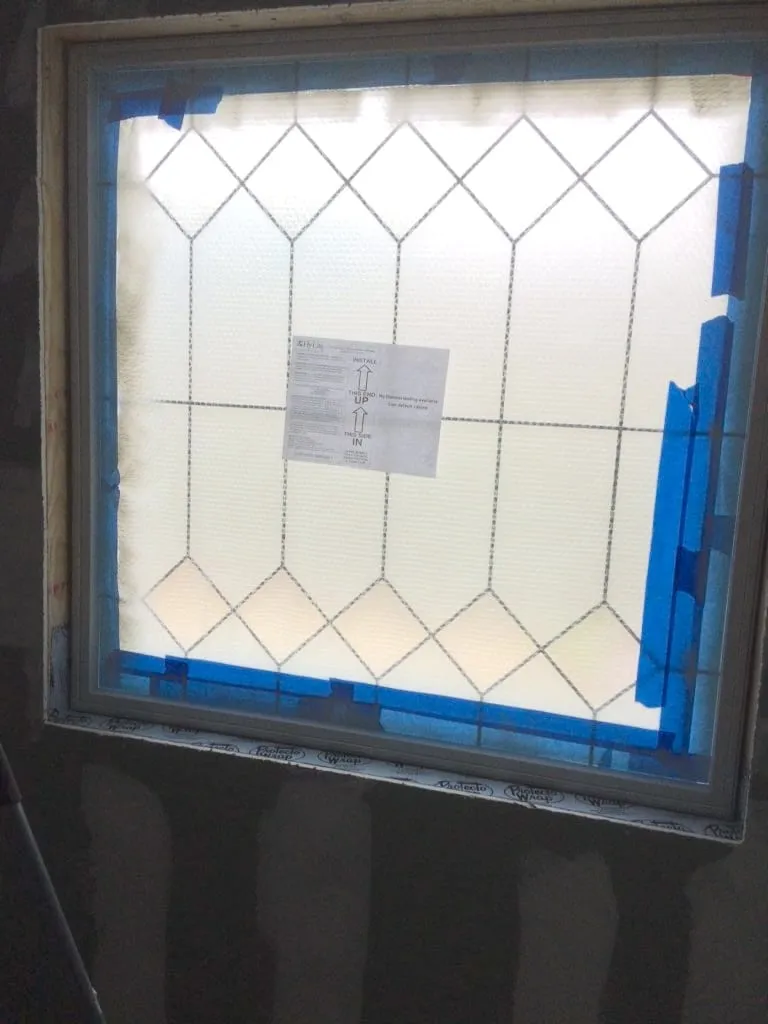
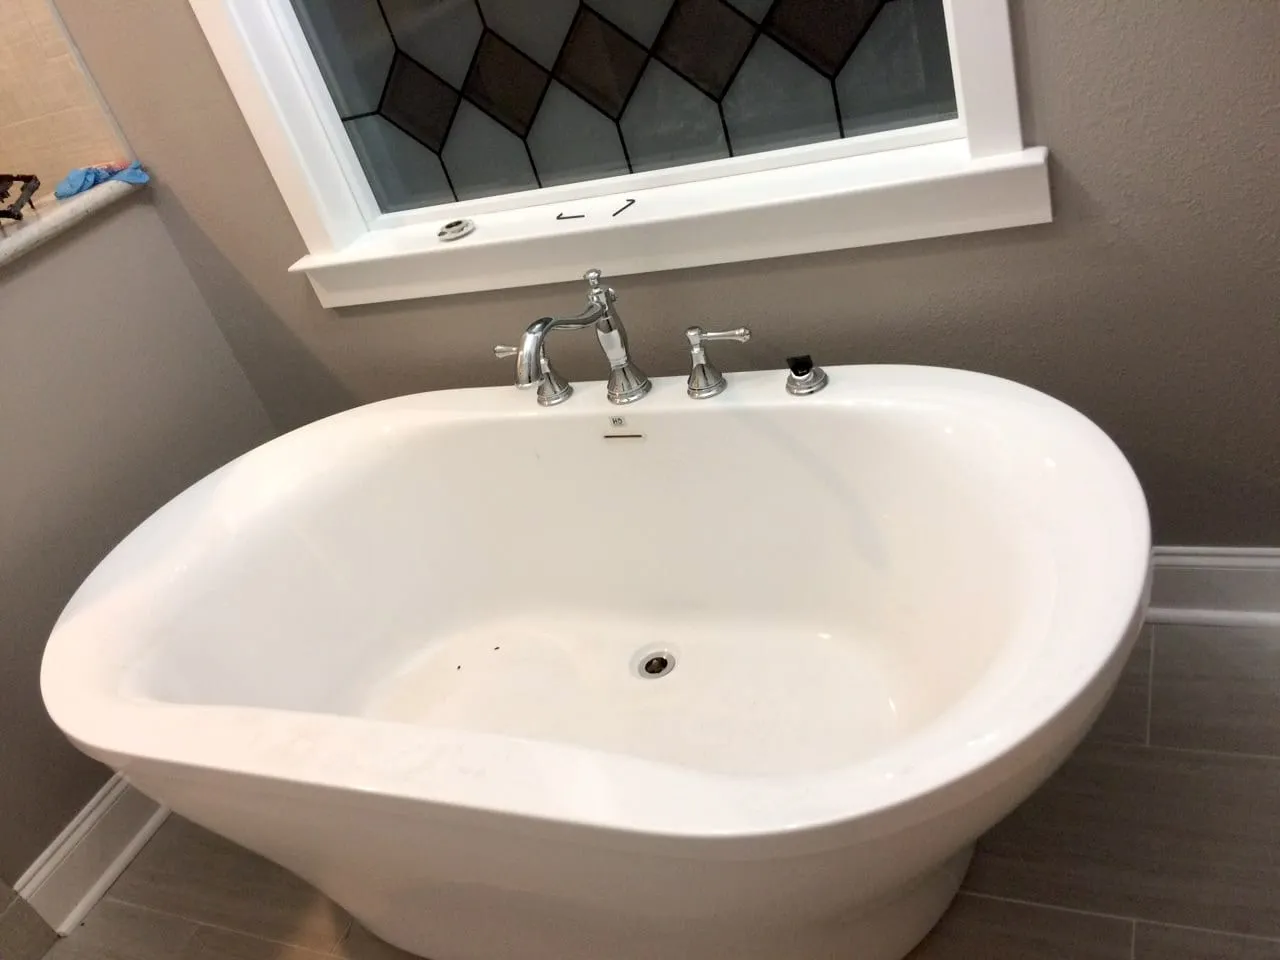
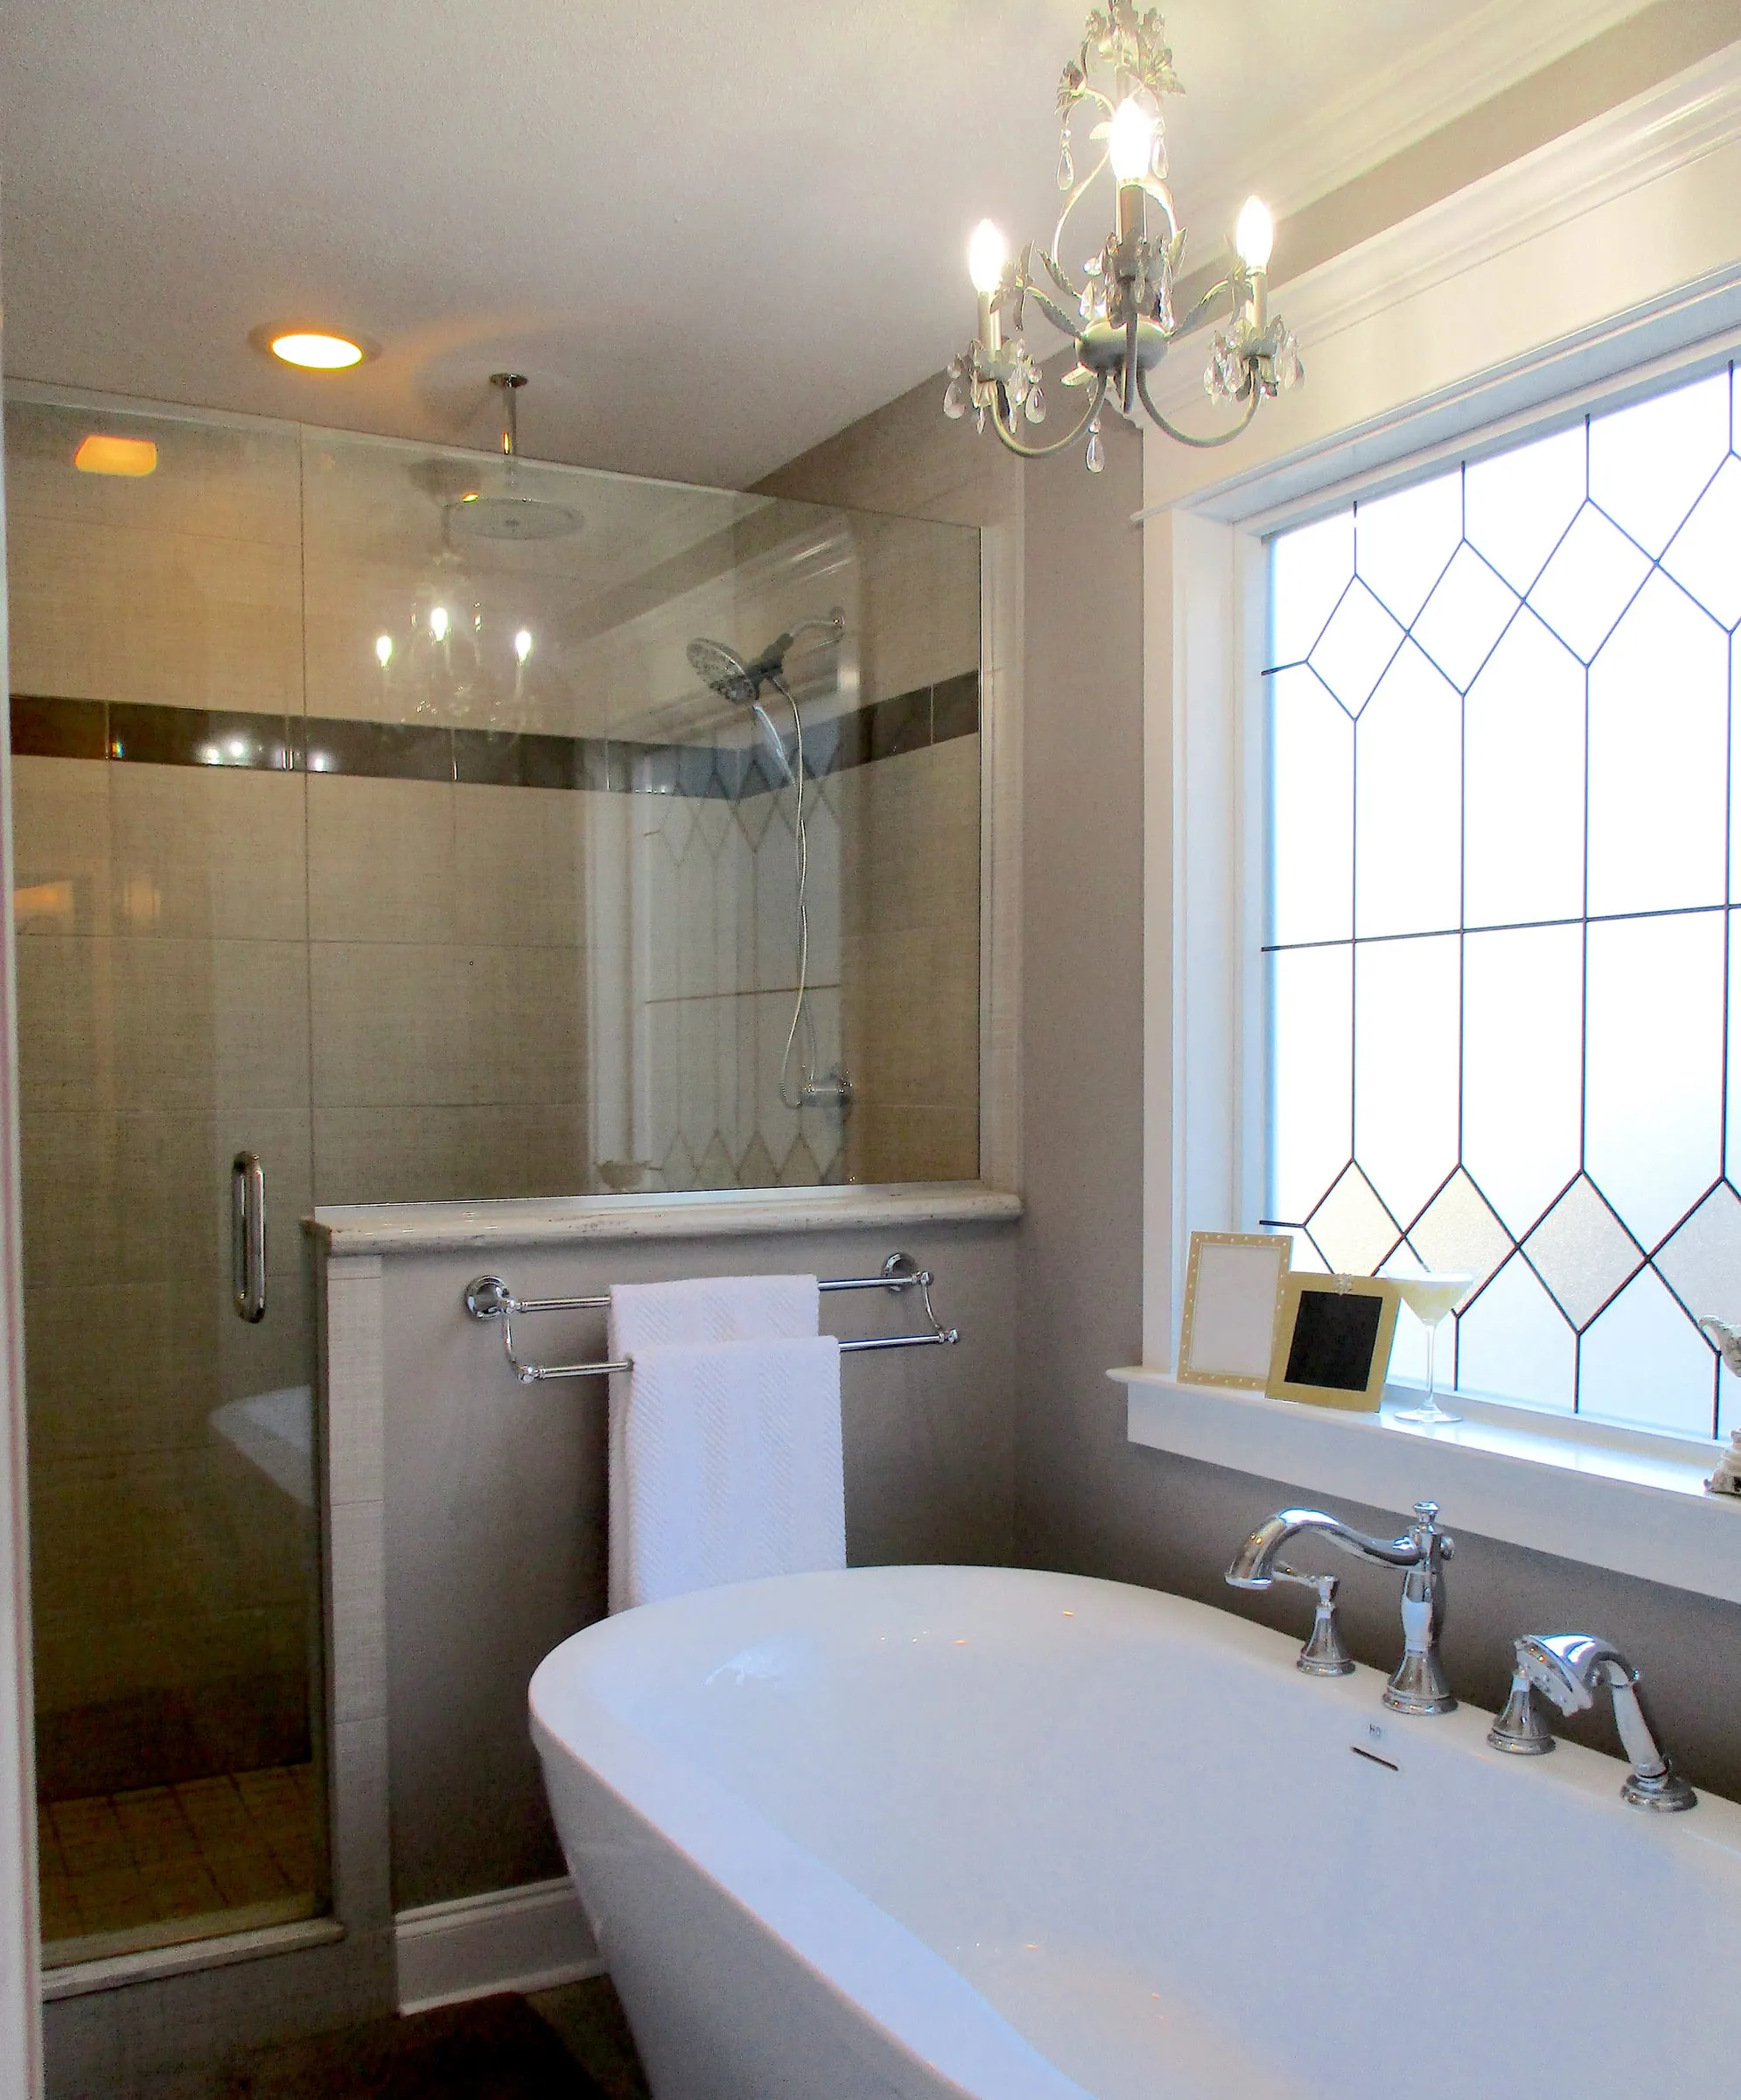
The plumbing was moved to the opposite wall for the new shower head, and I added a rain shower head in the ceiling. Since the tub was in a totally new location, new plumbing was installed through the floor. Electrical was added for the heat/vent/light in the water closet and lights over the tub and shower. I also added an outlet in the new wall by the entry so there would be an outlet by each sink. While shopping at my local lumber company for the trim, I saw a large square window with a diamond pattern that was a perfect backdrop for the tub. I bought it and it was installed, becoming a beautiful focal point for the bathroom.
The old sheetrock was re-skimmed, eliminating that thick, raised texture, and the new sheetrock was skimmed to match. The ceiling over the shower and tub was also re-skimmed to smooth out poorly done previous repairs.
The next step was building the mortar bed for the shower. Then the prep work started for the tile. Since the house was raised, we had to install cement board, tape the seams, and ensure everything was level before the floor and shower tile could go in. This is a long, tedious, and dusty process. Additional waterproofing is also required for the shower walls.
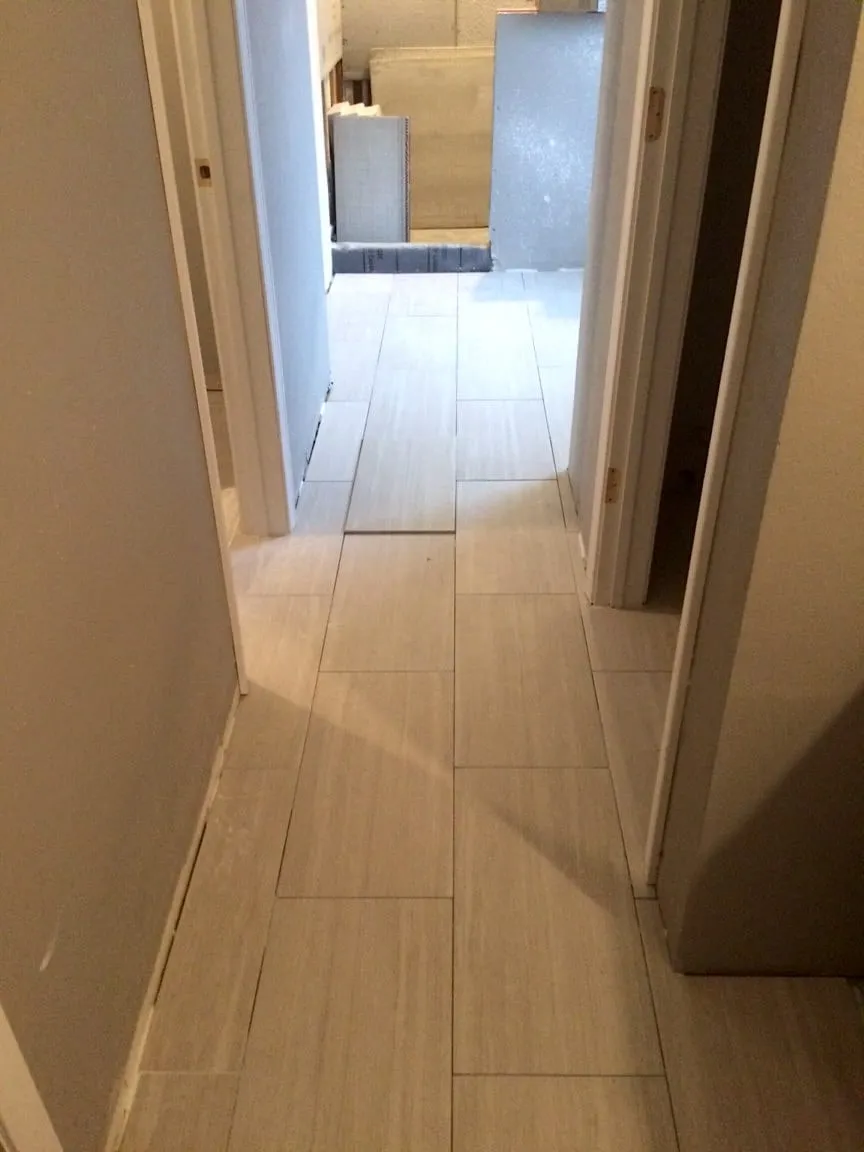
Once the tile was installed, the joints were grouted and sealed. When we ordered the countertops for the home, we did not order anything for the ledge that was built to enter the shower or the top of the half wall. (We also didn’t order anything for the laundry room since that changed mid remodel, but that’s another story.) We ended up using River White granite for these two ledges. It was different from the White Cloud but blended perfectly with the shower colors.
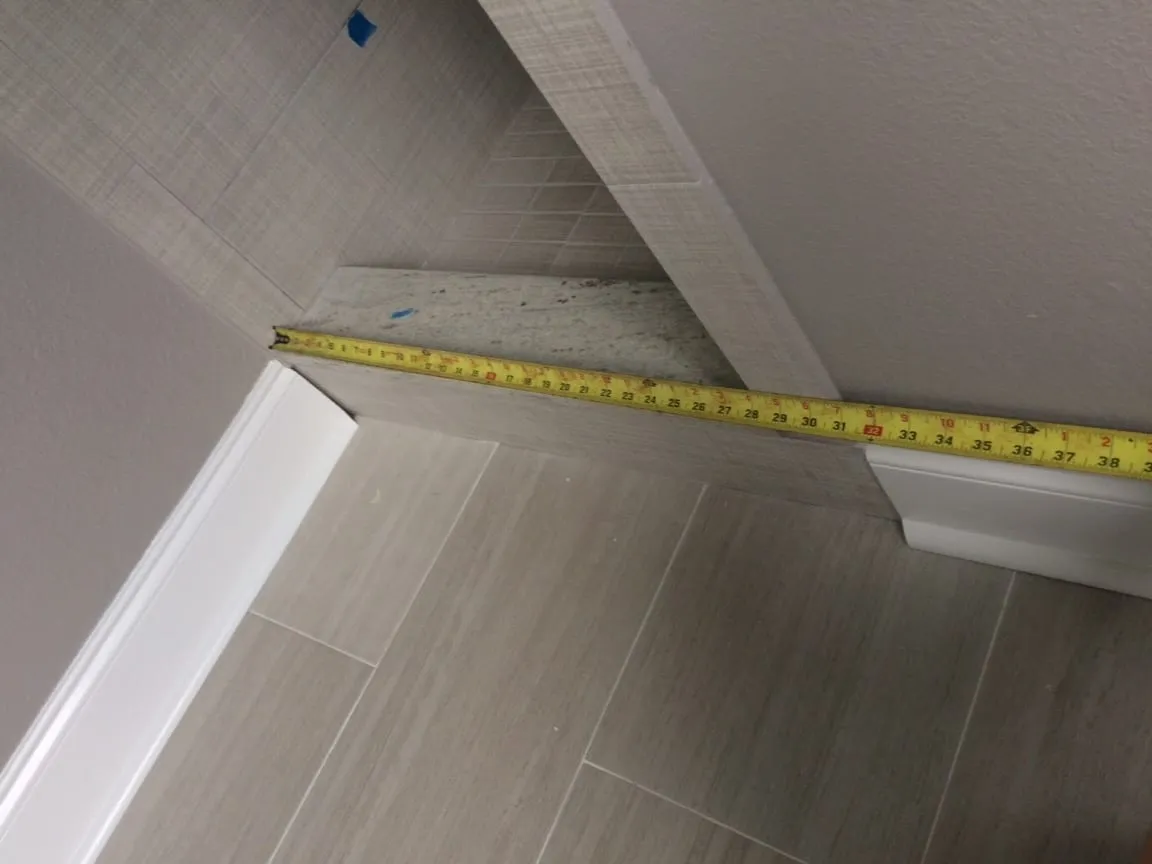
Next, it was time to install the shower fixtures, the tub, and the tub fixtures. The faucet and handles sat on the top deck of the tub and the drain was in the bottom center. I had never watched the process of installing a freestanding tub before and it was challenging. The measurements must be perfect when the plumbing is installed so that everything lines up correctly.
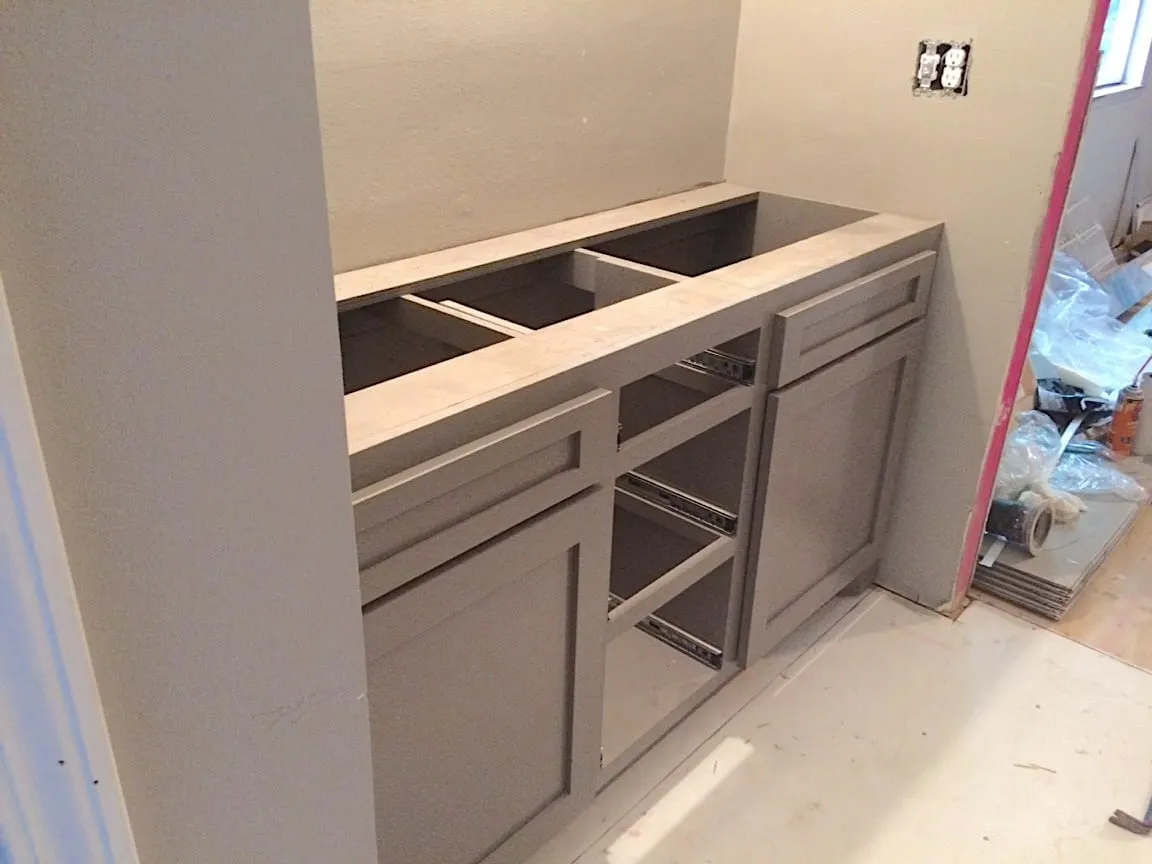
We chose to do custom cabinetry in most of the house and my partner handled the initial order. When the cabinet for this bathroom came, I was in disbelief! There were no drawers! It was all doors, two under each sink. No place to put your toothpaste, makeup, or your Q-tips! I knew this wouldn’t do. I can’t imagine not having drawers in my bathroom. I spoke to the cabinet maker, who met me at the house to talk it over. It ended up being an oversight. He remade the cabinet so that it had one door under each sink and three drawers in the center, one shallow and two deep. The cabinet base showcased a unique angled foot, which gave it an upgraded feel.
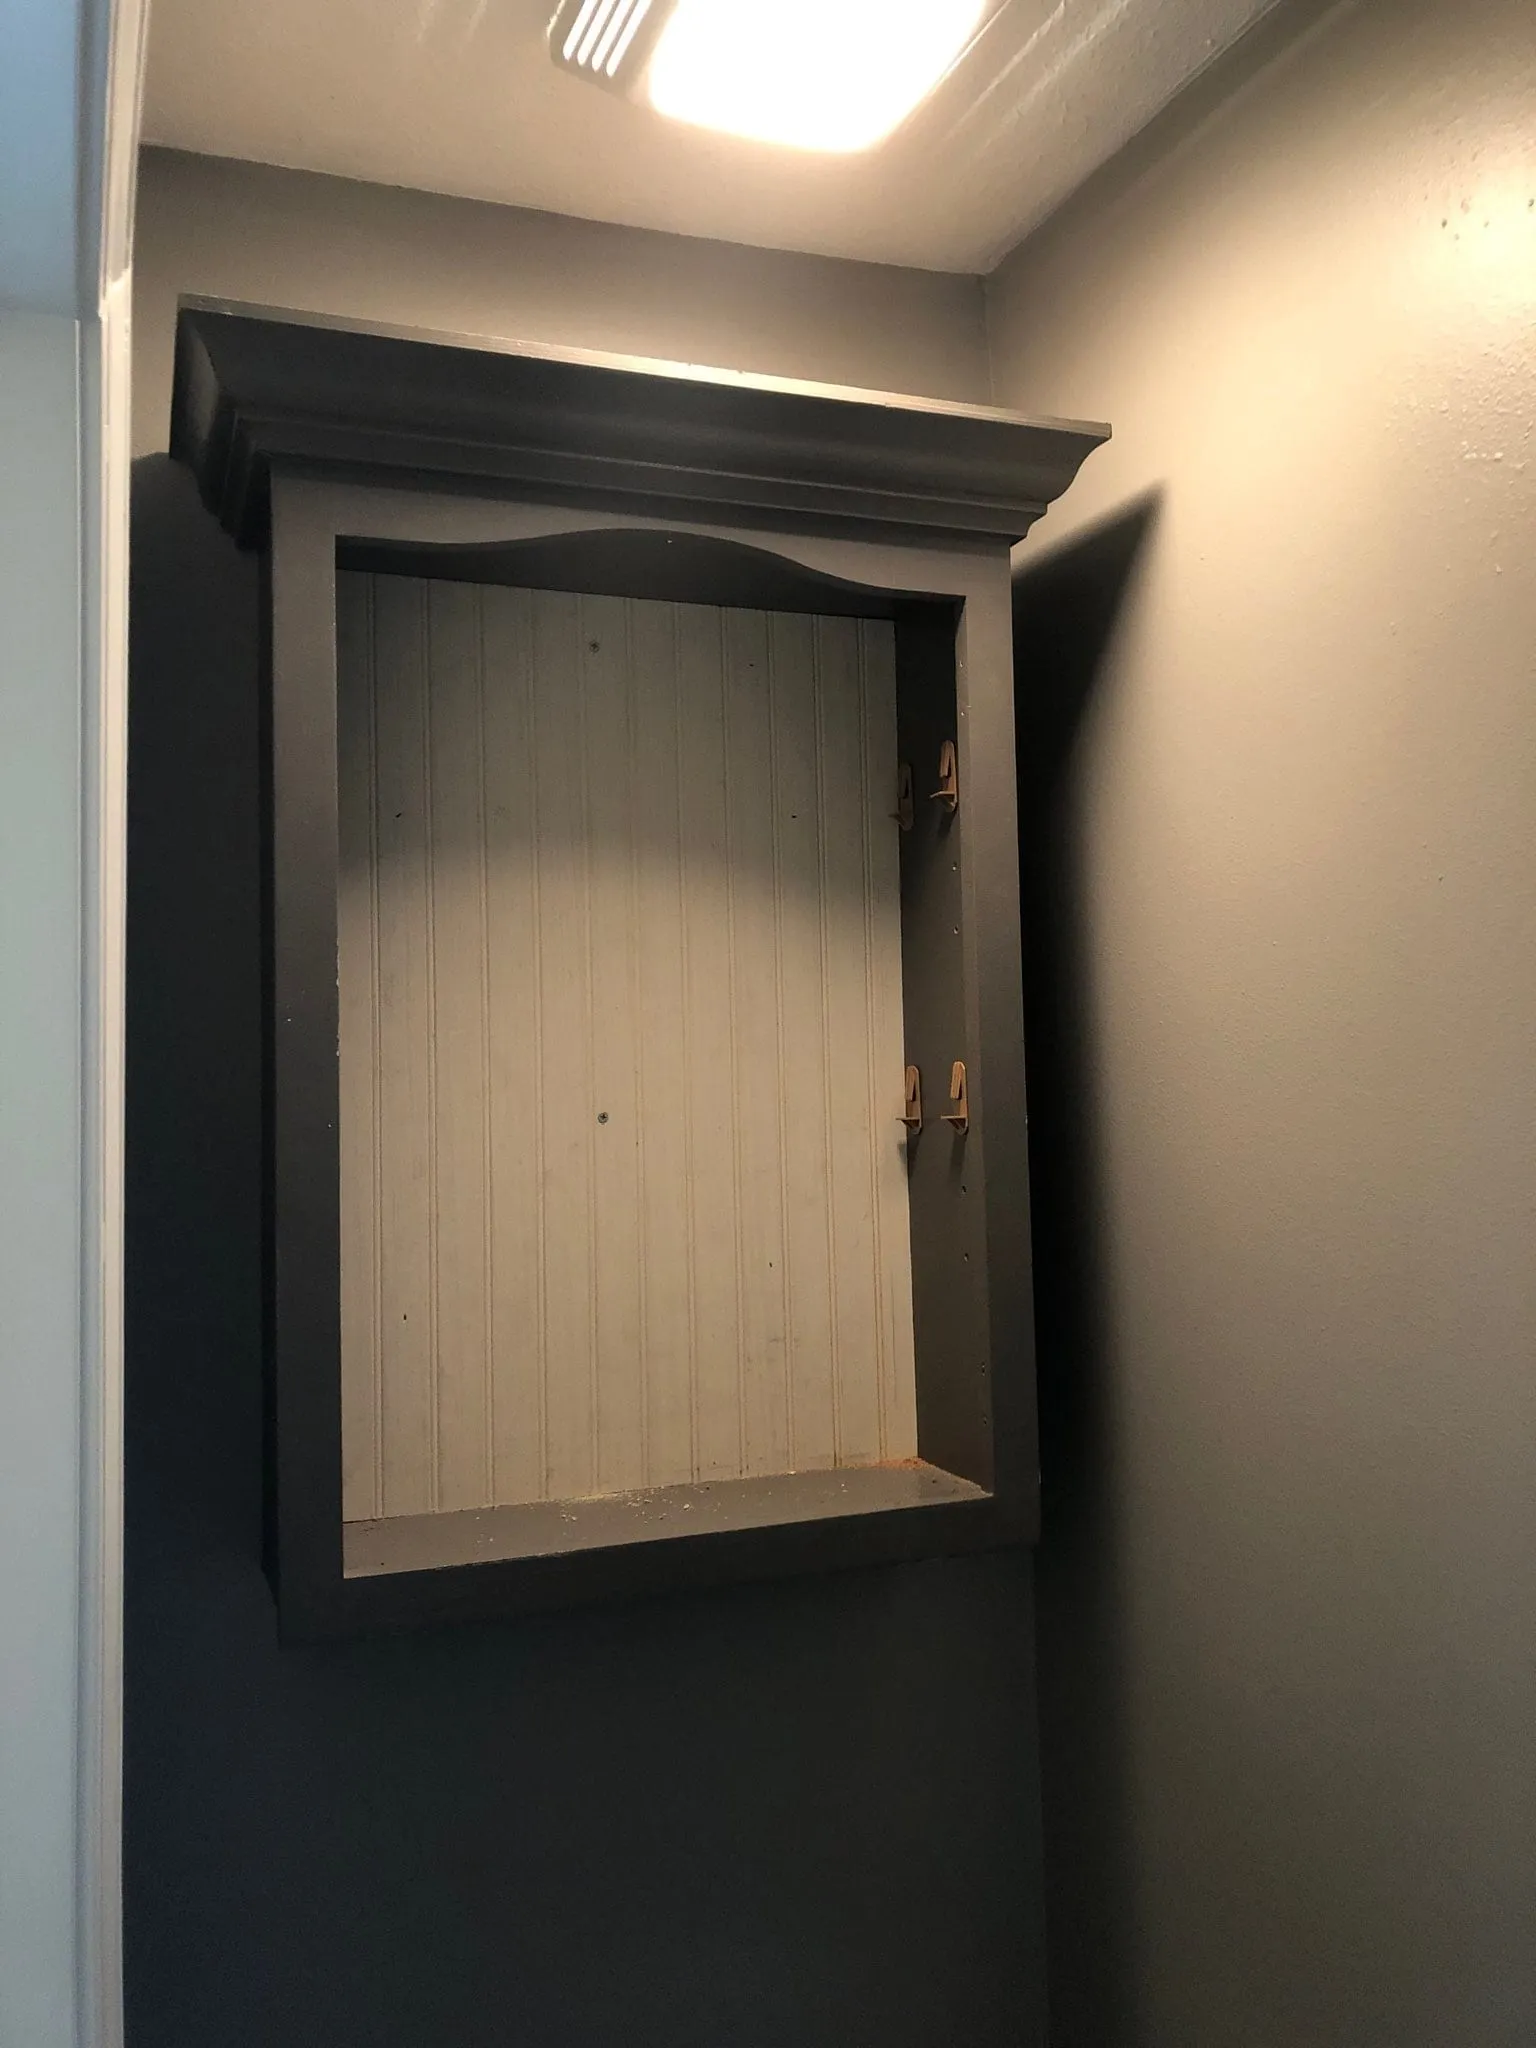
During the kitchen demo, I saved a few of the cabinets to reuse somewhere else. You can read that post, here. I cleaned, sanded, and repainted one of them in Amazon Stone. I hung it over the toilet to recapture some of the storage we lost from the linen closet.
The ceiling was primed and painted with Behr Ceiling Paint in Ultra Pure White. The walls were primed and painted in Behr’s Fashion Gray mixed 50% lighter. The contrast was just right with the darker Amazon Stone of the cabinetry. New, taller baseboards, door trim, and crown molding were installed throughout. Doors were replaced throughout the house, one of the simplest ways to dramatically update a home. I chose a smooth two panel Roman arched door, which came primed. All doors and trim were caulked and painted with Benjamin Moore’s Regal in White. This paint gets a bit sticky, so your brush must be kept damp and cleaned frequently.
The large new window had privacy glass, so no window treatments were needed. Toward the end of the remodel, as another custom touch, I decided to try my hand at a fancier window molding than what is standard throughout the house. I now know it’s called an entablature. It turned out beautifully but was a bit of trial and error as my cousin and I put it together. This post is coming soon!
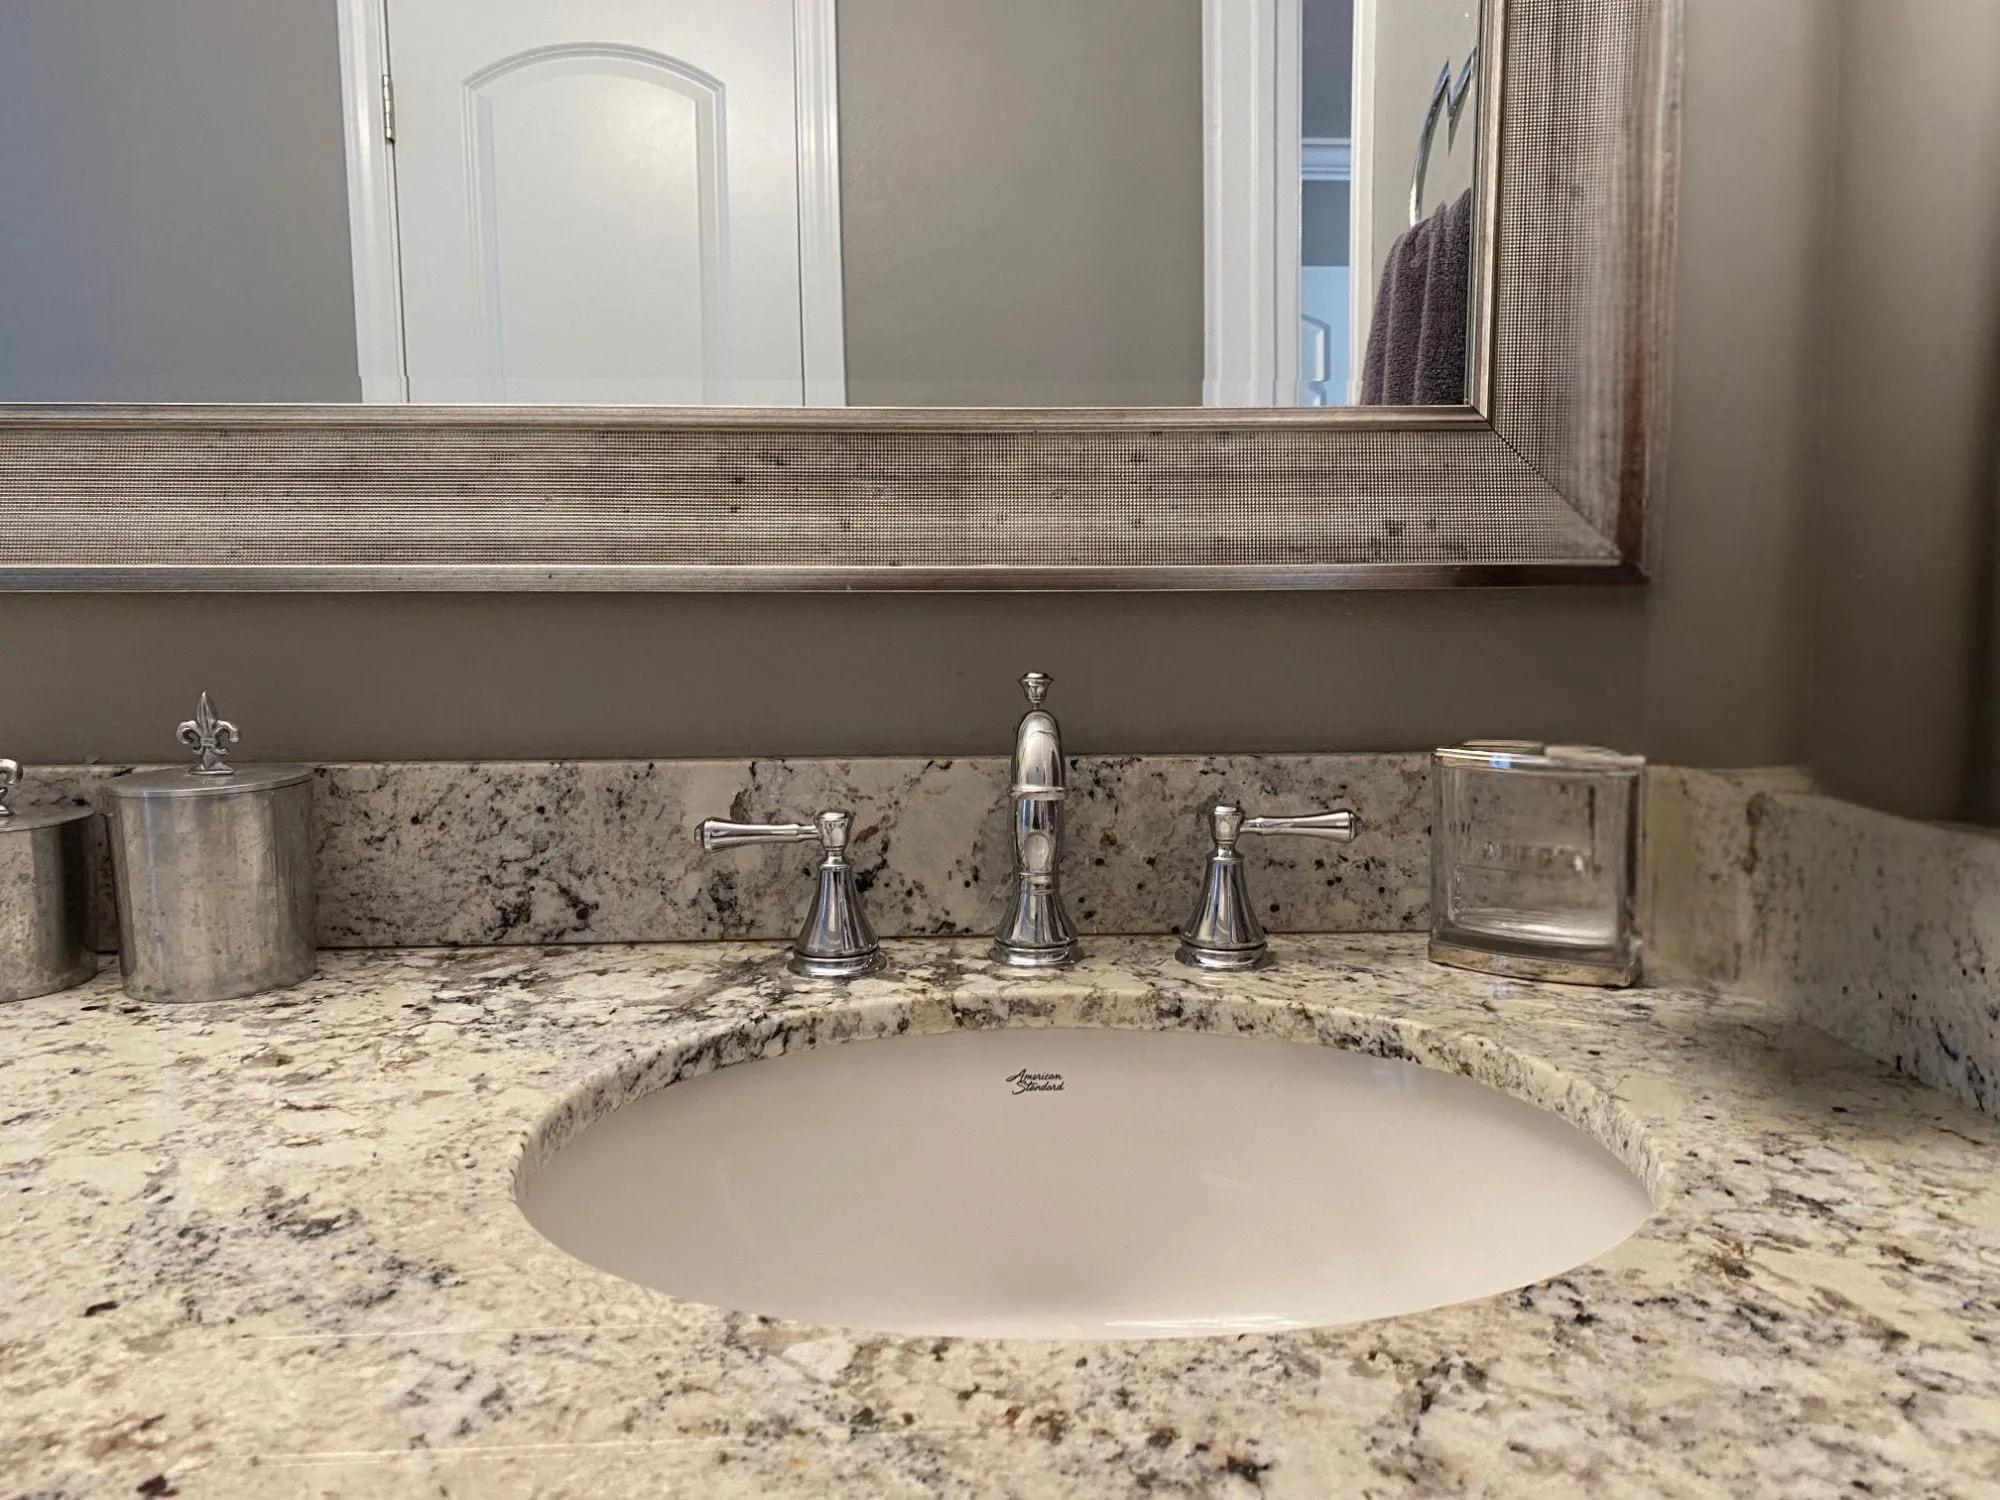
Once the vanity and White Cloud granite countertops were installed, the sinks and faucets went in. I chose American Standard Ovalyn sinks and Delta Cassidy faucets. Since this was the master bathroom, I chose the widespread design, which gives a more high end feel. The chrome finish is striking and adds a little bling. Widespread faucets cost a bit more to install, just like the edge detail on the countertop. The Delta Cassidy widespread style was also used for the tub fixtures, which came with a handheld shower head as well. I chose a less expensive Delta shower trim system called Linden but used the Cassidy shower head. The shower glass was the last thing to be installed and went off without a hitch.
The Jewelry
Lighting choices were both easy and interesting for this room. I ordered the Quorum Powell four light vanity in classic nickel. I loved this style the moment I saw it and it looks great in countless finishes. The glass globes have a translucent faux alabaster finish. It can also be used with the lights pointing up or down. Over the tub, I decided to install a chandelier. Electrical code has strict clearances in wet areas, so check your local codes and use a fixture rated for damp areas. I’ve bought a couple of lights at consignment shops, and this small chandelier was a good find. It was an antique off white color, so I lightly sanded it and spray painted it satin nickel to blend effortlessly into the room. It has just enough crystals to give it pizzazz. I installed a dimmer switch so that it could provide bright light when needed or less light for a cozy ambiance. Over the shower, I used a recessed light rated for wet locations, and in the water closet, a heat/vent/light.
The initial plan was to have two mirrors, one over each sink. I picked out two luxuriously framed mirrors from Kirkland’s. When it was time to hang them, my cousin, who helped me with a lot of this project, told me there was some reason I couldn’t do two mirrors. I had already purchased them, so I used them in the foyer and one of the guest bedrooms. Later, I used them in the master bath of my new home. Neither of us can remember what the reason was, but I went back to the drawing board and chose a modern but elegant large mirror that took up almost the entire wall. It had a painted satin nickel finish and tiny beaded details along the whole frame. The silver finish contrasted beautifully with the wall color.
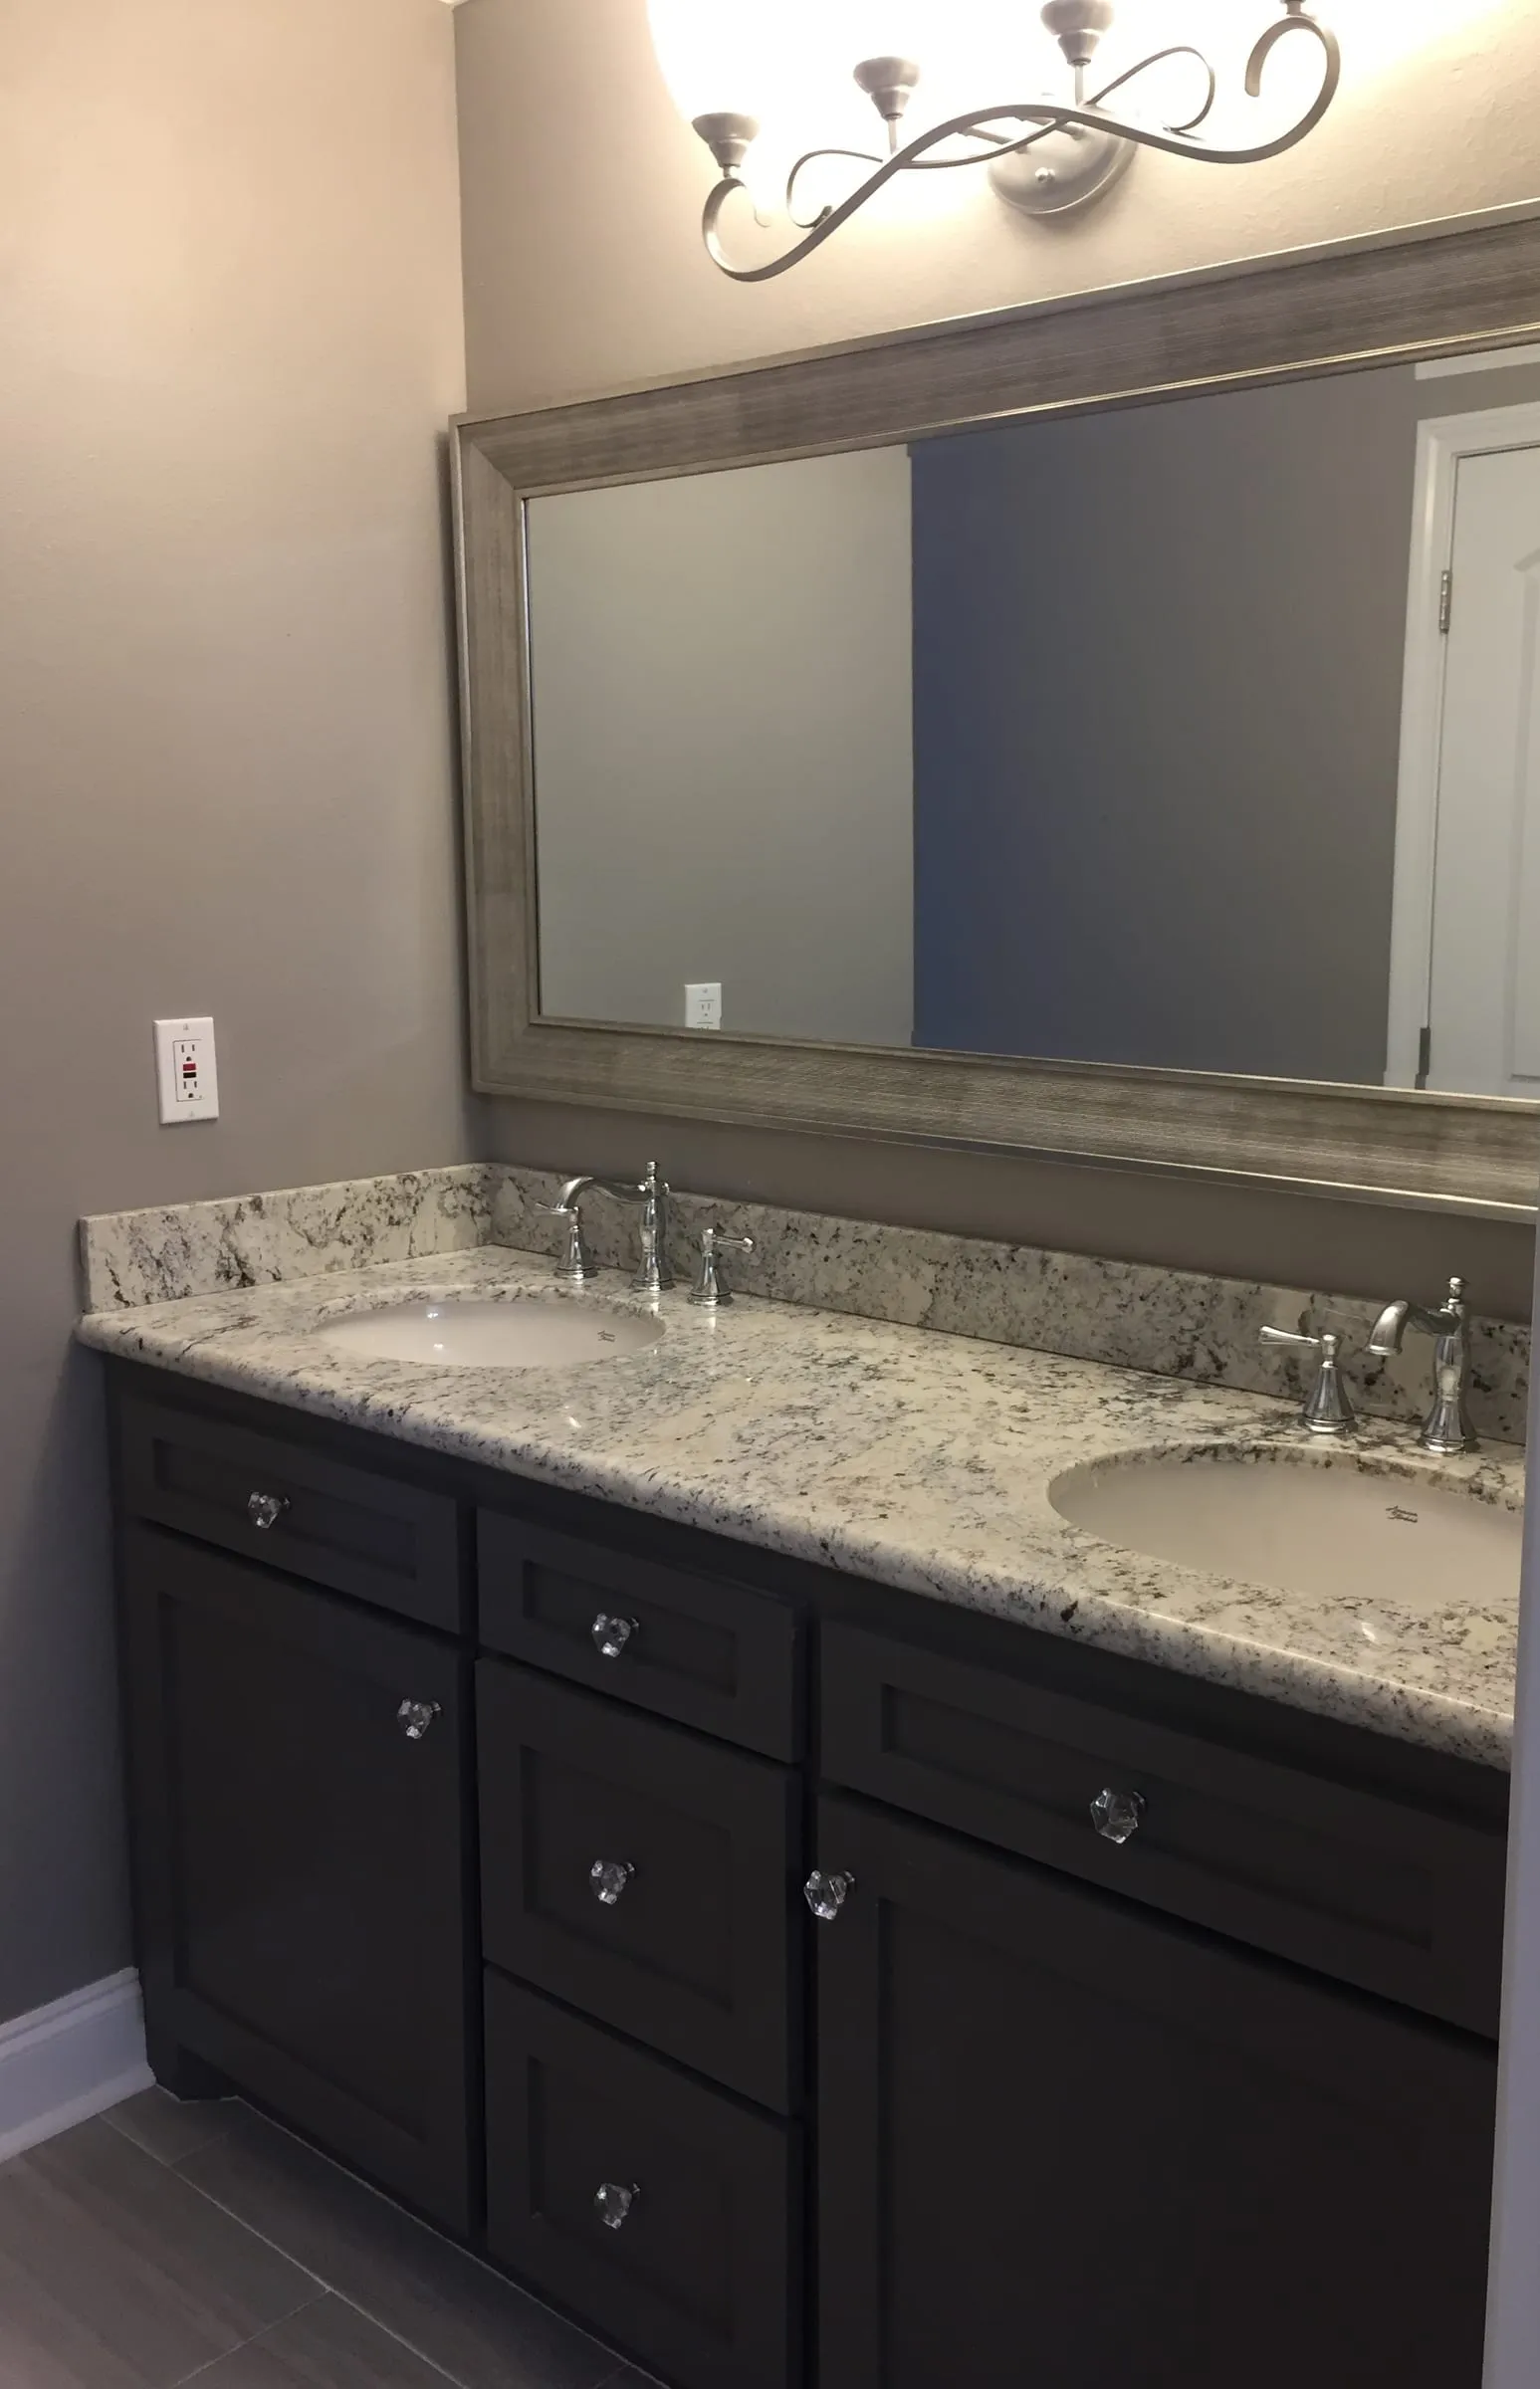
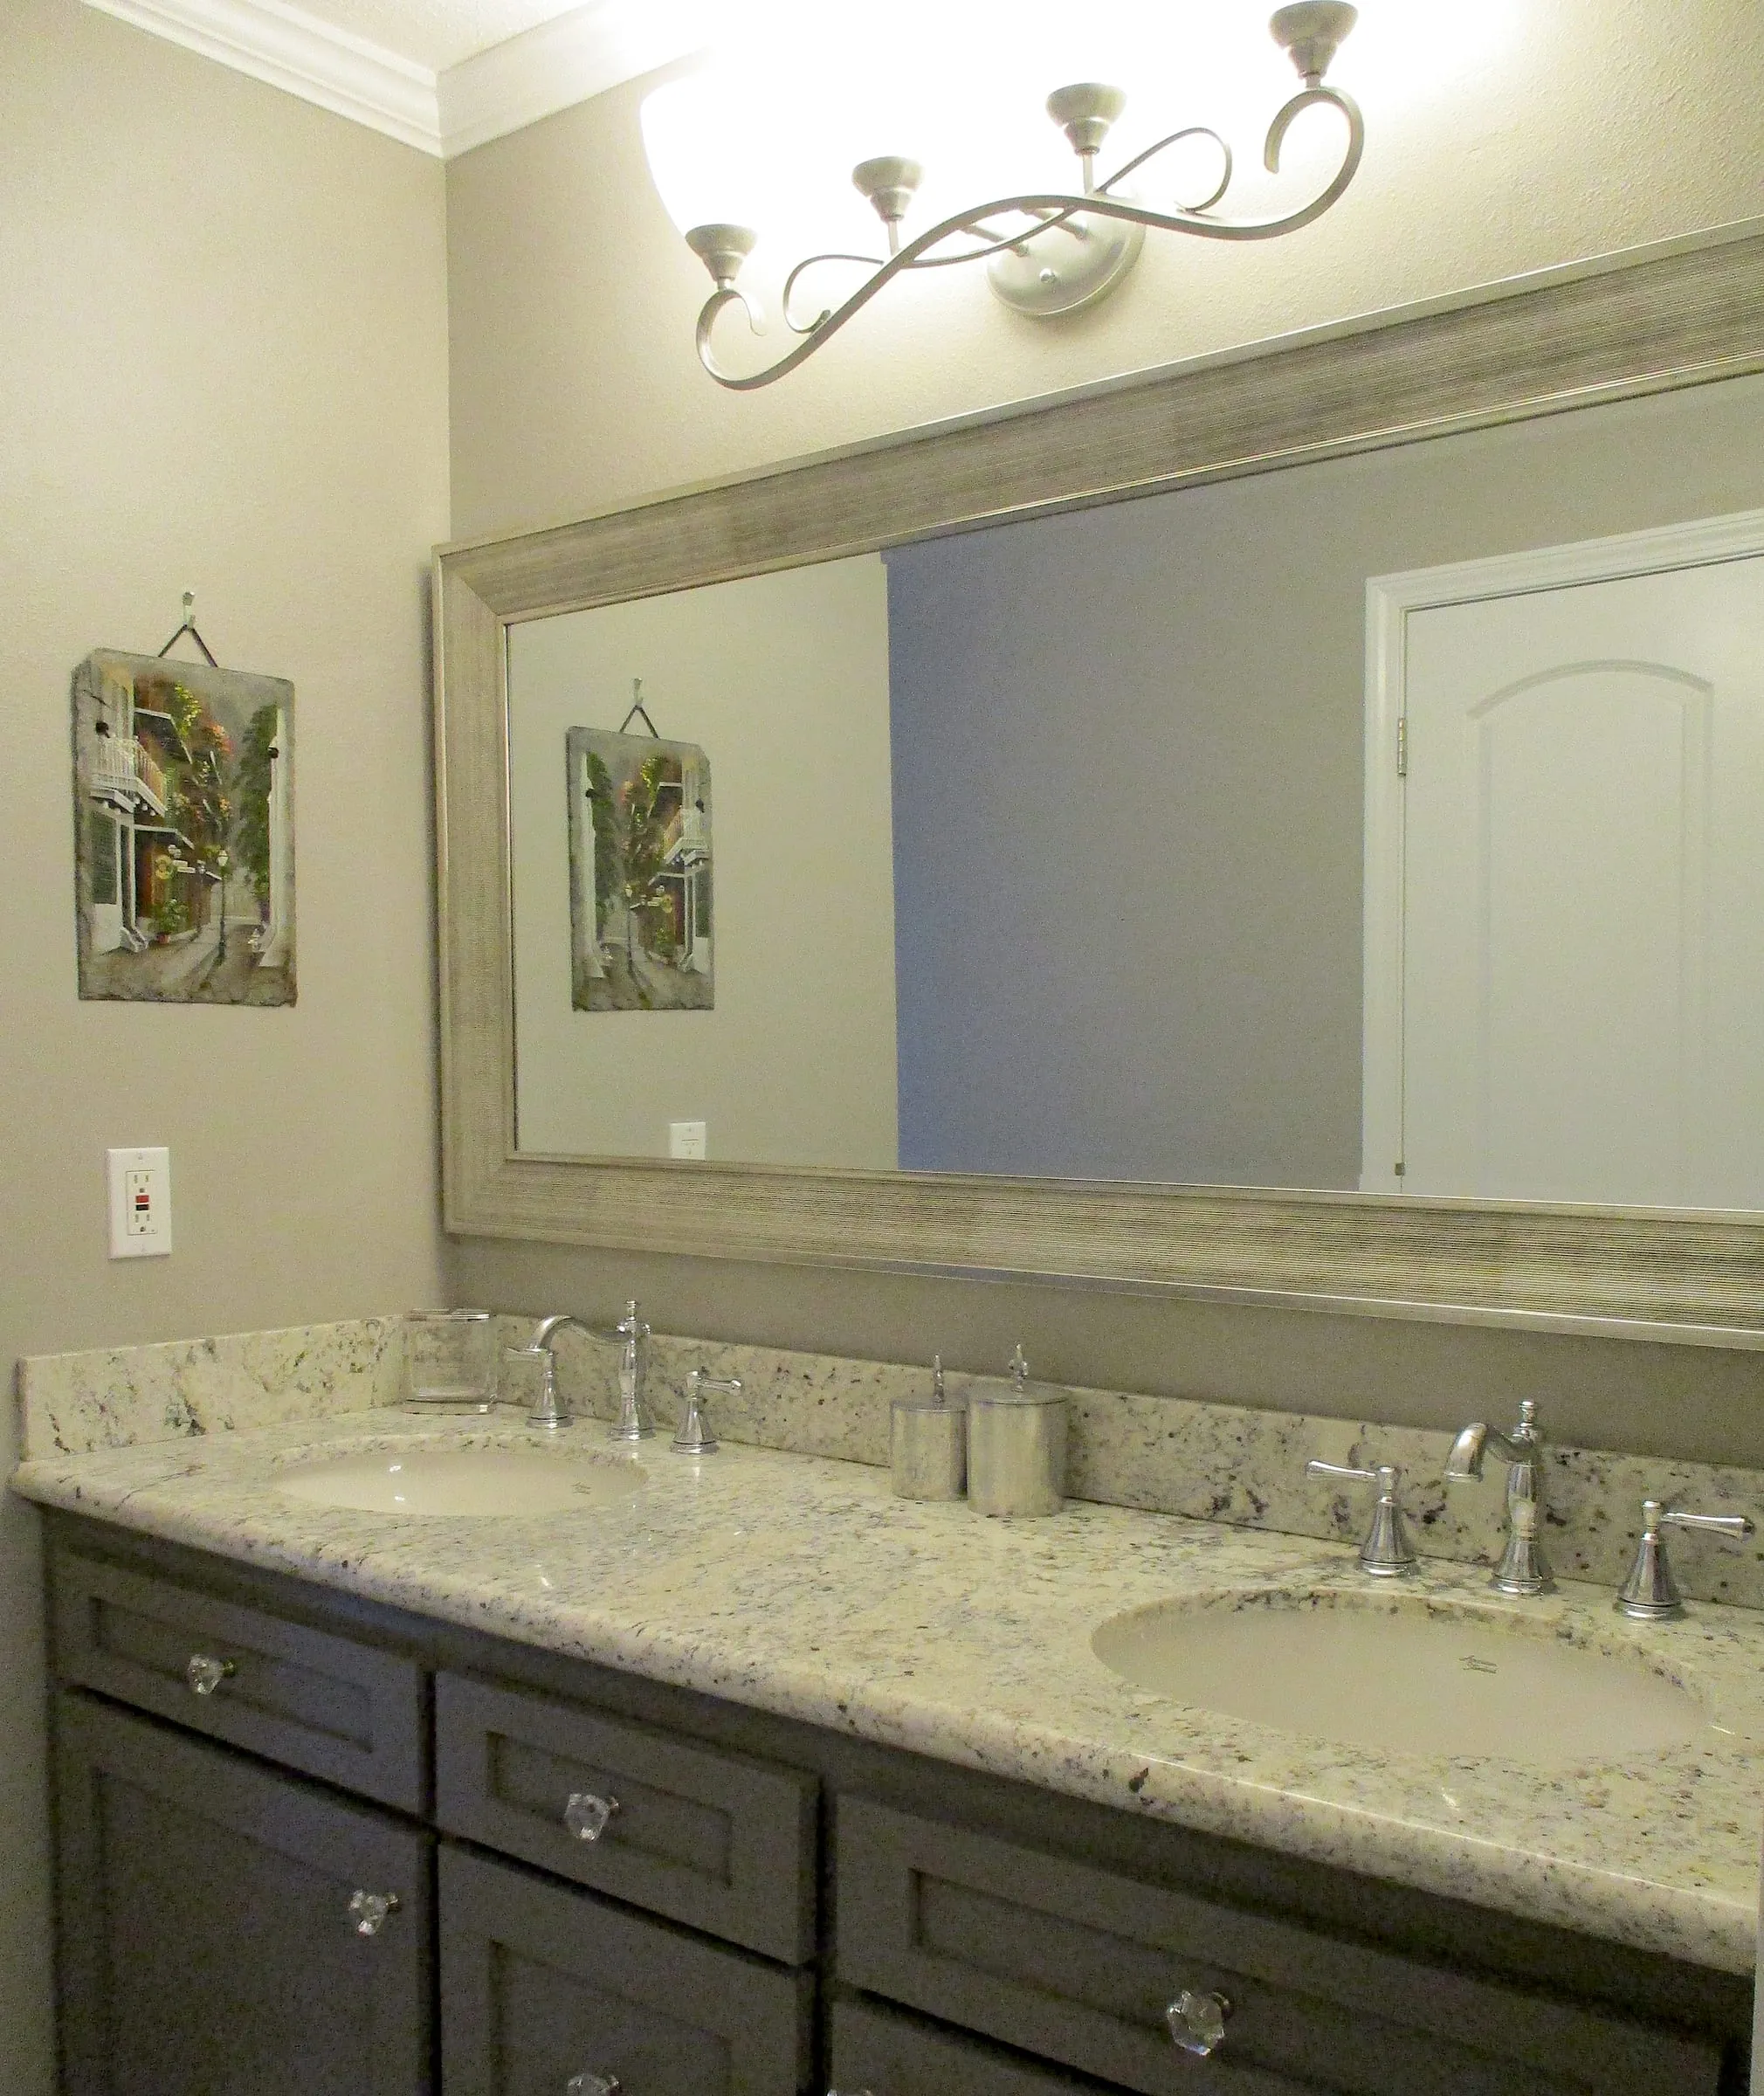
For the cabinet knobs, I originally chose an elegant acrylic faceted knob by Liberty with satin nickel detailing. I loved these knobs. They were attractive and the perfect finish for this project. Later, I switched them out with some beautiful mercury glass knobs. I had originally purchased the mercury glass knobs for my bathroom in my new home, but once I began installing them, I did not feel they were the right choice. The scale was not a match for that vanity. I looked at multiple options for each room and realized that I should switch them out. The mercury glass cabinet knobs looked great in this bathroom and were a gorgeous contrast to the cabinet color.
Lessons Learned: What I Would Do Differently
I would have been slightly more organized and not torn down that half wall just to rebuild it. But this was my first big project, so there were so many decisions to make early on, and it wasn’t a huge expense. For the shower niche, I would have made a smaller compartment for soap and a razor in addition to the taller compartment for shampoo and conditioner. I also would have kept the shower faucets on the original side where the door was. I’m not sure why we moved them in the first place. I also found the large mirror over the vanity did not hold up well in a bathroom. There were a few spots that turned dark on the bottom portion of the frame above the sinks where water droplets splattered. There were no issues on the sides or top of the frame, so I think it would have held up better in a room where it wasn’t put to the test. Lastly, the Delta Cassidy double towel bar is a wonderful idea and I used it in my new home. It projects out about 6” to accommodate two towels. This puts a lot of pressure on the screws holding it into the walls. Since it is 24” wide, both ends can’t be anchored into studs, which are normally 16” apart, so it’s not the most stable towel bar.
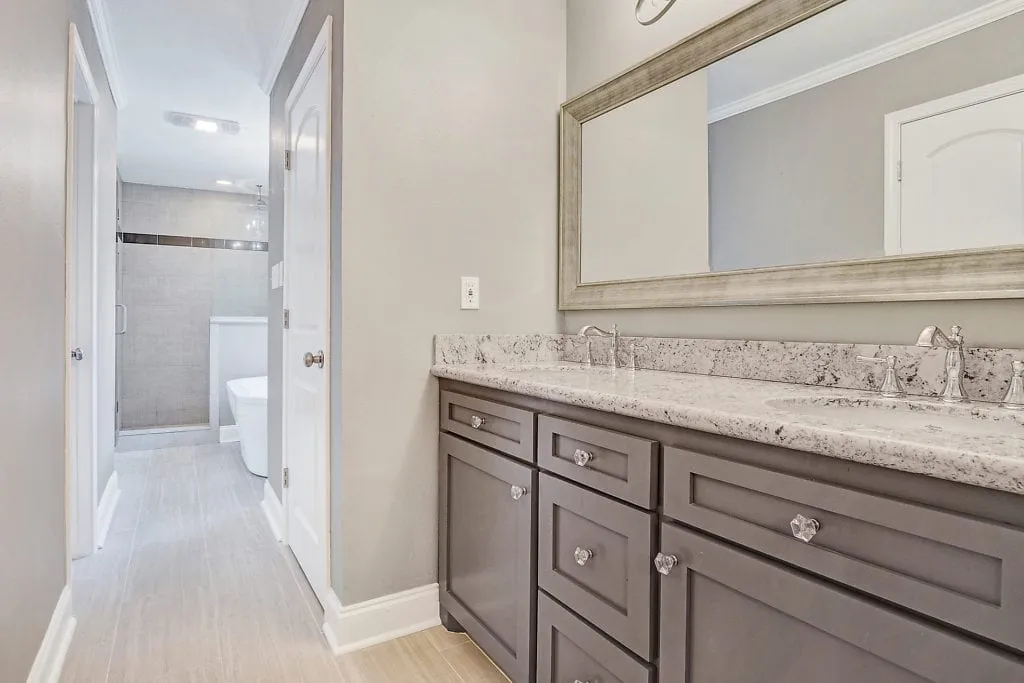
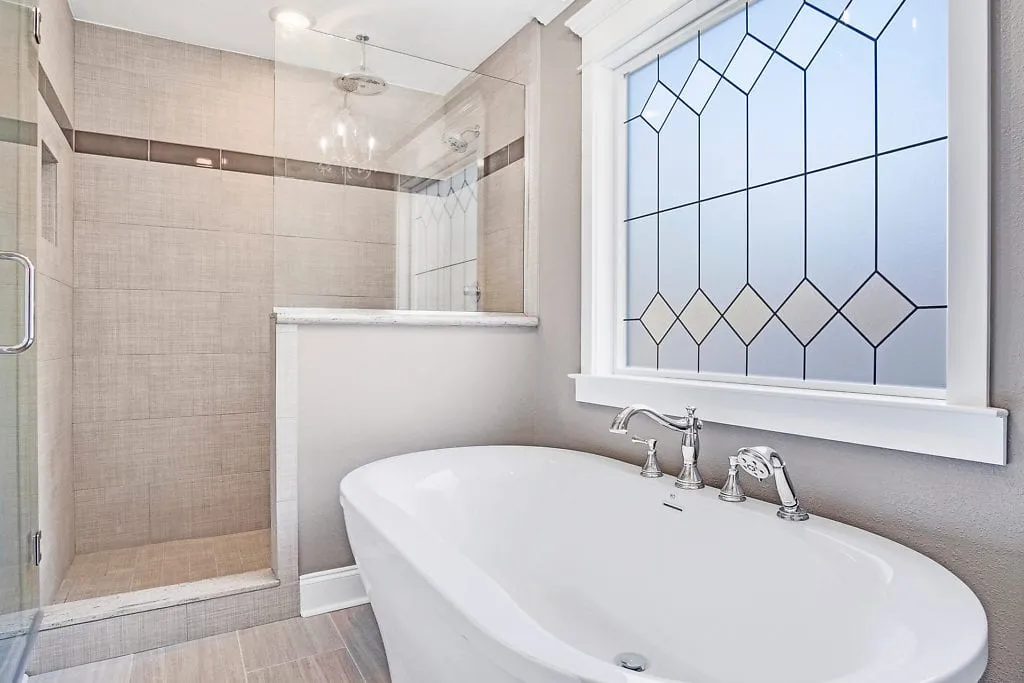
Overall, this bathroom turned out to be everything I hoped it would be. It was elegant and bright with an upscale feel, but not over the top. It packed a lot of features in a relatively small space. The large window over the tub provided plenty of natural light. The finishes were beautiful and timeless. The chandelier was perfect for over the tub. The shower was roomy and easy to keep clean. The soaker tub was very comfortable for leisurely bubble baths and the handheld head made it easy to wash your hair and clean the tub. I actually miss this tub and wish I had used the same one in the master bath of my new house.
I’d love to know your thoughts on my design!
Shop the look
Shop the Look
The finishes, fixtures, and lighting from this bathroom. Items marked Similar are close matches, not the exact piece I used.
Finishes
- Floor Tile
- MSI Classico Blanco Porcelain Floor and Wall Tile (Home Depot)
- Marazzi Modern Renewal Parchment 12 in. x 24 in. Glazed Porcelain Floor and Wall TileSimilar (Home Depot)
- MSI Trinity Ivory 12 in. x 24 in. Matte Porcelain Floor and Wall TileSimilar (Home Depot)
- Mortar
- FlexBond in White (Home Depot)
- Grout
- Polyblend Plus Sanded Grout in Bright White (Home Depot)
- Shower Tile
- Daltile Meier Park in Silver Strand (Home Depot)12x24 on walls, 3x12 bullnose, and 12x12 mosaic on the shower floor
- Shower Grout
- Polyblend Plus Sanded Grout in Delorean Gray (Home Depot)
- Shower Ledge and Foot Plate
- River White Granite (Local Fabricator)
- Accent Tile
- Dark Gray Subway Tile (Lowe’s)
- Countertops
- White Cloud Granite (Local Fabricator)
- Wall Color and Paint
- Behr Fashion Gray, mixed 50% lighter, in Eggshell (Home Depot)
- Trim Color and Paint
- Benjamin Moore Regal in White (Benjamin Moore)
- Ceiling Paint
- Behr Ceiling Paint in Ultra Pure White (Home Depot)
- Cabinet Color
- Behr Amazon Stone in Semi-Gloss (Home Depot)
Fixtures and Lighting
- Tub
- Aquatic Ayra 66x36x23 Freestanding Soaker Tub in Whiteno longer sold
- Aquatic Cyrus 6636CF 66x36x23 Freestanding Soaker Tub in WhiteSimilar (Ferguson)
- Sinks
- American Standard Ovalyn in White (Home Depot)
- Sink Faucets
- Delta Cassidy Widespread in Chrome (Home Depot)
- Shower Fixtures
- Delta Cassidy Shower Head and Delta Linden Trim System in Chrome (Home Depot)
- Bath Hardware
- Cassidy Wall Mounted Double Towel Bar, Towel Ring, and Tissue Holder in Chrome (Home Depot)
- Cabinet Knobs
- Liberty Faceted Acrylic in Satin Nickel (Home Depot)
- Mercury Glass Cabinet Knobs (Etsy)many options
- Vanity Light
- Quorum Powell 4 Light Vanity in Classic Nickelmany online options
- Chandelier
- Consignment Shop Find