DIY Color Washed Mirror in Antique Window Frame
The Anthropologie Look Without the Designer Price Tag
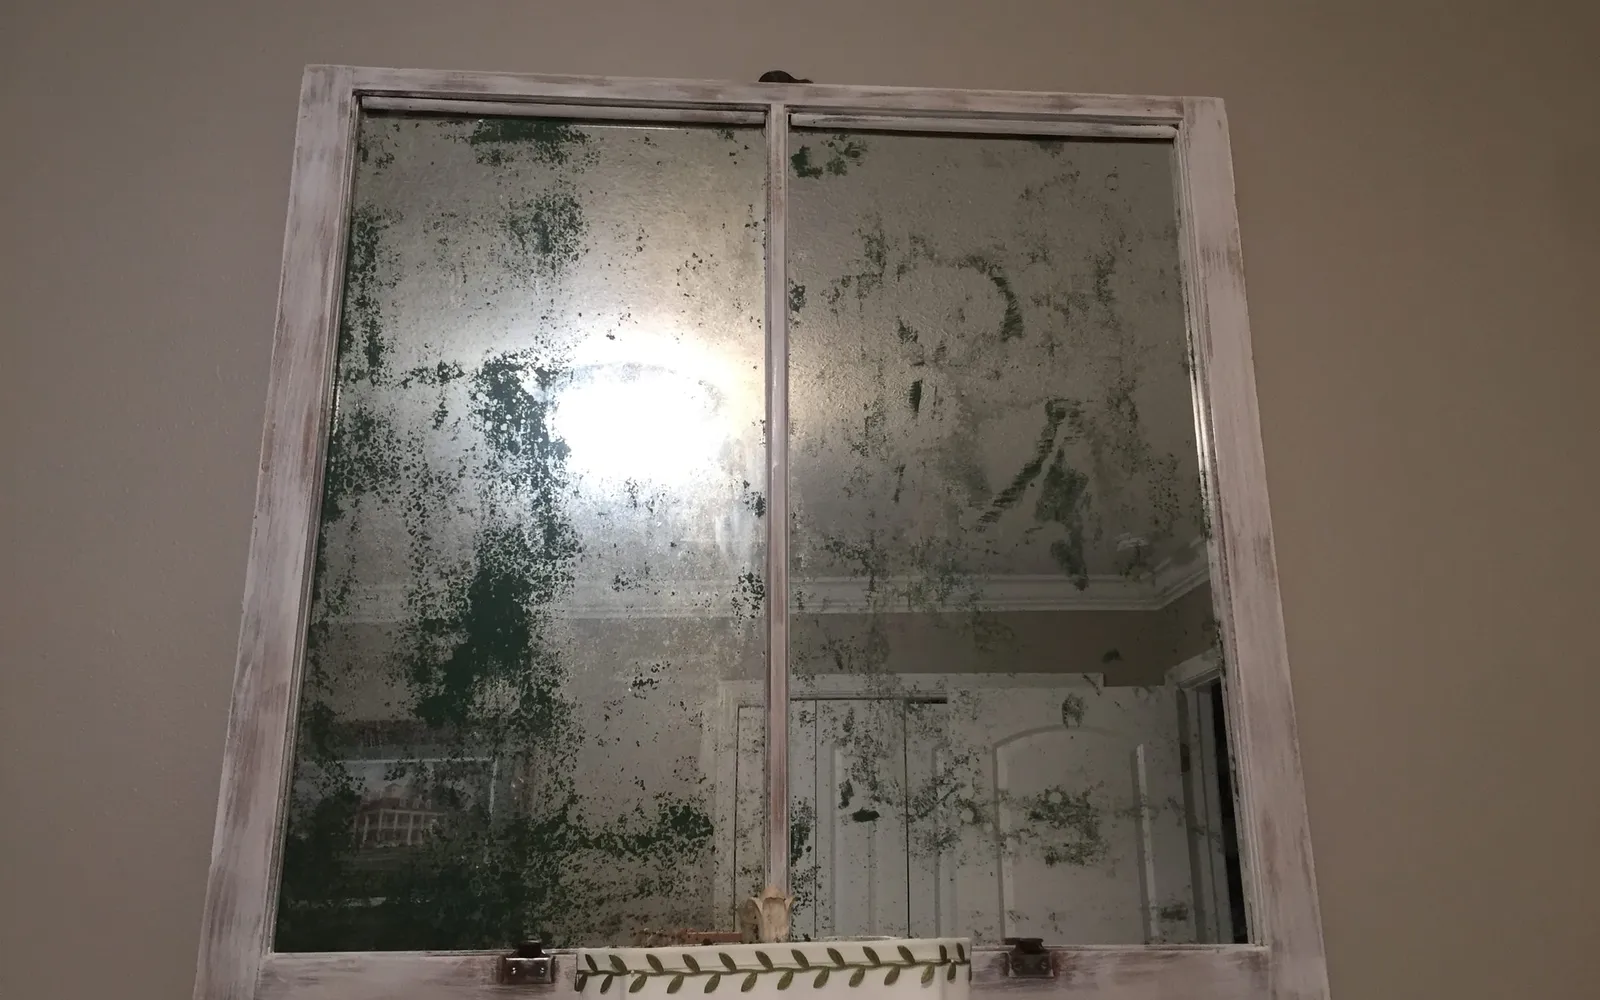
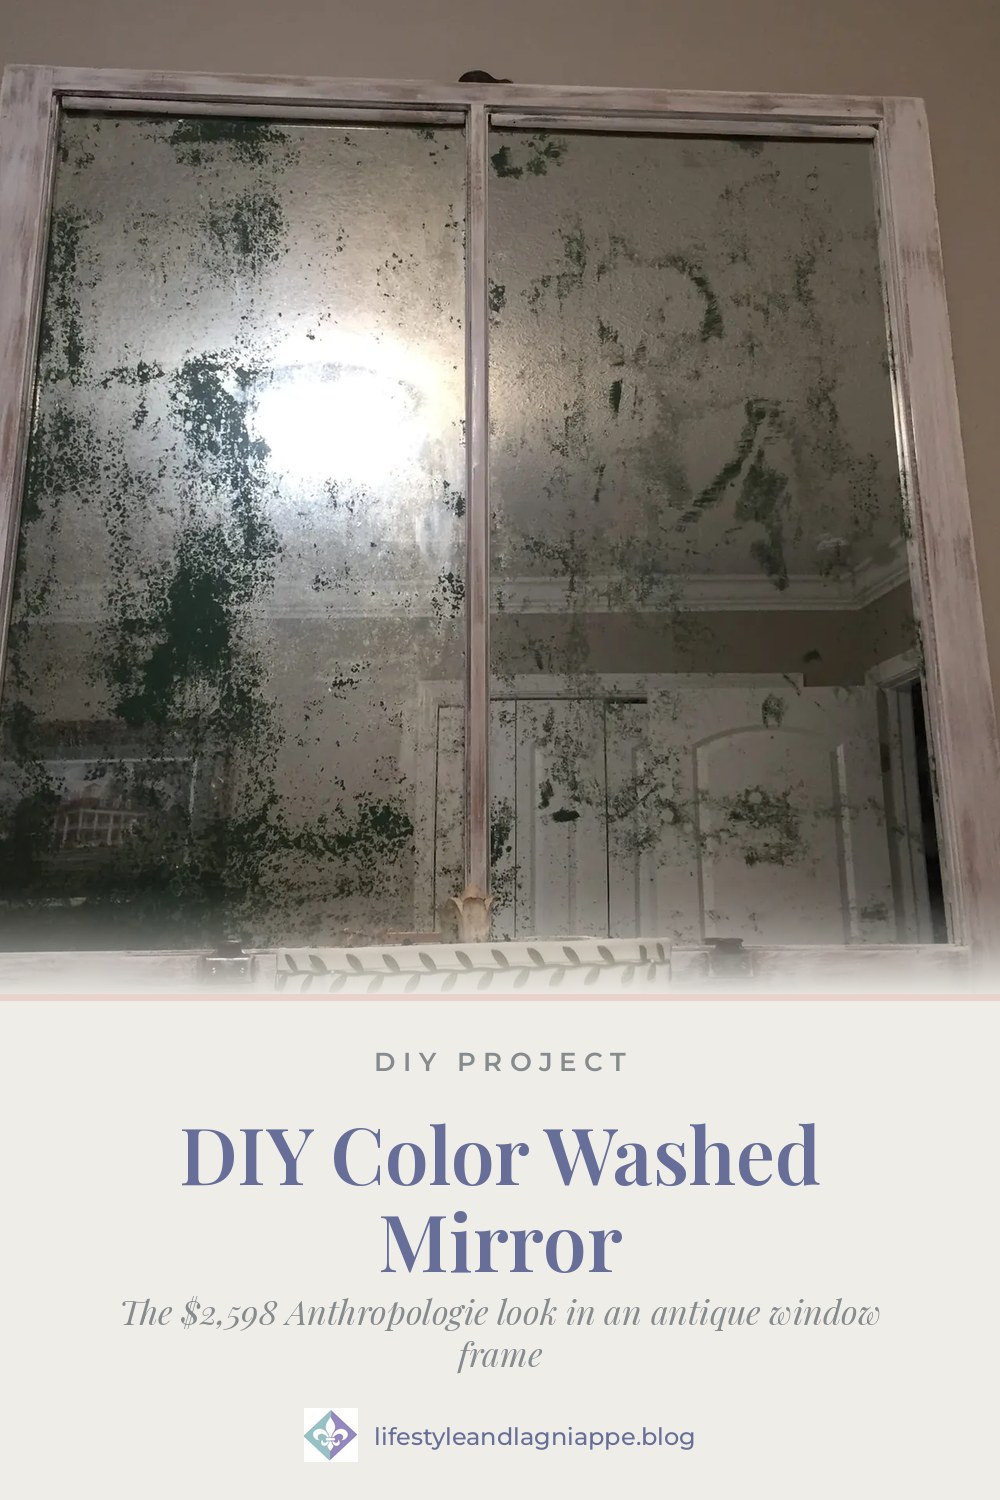
Anthropologie showcases gorgeous color washed mirrors in mint and red. The smallest size, a 10-inch square, is $128, while the extra-large size, 72 inches x 36 inches, sells for a whopping $2,598! The mint color is a turquoise hue reminiscent of a beautiful patina. I fell in love with this look, but not the designer price tag.
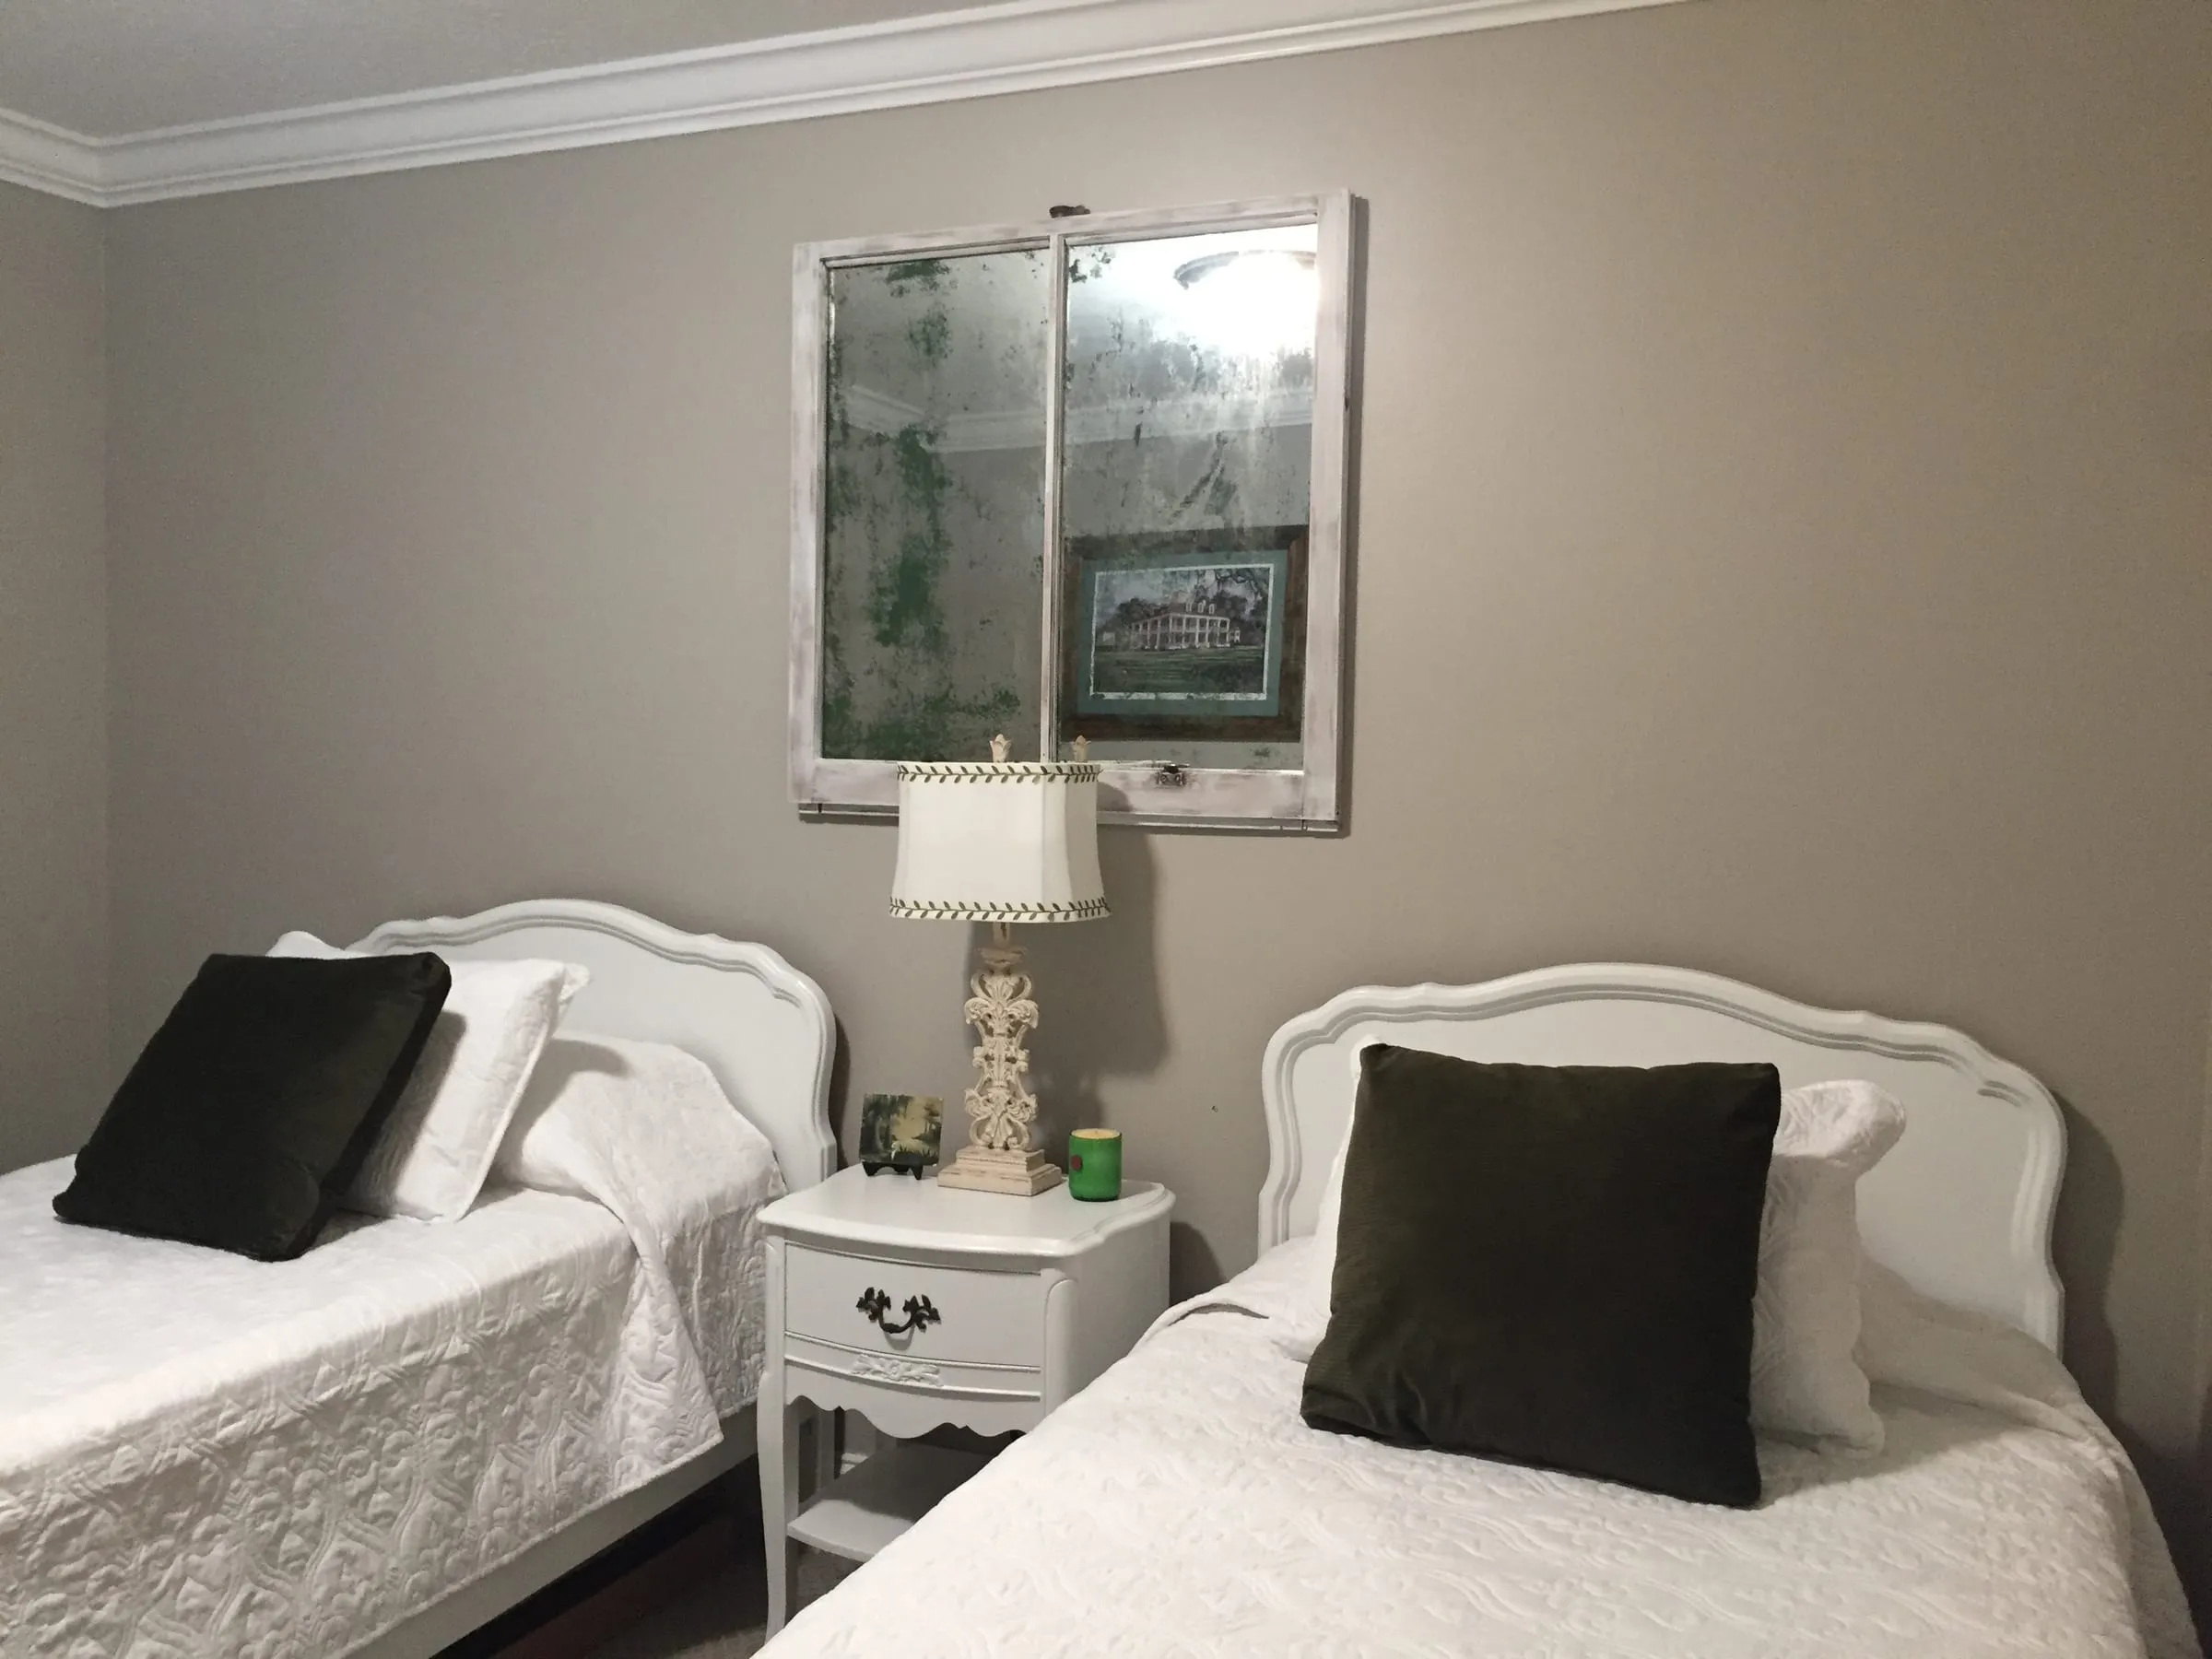
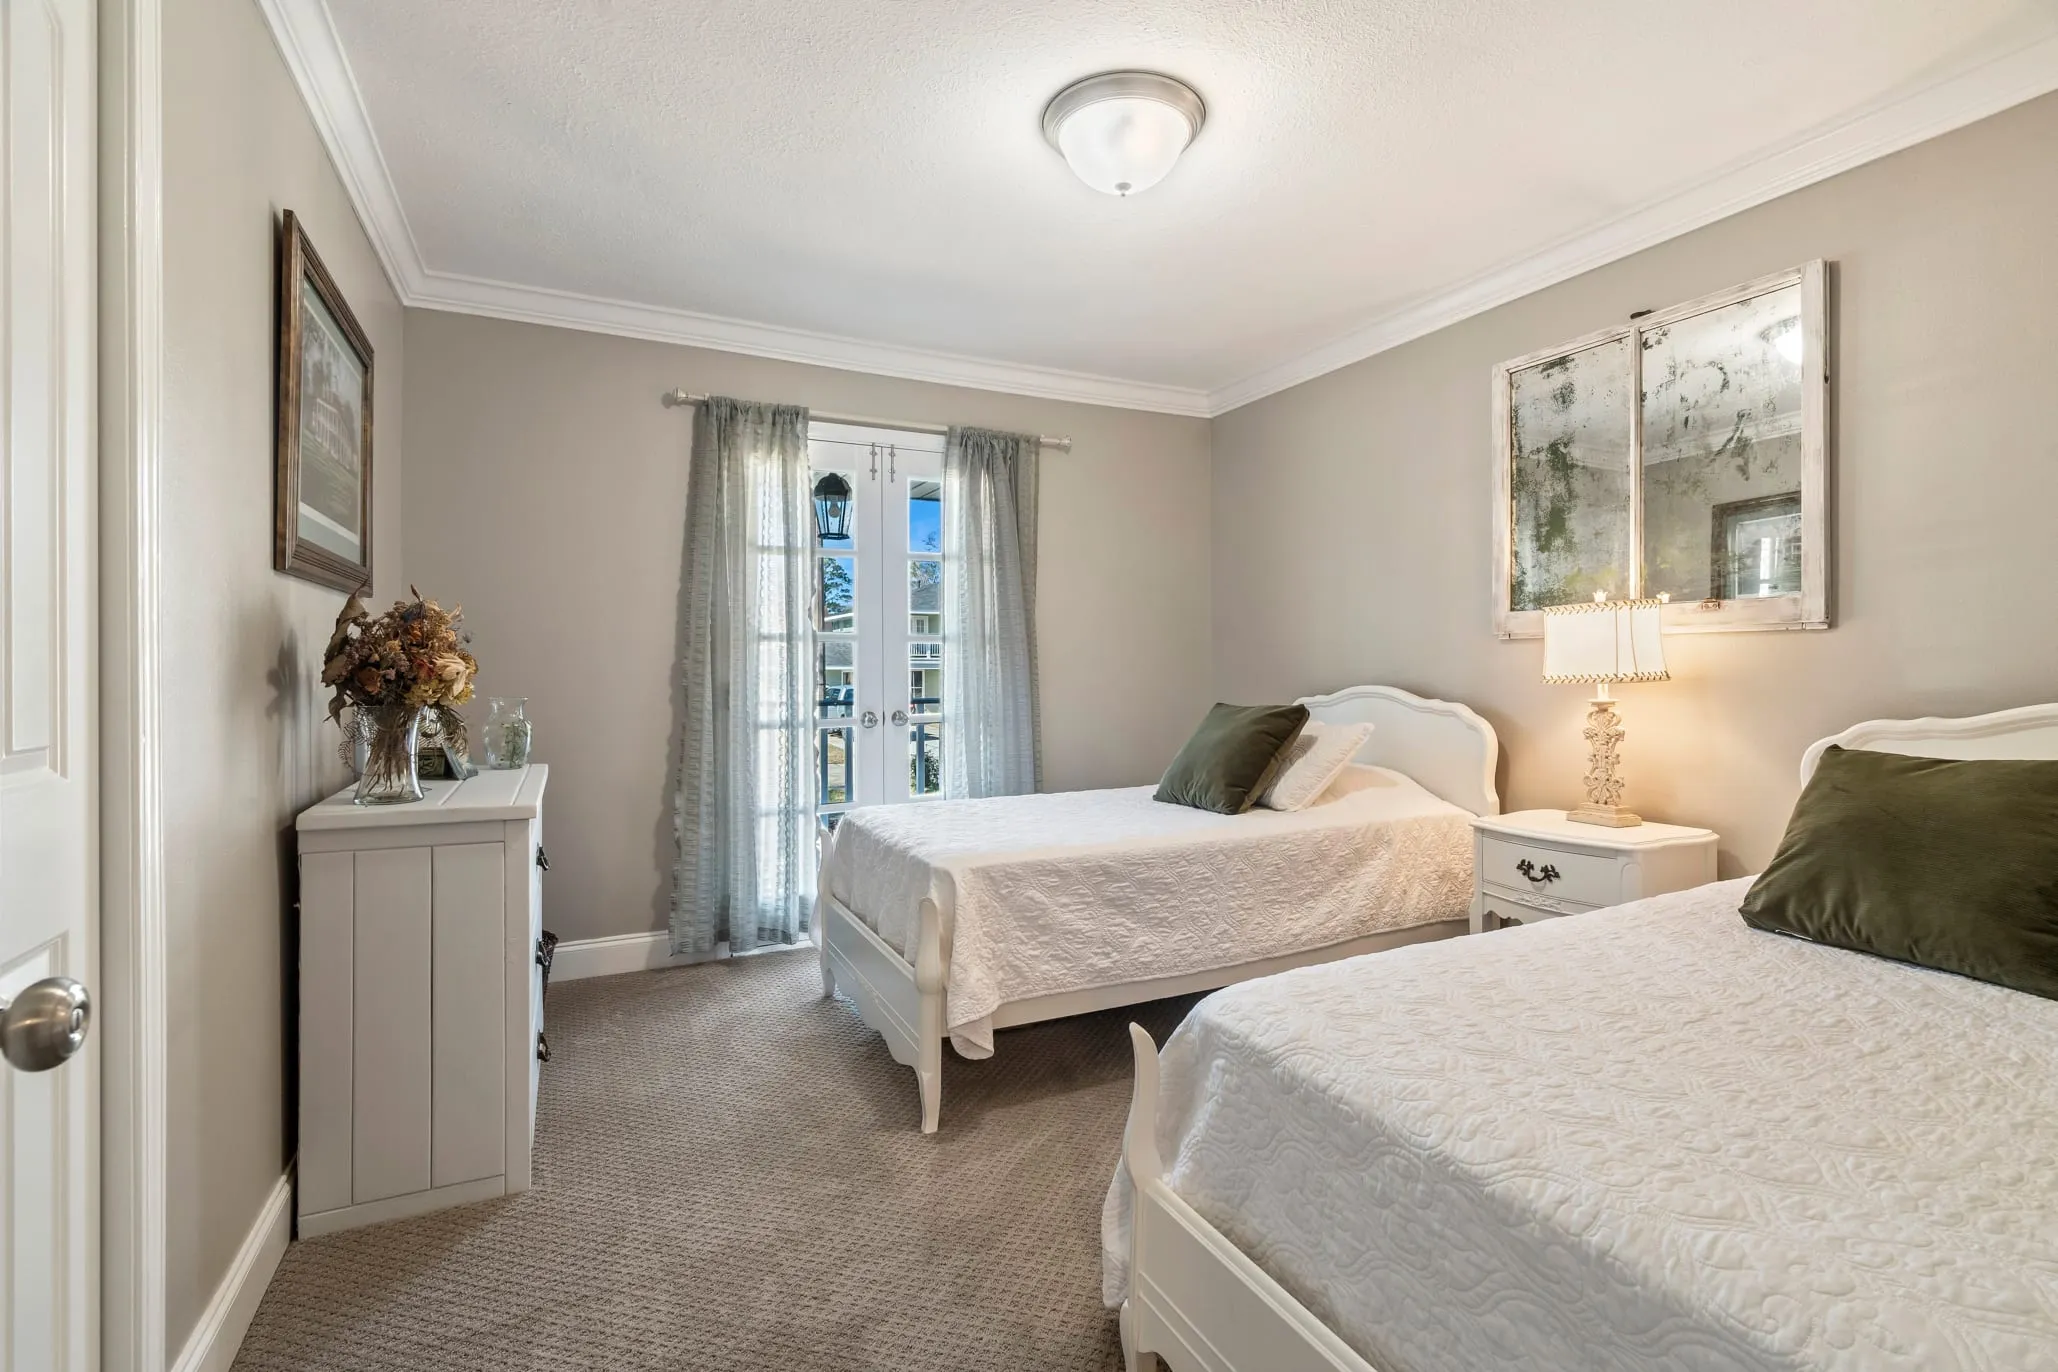
When I purchased my first flip, I kept a few pieces that were left behind. One was an antique window frame. As I was preparing to turn that property into a short-term rental, I reused several pieces of furniture from my past. For one of the bedrooms, I repainted my childhood twin beds and nightstand with Benjamin Moore Regal Select in White (01). I had a framed print of Houmas House, a historical Louisiana estate, matted in a shade of green that I planned to use over the small dresser, but I needed something for the main wall. I decided to try a DIY version of the color washed mirror placed in the antique window frame.
My plan was to use a deep, mossy green for the curtains and the accent pillows, so a shade close to that would be perfect for the mirror. I already had old bathroom mirrors that were glued to the walls from several renovations.
I also have a picture frame mat cutter and purchased a glass cutter accessory handle, which I used to cut the mirror to the correct size. The antique window frame has one mullion, dividing it into two sections. I measured the dimensions of each and wrote the numbers down. I set the matboard cutter up on my dining room table and watched a few YouTube videos as I had not cut mirror before, which was thicker than the typical picture frame glass. Using lighter fluid was recommended and made a huge difference in making sure that the mirror cut smoothly, ensuring a clean break. If you don’t have experience with cutting glass, I DON’T recommend it. You can use mirror already cut to size or have the professionals do it for you. It is very affordable and as a hand therapist, much less risky.
Most local glass companies can get it done quickly and are also a good resource for old mirrors. They haul off the old product from their jobsites and dispose of it for the client. It’s the perfect opportunity to repurpose the mirror and a win-win for everyone.
Making a color washed mirror follows the same steps as antiquing mirror, but instead of using gold, black, or bronze spray paint, which gives a realistic aged appearance, you choose colors that are more bold, resulting in a more modern feel.
Step 1. Gather Your Supplies
You will need the following supplies:
For the Mirror:
- Mirror
- Frame
- 2 Plastic Scrapers
- Chemical Paint Stripper, I used Citristrip
- A Small Funnel
- Muriatic Acid
- Spray Bottle
- Painter’s Plastic
- Spray Paint in Your Chosen Color
- A Small Cardboard Box with Some Paper Towels
- Several Sections of Old Newspaper
- A Roll of Paper Towels or Rags
- Heavy Gloves to Protect Yourself From the Chemicals
- Eye Protection Goggles
- Inexpensive Chip Brush (You will just throw it away.)
For the Frame (you may not need these items if you are using a ready-made frame):
- 120 Grit and 220 Grit Sandpaper
- Mouse Sander
- Tack Cloth
- Rust-Oleum Milk Paint
- Paint Brush, I used the Wooster Shortcut 2″ polyester angled paintbrush
- Glazier Points
- Chisel
- Hammer
- D-Ring Hangers
Step 2. Set Up Your Work Station
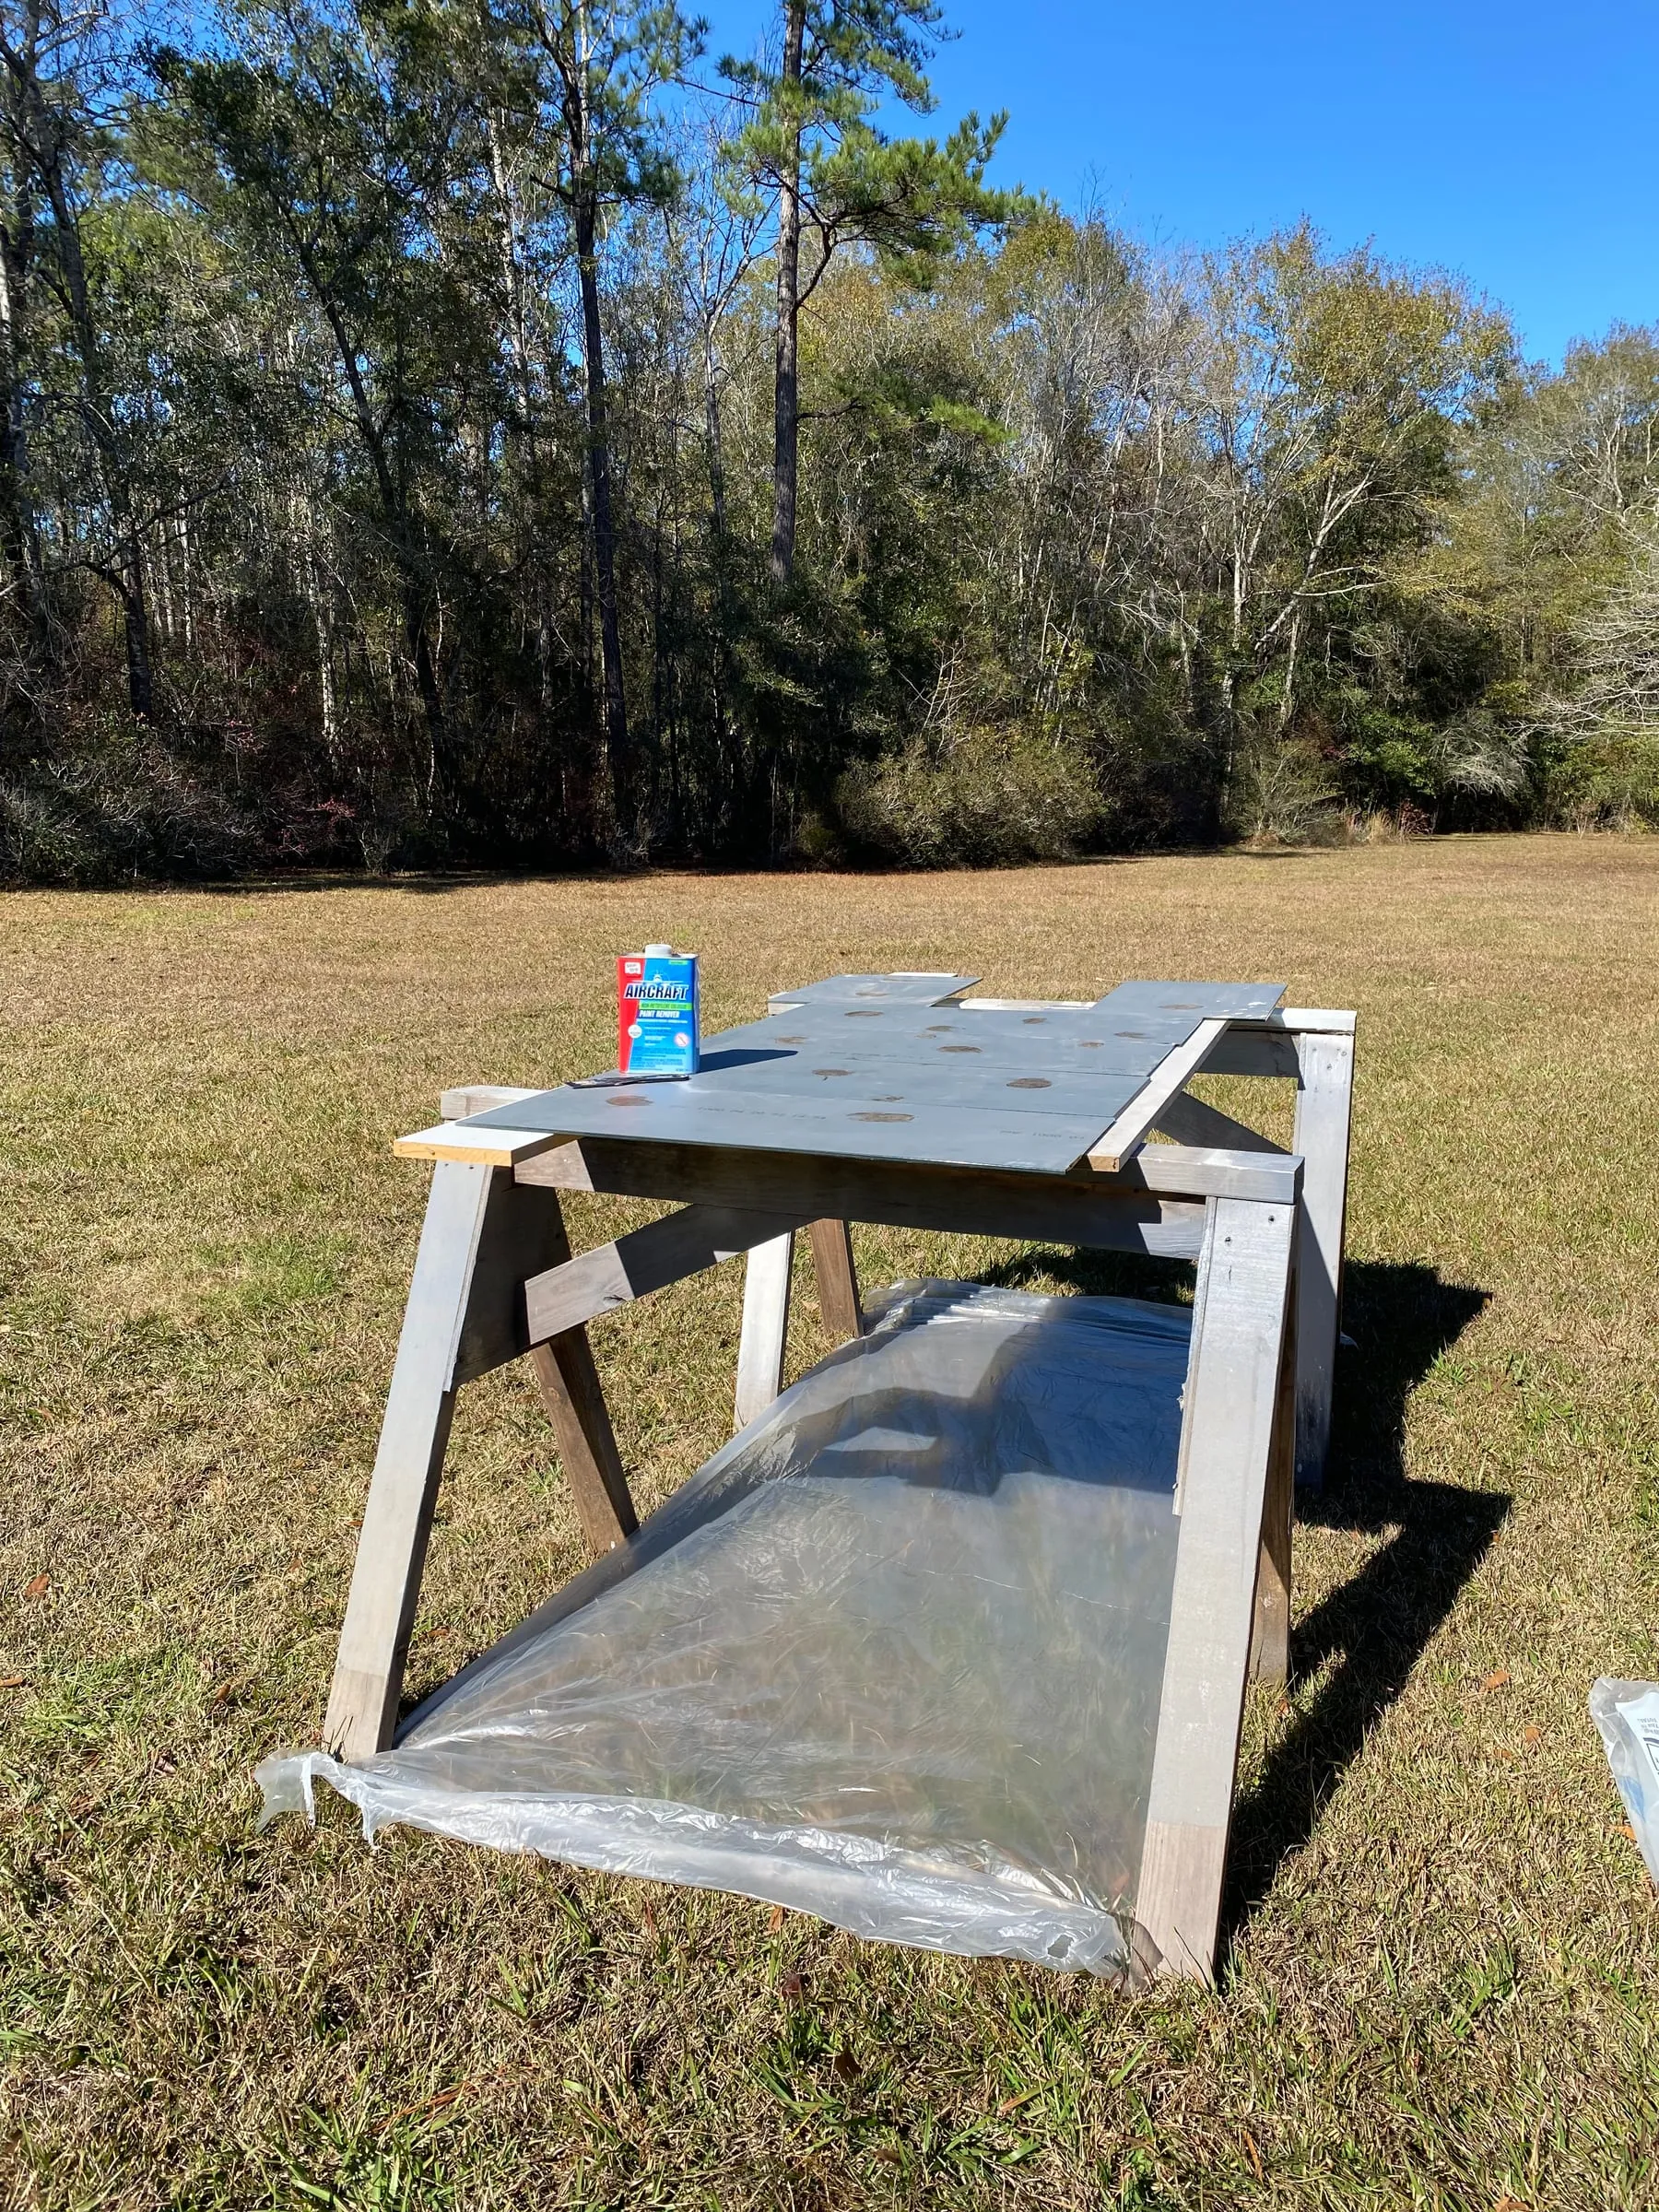
The process of removing the protective coating from the back of your mirror is a messy one. Plan to do this outside. I placed some thick painter’s plastic sheeting on the ground to avoid getting the scrapings on the grass, a must if you have pets or like to walk in your yard with bare feet. Then we moved two sawhorses on top of the plastic with a piece of plywood laid on top to create a large work area. I added several layers of old newspaper on the plywood for easy cleanup afterwards. With your gloves on, pour some muriatic acid into a spray bottle.
Step 3. Remove the Protective Coating
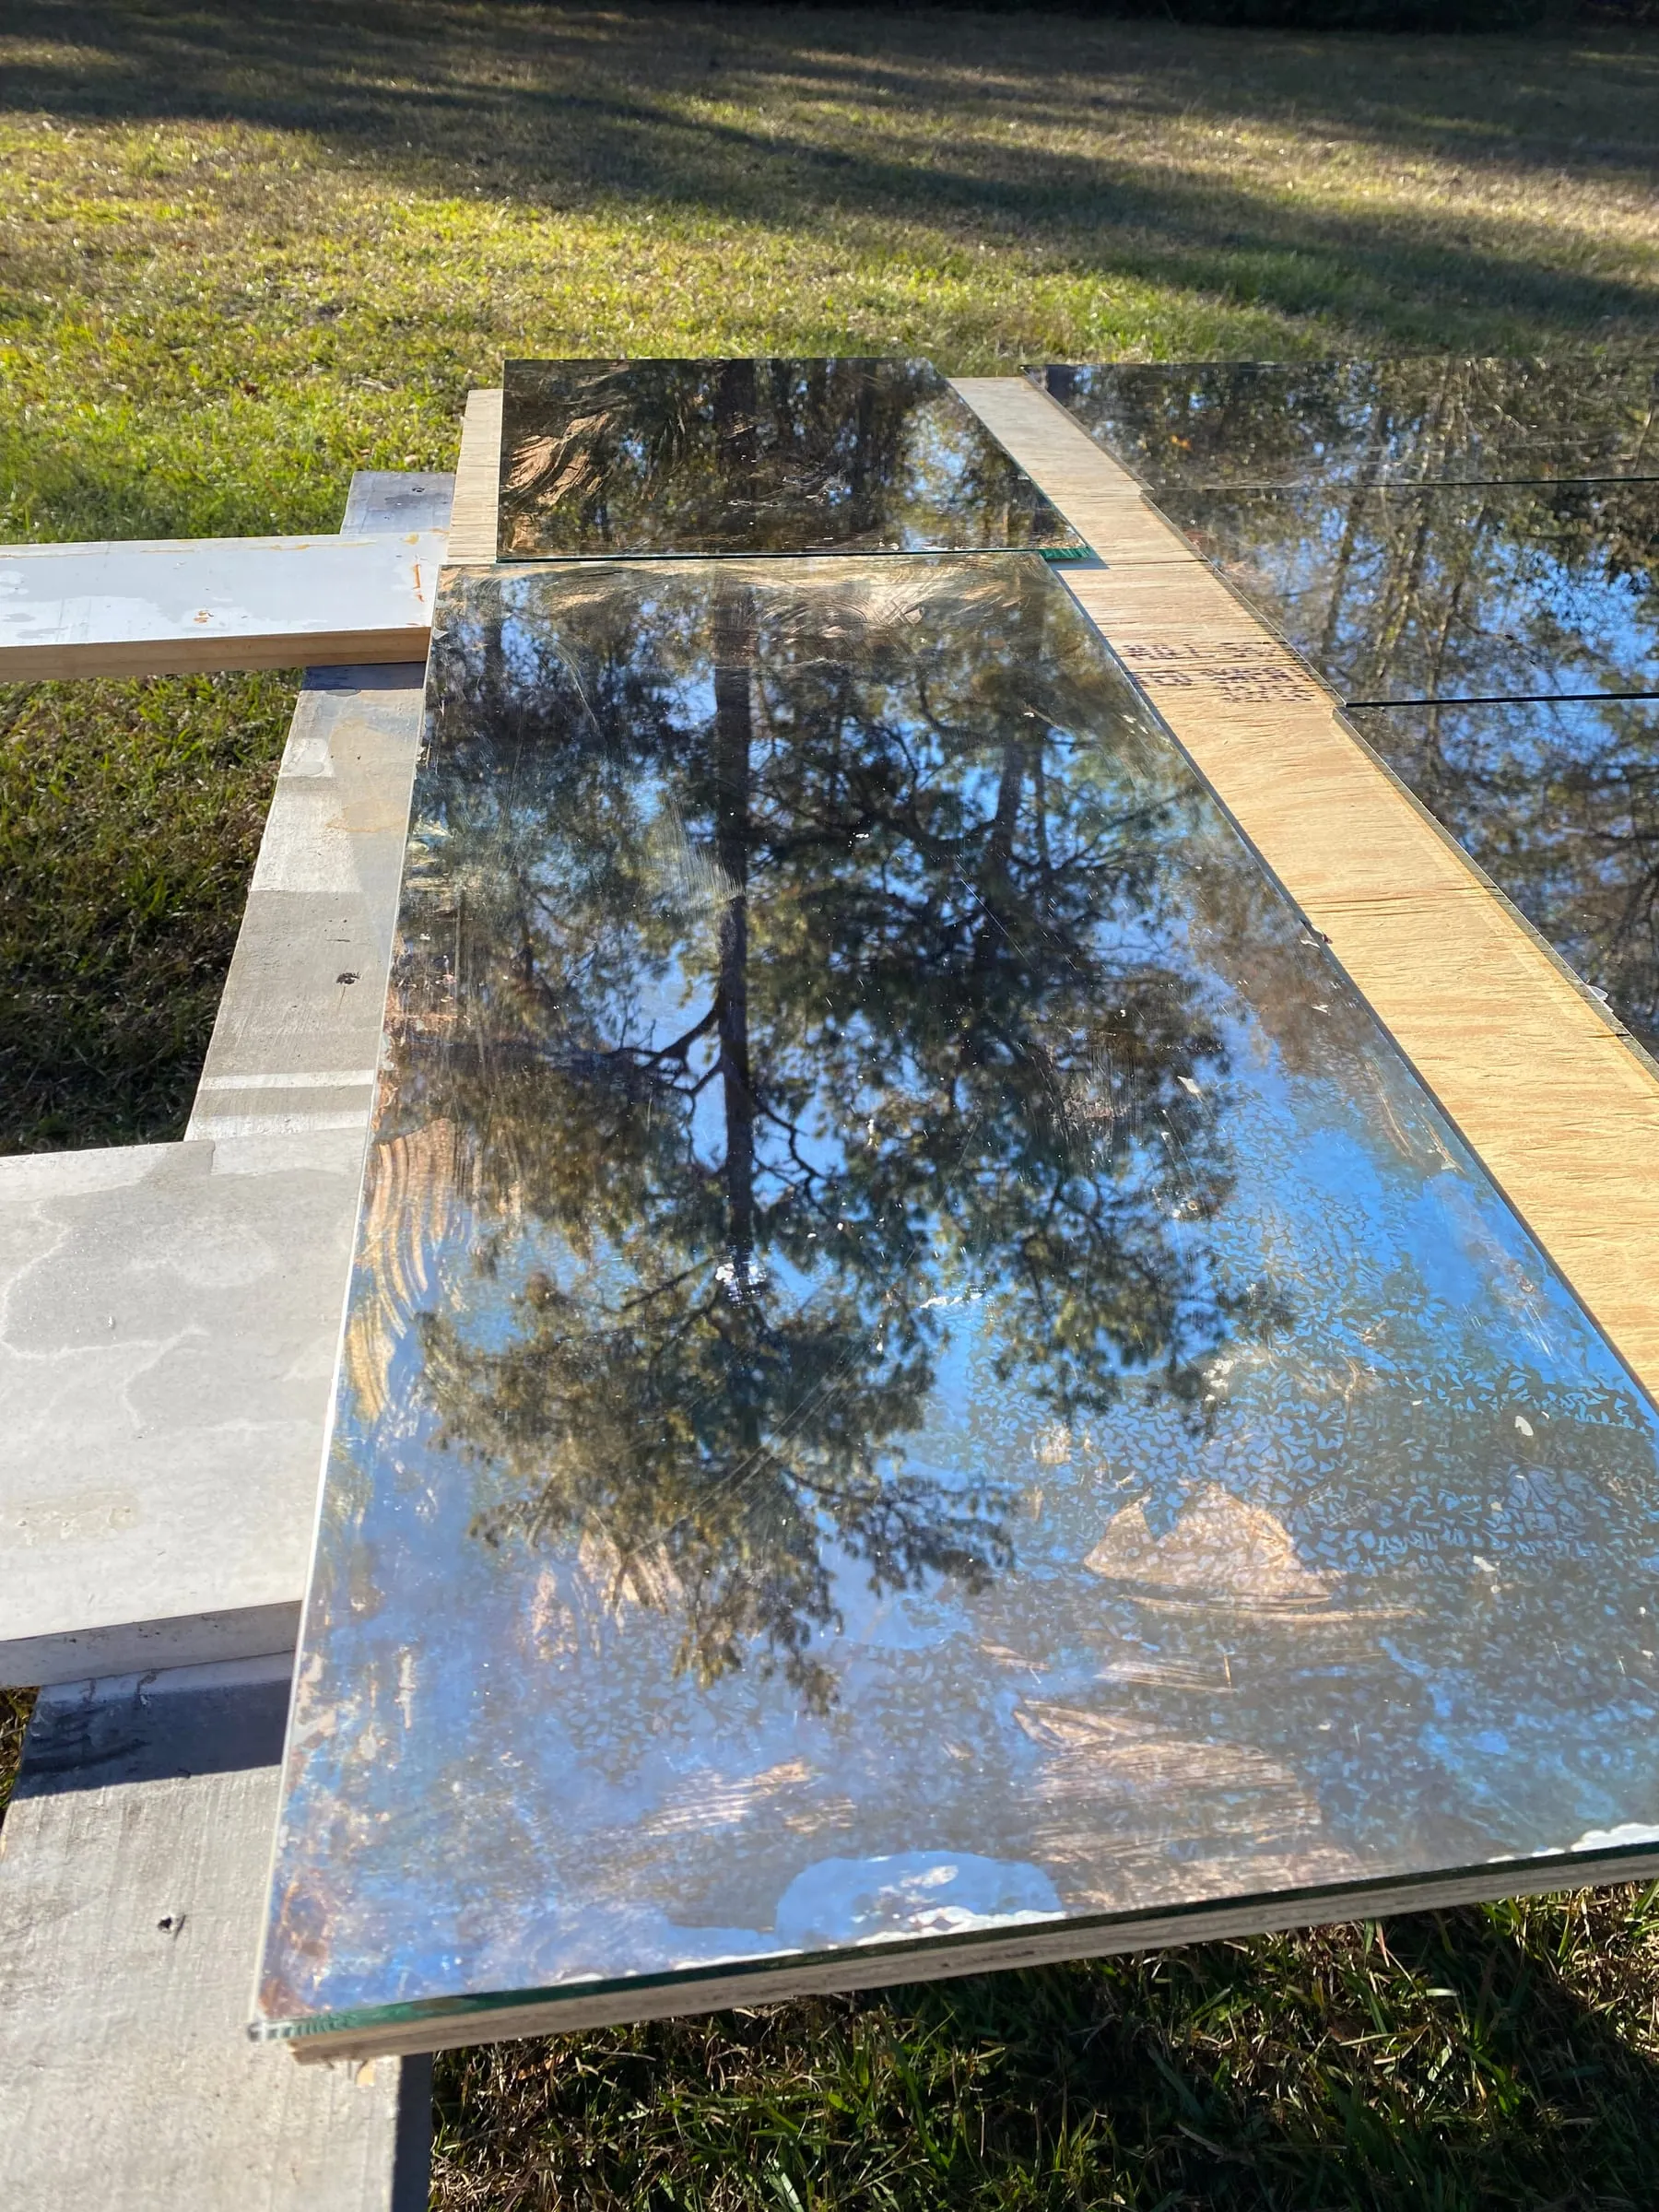
Place the mirrors on top of the newspaper with the back facing up. To remove the protective coating (usually a gray color) from the back of your mirror, pour the paint stripper and use the chip brush to spread it around evenly. You want it to be a pretty thick coat. Let the stripper sit until the gray paint bubbles up. The time it takes to do this varies with different brands as well as with different mirror backings. When I’ve used airplane stripper, it took only 15 or 20 minutes, sometimes shorter. Citristrip has taken over an hour before. Be patient; anywhere it doesn’t bubble up will either require some elbow grease or extra stripper, so don’t rush the process.
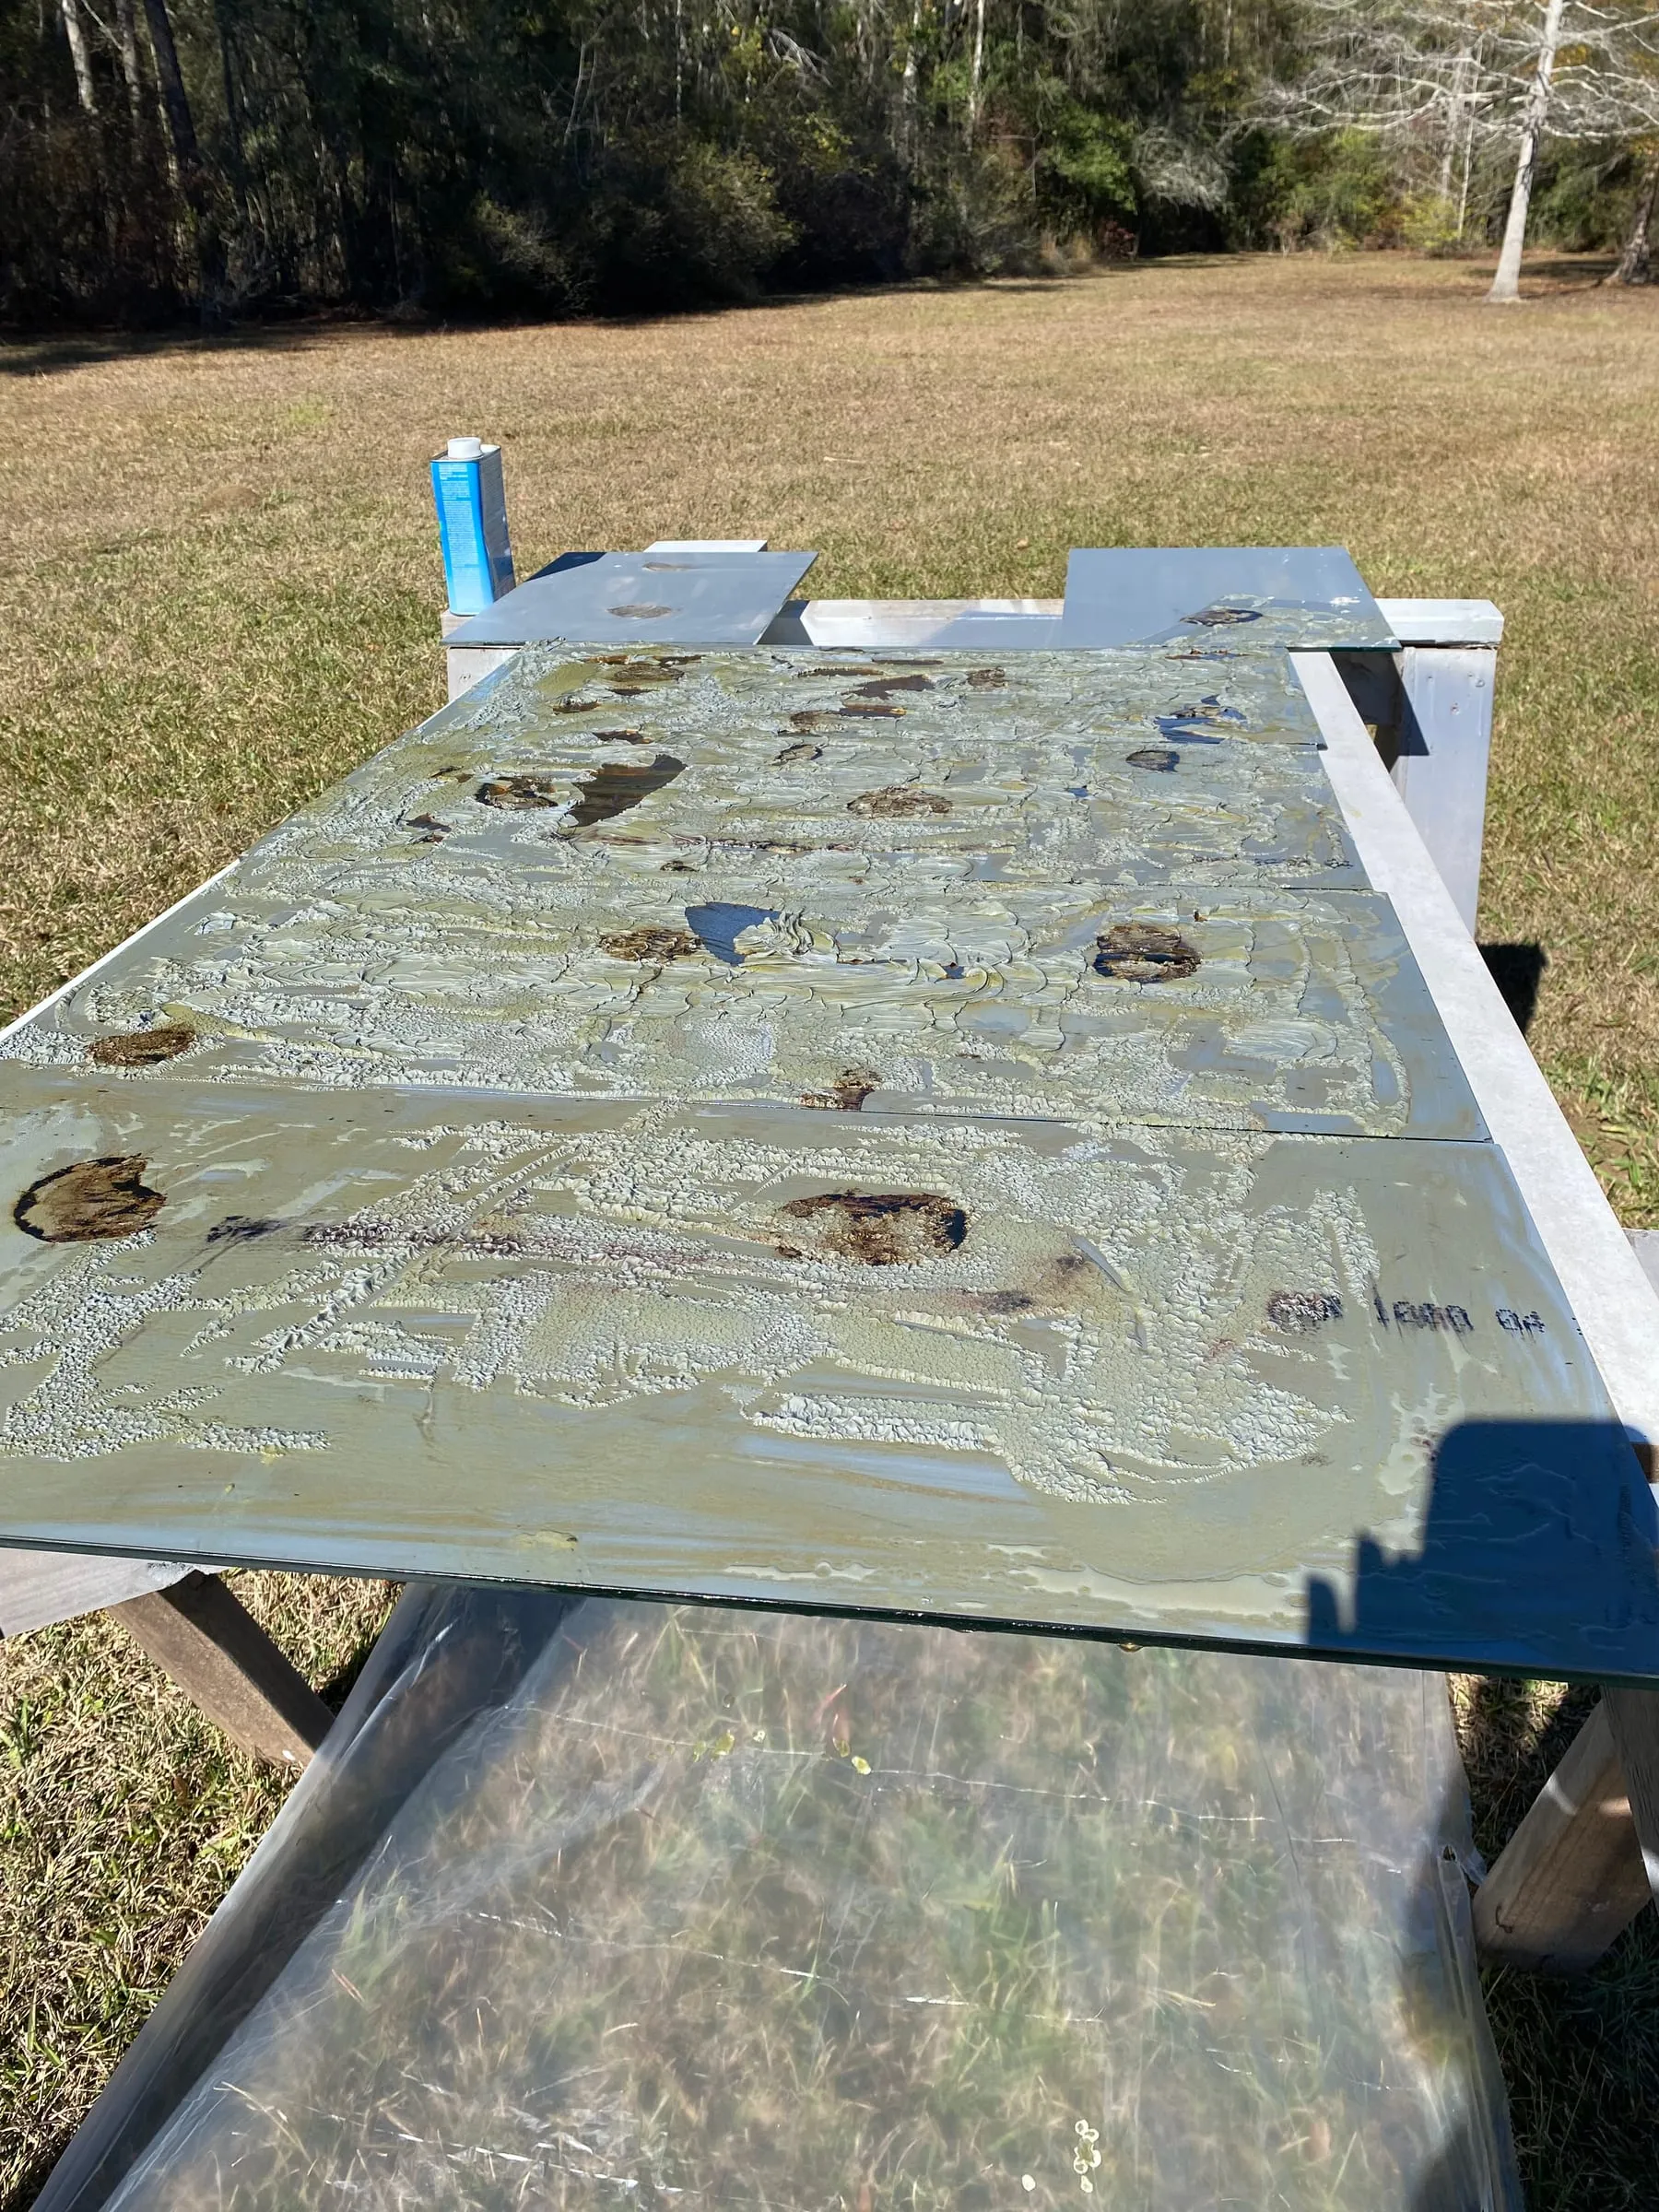
Once it has bubbled up, use the plastic scrapers to remove the paint and dispose of it in the cardboard box as you go.
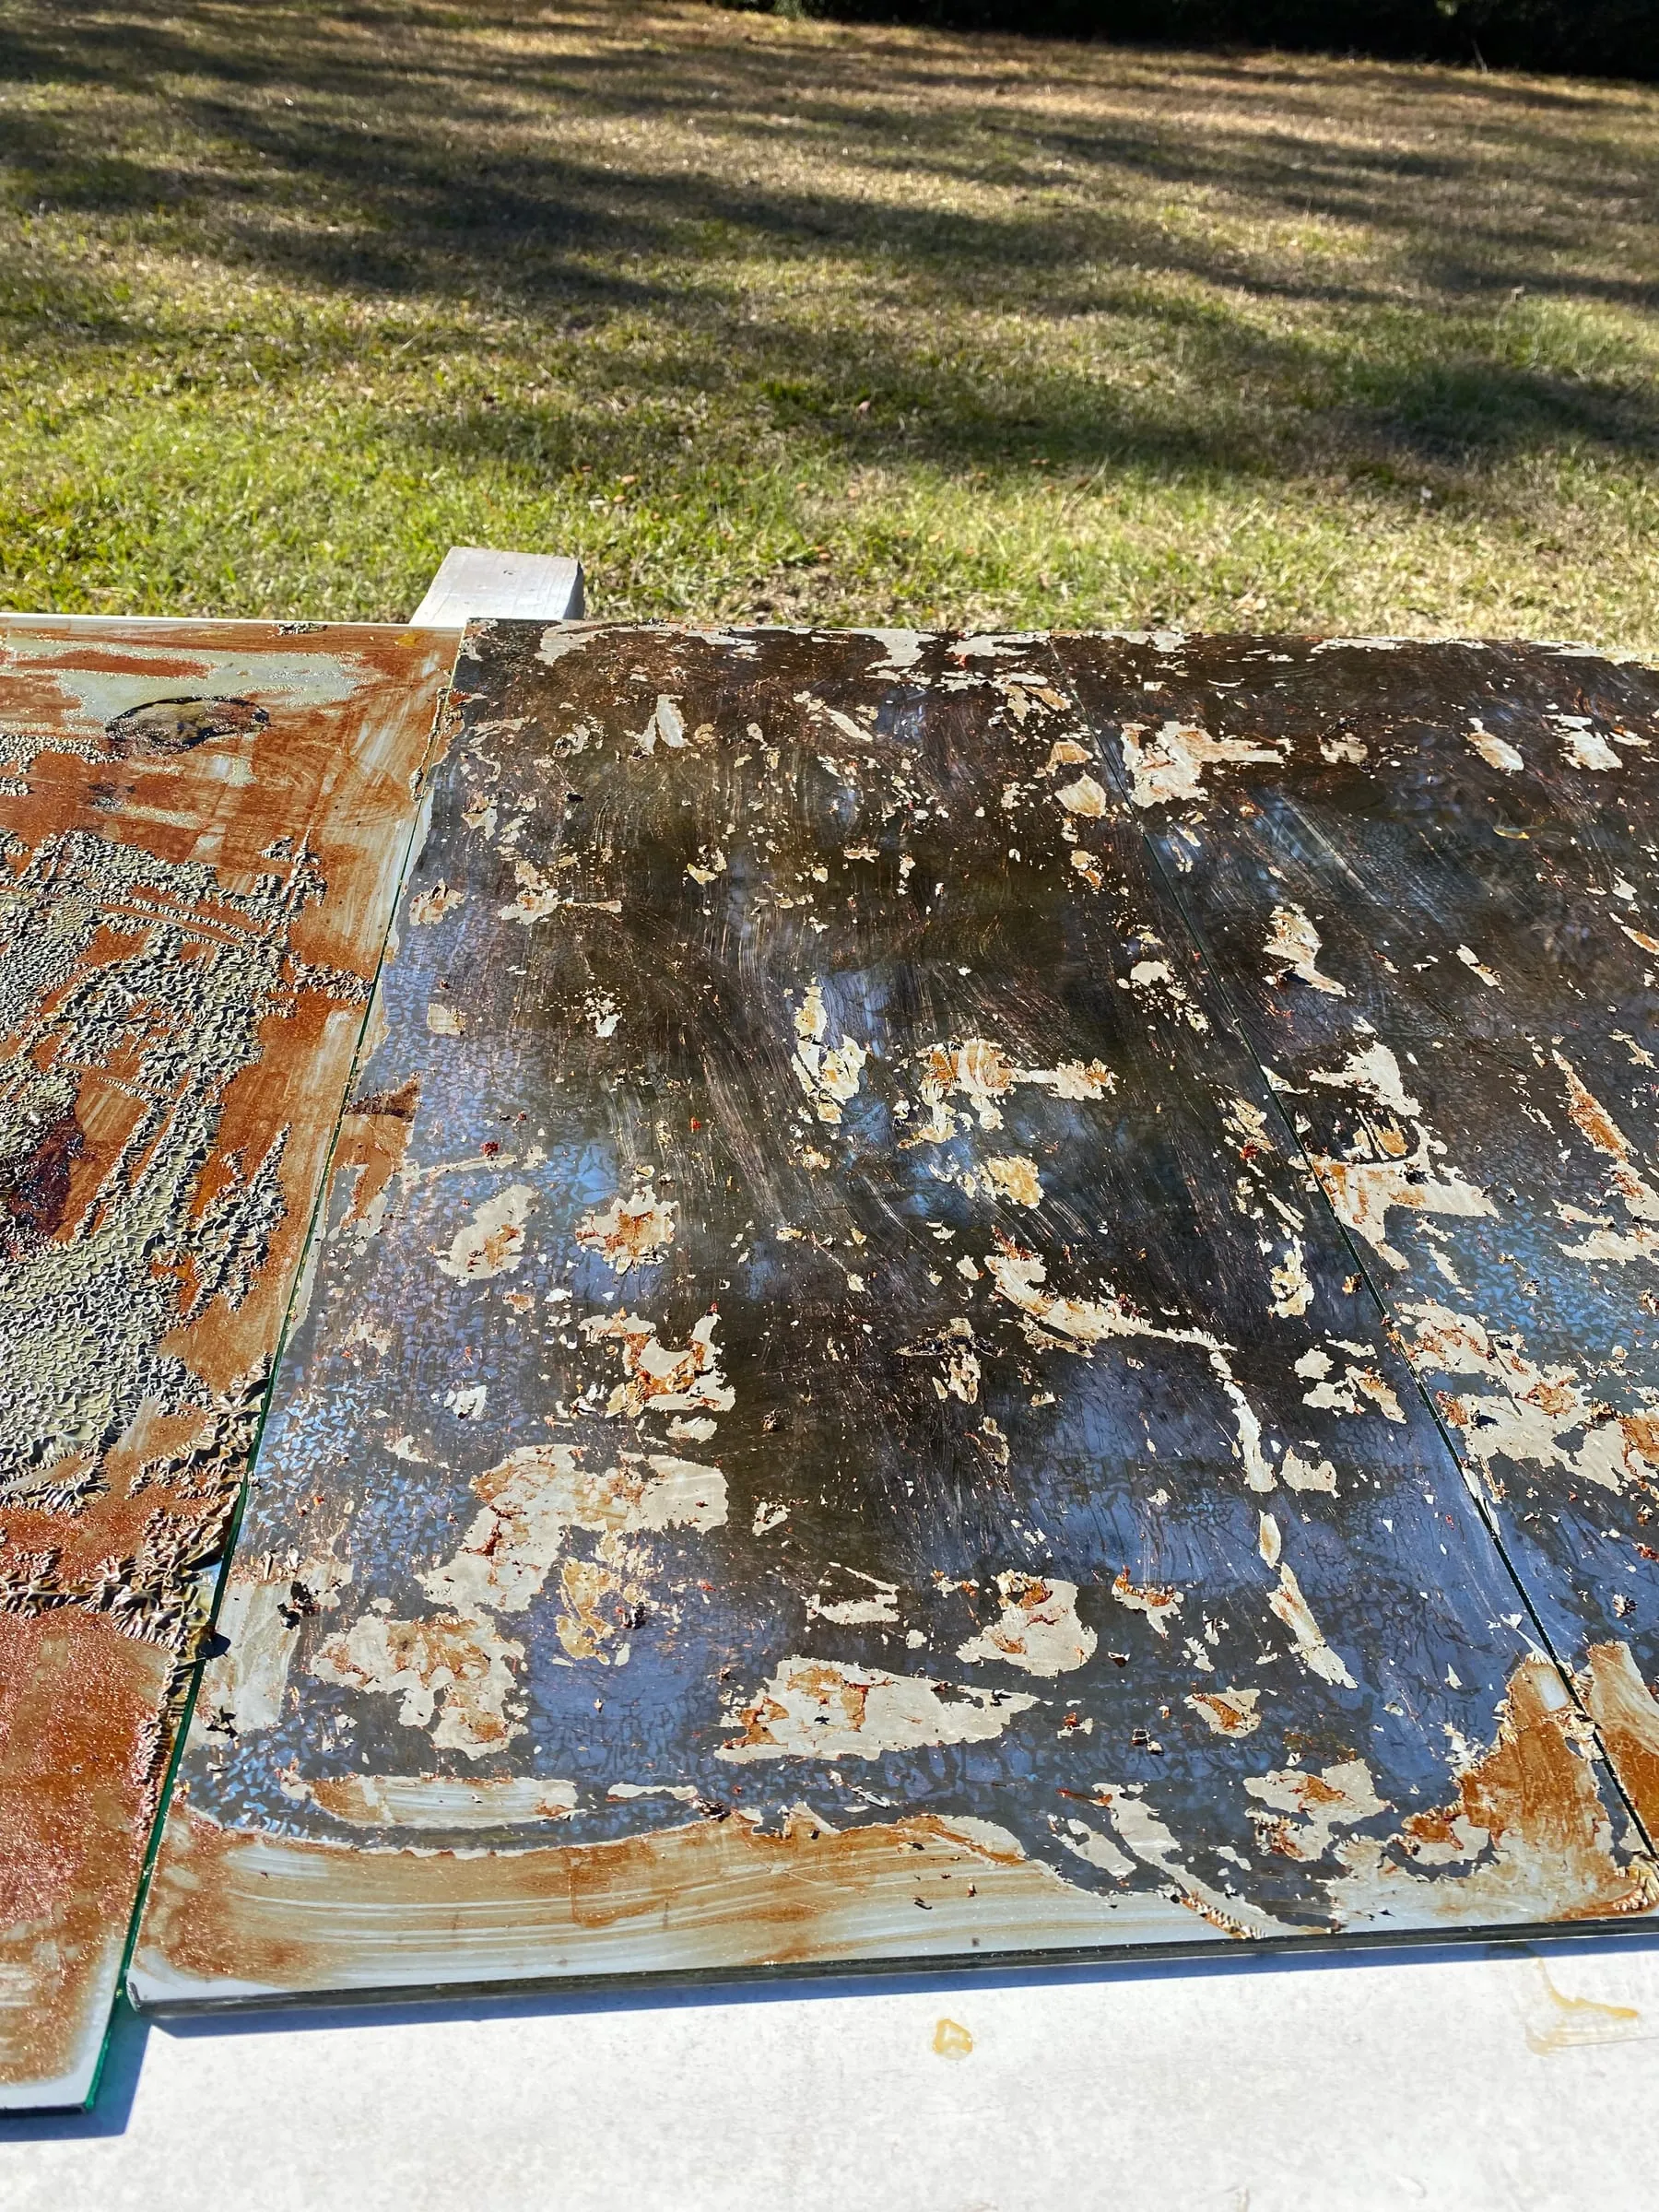
You want very little, if any, gray paint remaining. Once you’ve achieved this, rinse off the remaining stripper with a garden hose, being careful not to mix up which side is the back and which is the mirrored front as they will look similar. When finished, dry the mirror with a soft cloth, then clean it with your favorite glass cleaner. Place another couple layers of newspaper on top of the old ones and lay the mirror down with the back facing up.
Step 4. Removing the Reflective Coating
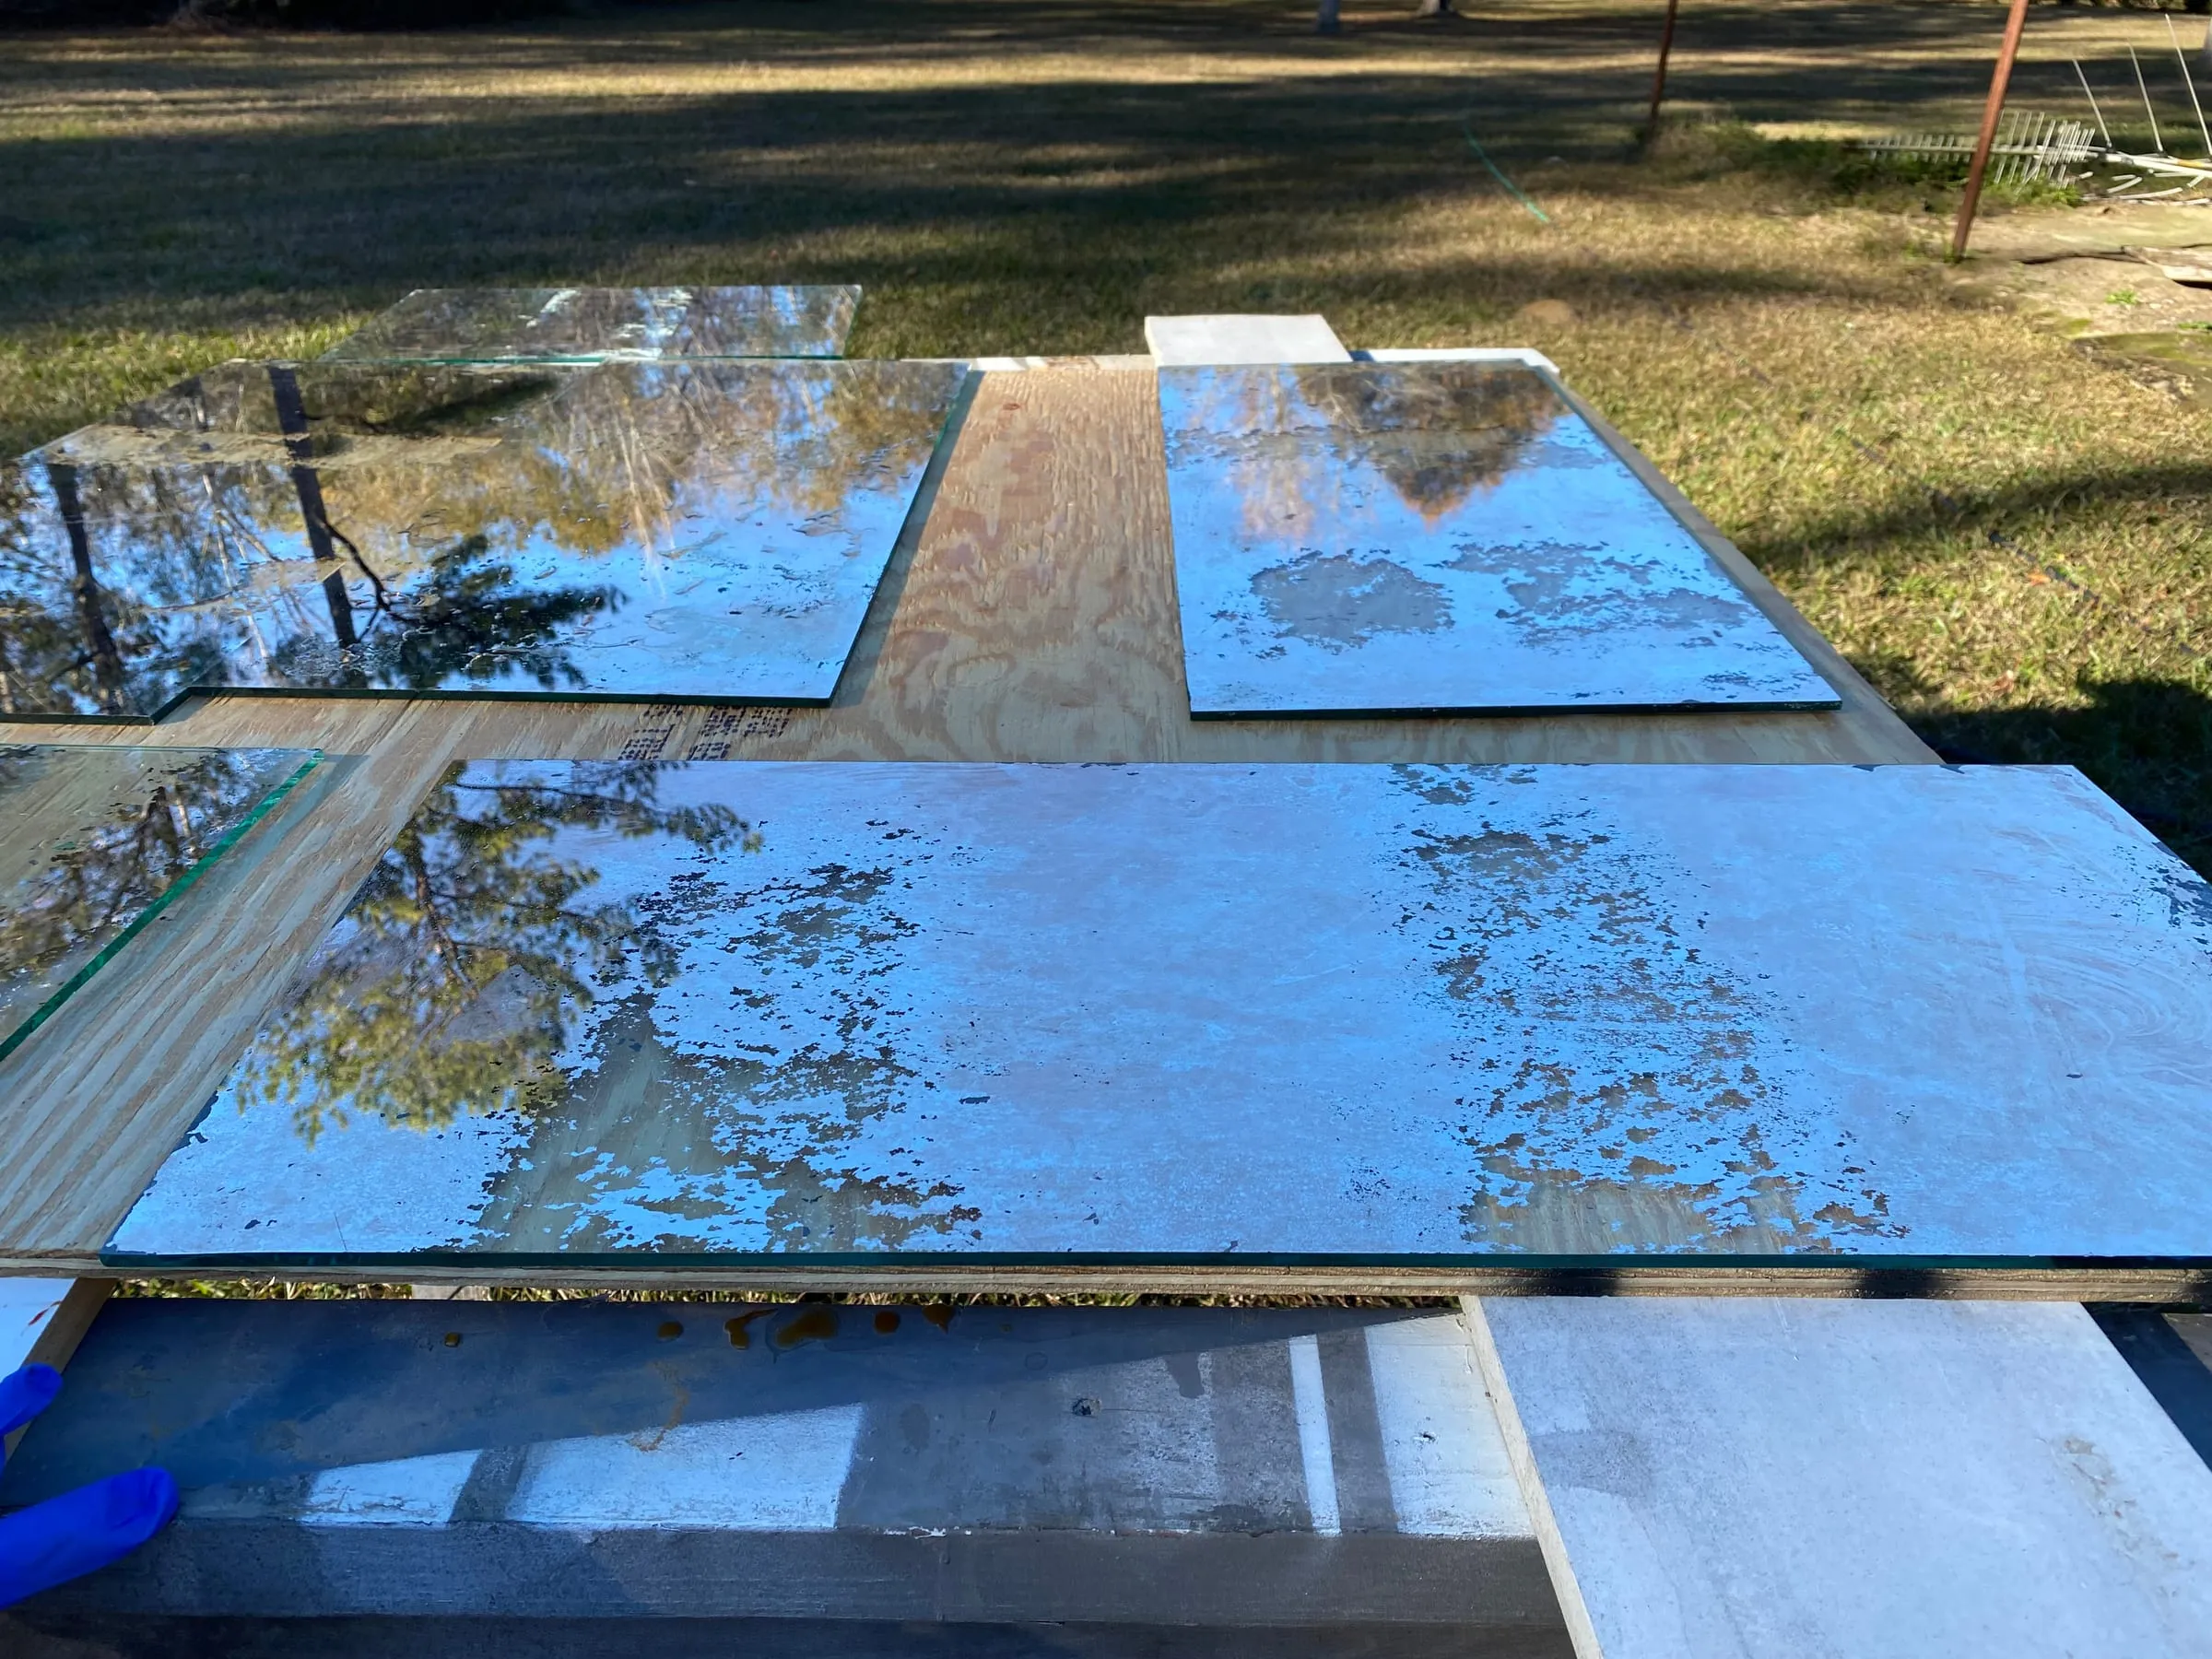
If you haven’t done so already, transfer some of the muriatic acid carefully into the spray bottle, using a funnel for safety. Don’t forget to replace your gloves if needed. Before moving on, consider what you would like your end project to look like. True antique mirror usually has spots or splotches of black, bronze, or gold color around the edges with some light flecks in other areas. You might want to mimic this if you are looking for more subdued pops of color. If you want bolder splashes of color, you’ll want to remove larger portions of the reflective coating. I suggest starting with small areas around the edges to see how quickly and how easily the acid will eat through the coating. Try to avoid removing the reflective coating in a pattern. The best results look random and natural.
Spray a fine mist of muriatic acid in one corner, wait a few seconds, then use paper towels to quickly blot the droplets. The acid should eat through the coating and you should see clear glass as you blot. If it doesn’t come off, spray a little more and wait a little longer. If you want large areas of color, spray larger droplets and allow the acid to eat through the back. Once you’ve achieved the look you’re after, quickly hose the acid off. You’ll need to work quickly to stop the chemical process.
Step 5. Painting the Mirror
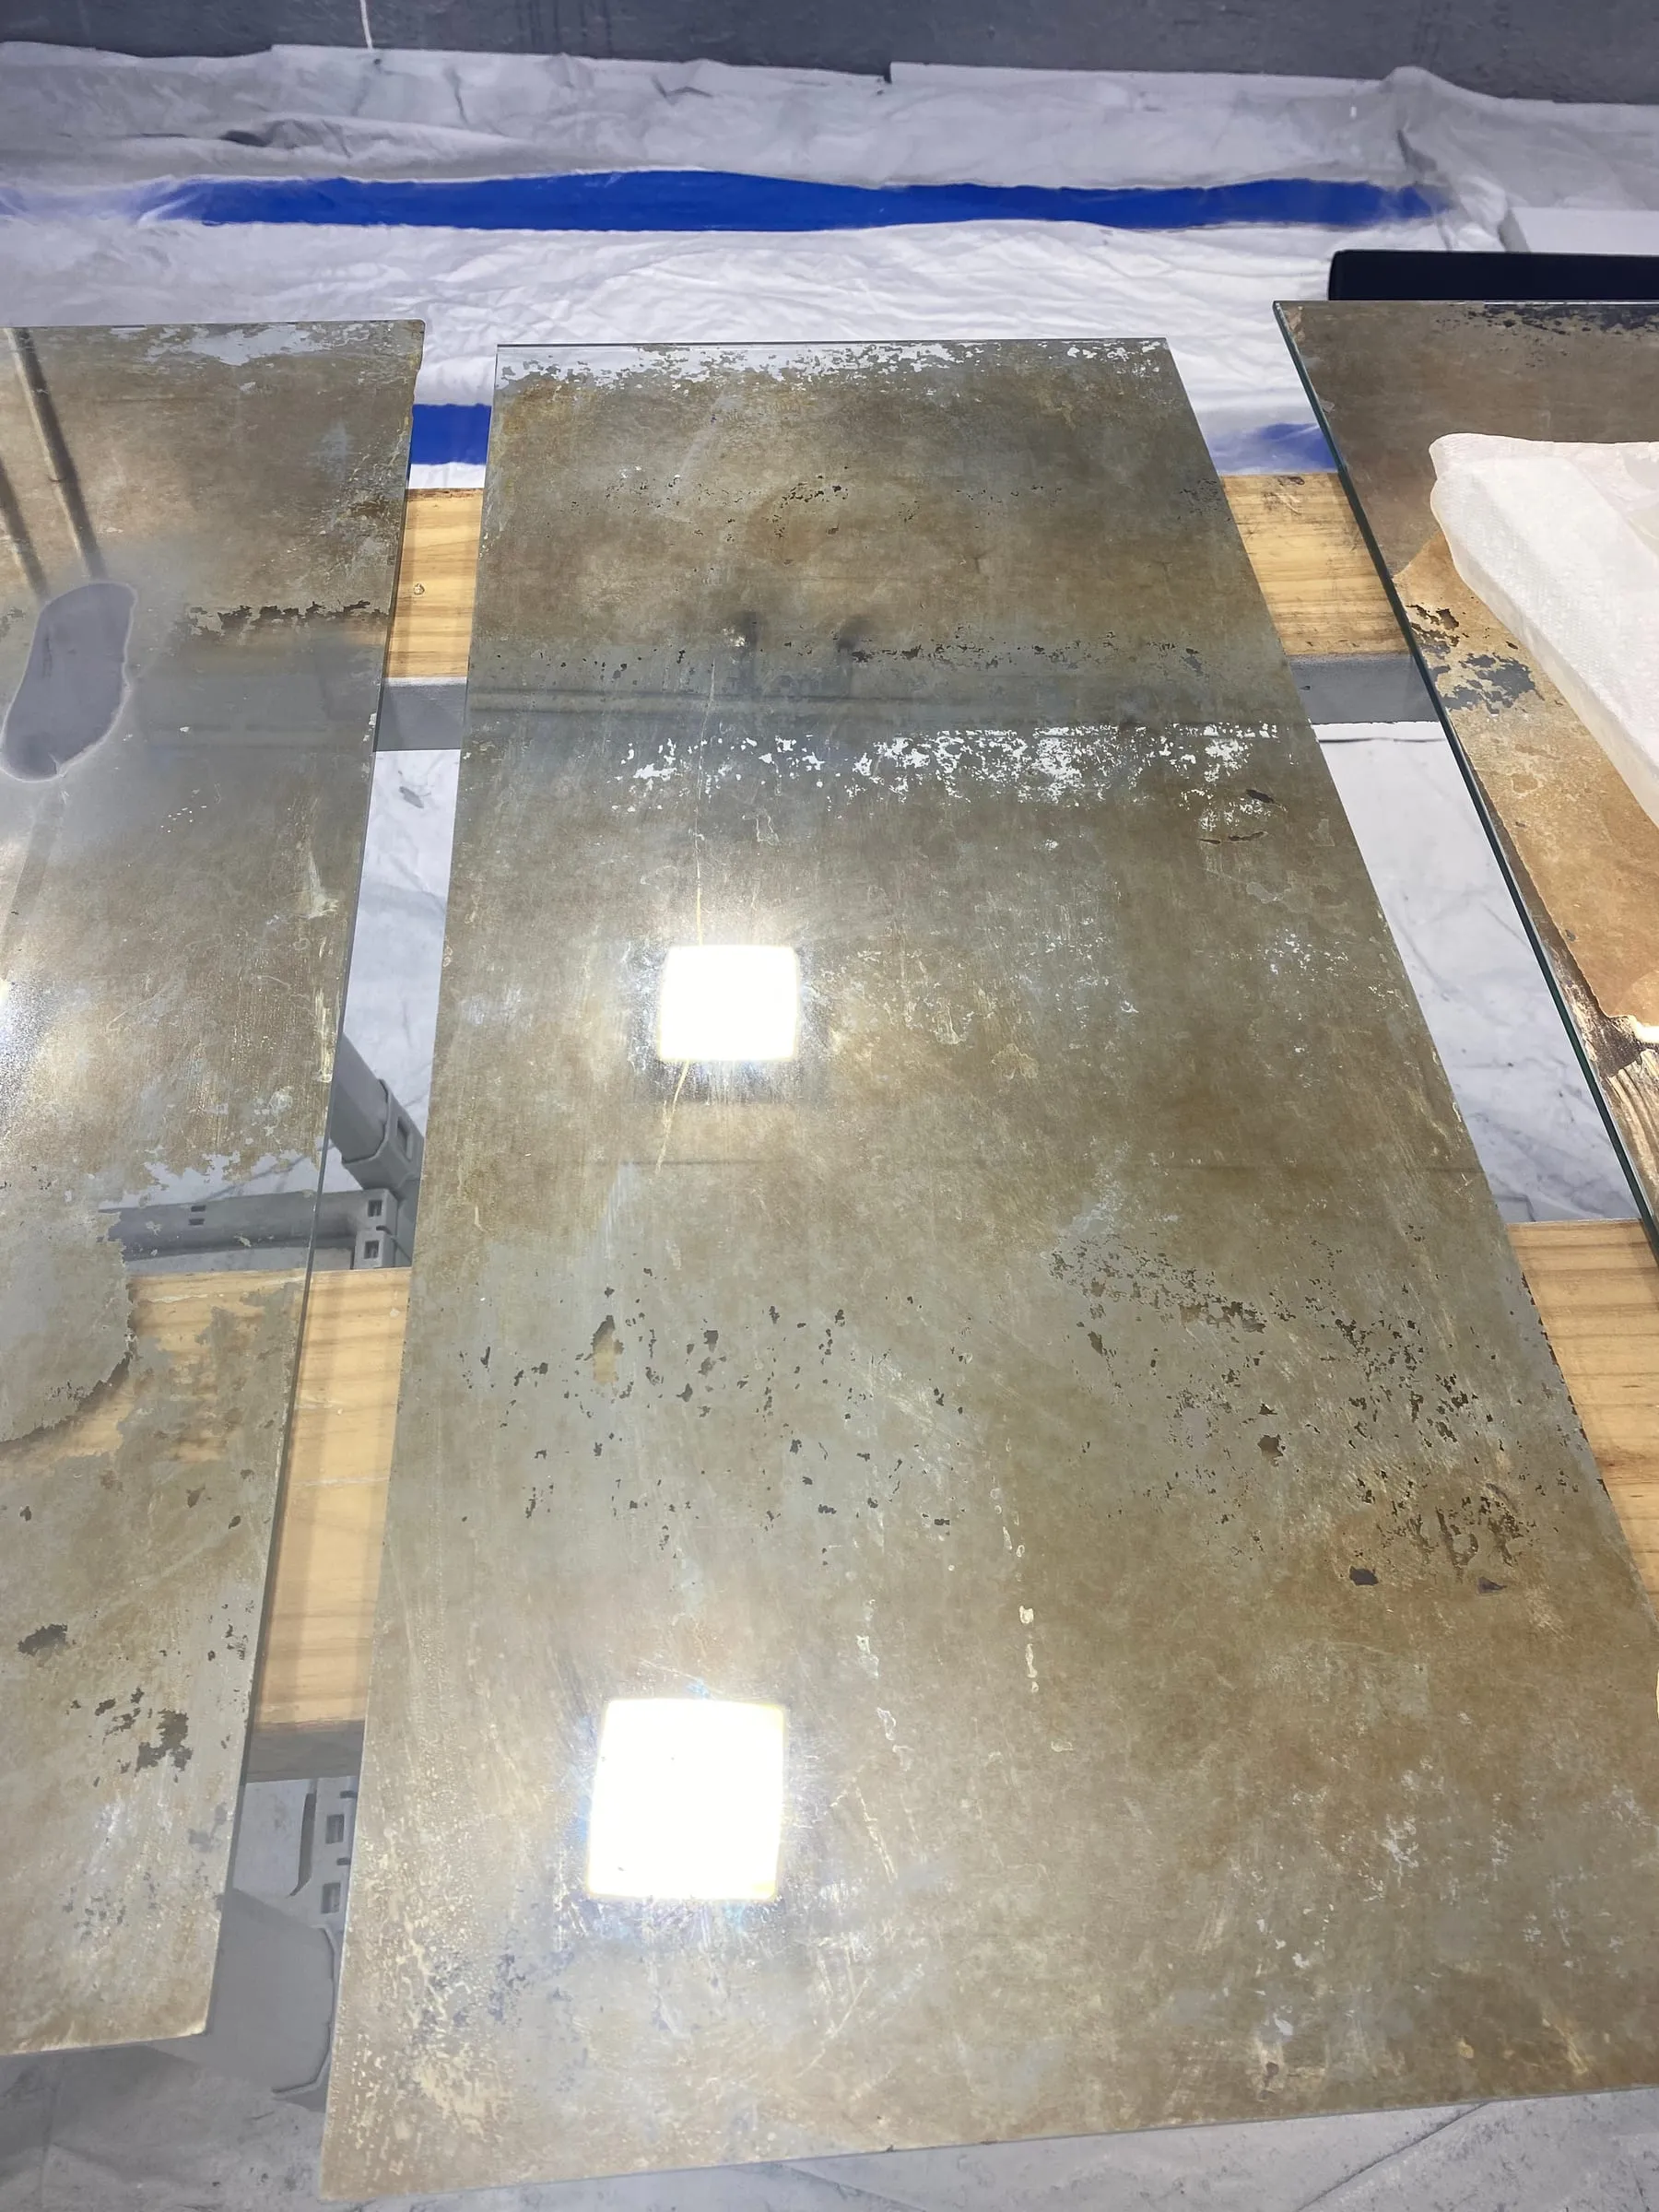
Now it’s time to create the color washed mirror. Make sure the back of the mirror is clean and dry. Review the instructions on the can for optimum performance and technique. Using the colors you’ve decided on, spray the back of the mirror in a low steady motion to avoid drips. Several coats may be required. If you have chosen to do more than one color, you will spray in small areas so that there is a mix of colors. Once you’ve achieved the look you’re after, you can leave the back as it is or you can apply a few coats of one color to complete the project and make the back look uniform. This may or may not matter to you depending on your use of the mirror. For this project, I only used a dark green so the back was already a uniform color. But, it really doesn’t matter because it will be hanging on the wall. In another project, I antiqued mirror to be inserted into the panel of cabinet doors. Here, a uniform finish will complete the look because as you open the door to retrieve objects, the back will be visible.
Step 6. Cleaning Up the Antique Window Frame
The antique window frame had a good bit of peeling paint. To sand it, I wore an N95 mask, as an added precaution. It took a combination of hand sanding with 120 grit and a mouse sander, used for both speed and to help get in the grooves. Once the wood was bare, I sanded it with 220 grit. Then I vacuumed it and used tack cloth to make sure all the sawdust and paint bits were removed.
On this project, I decided to try a type of paint that was new to me, Rust-Oleum Milk Paint. Continuing with the antique theme, I decided to whitewash it instead of painting it solid white. I applied the paint using one of my favorite brushes, the Wooster Shortcut 2″ polyester angled paintbrush. Then using a damp paint rag, I wiped the wood to remove some of the paint, allowing some of the wood grain to show through. This process was repeated until the entire frame was whitewashed.
Step 7. Installing the Mirror and Hanging Components
Happy with the outcome of the window frame, I gathered my glazier points and a chisel. I spread a towel out across my dining room table and laid the window frame on the table with the front facing down. We carefully laid the piece of mirror into the frame and got busy installing the glazier points. If you haven’t used these before, they are small clips with one sharp pointed side, which gets pushed into the wood surface using a chisel and hammer. The flat square side is used to hold the contents in the frame. Since this wood was old and soft, the points were easily pushed into the frame, securing the mirror in place. Next, we moved on to securing the fasteners to the antique window frame using a small hammer.
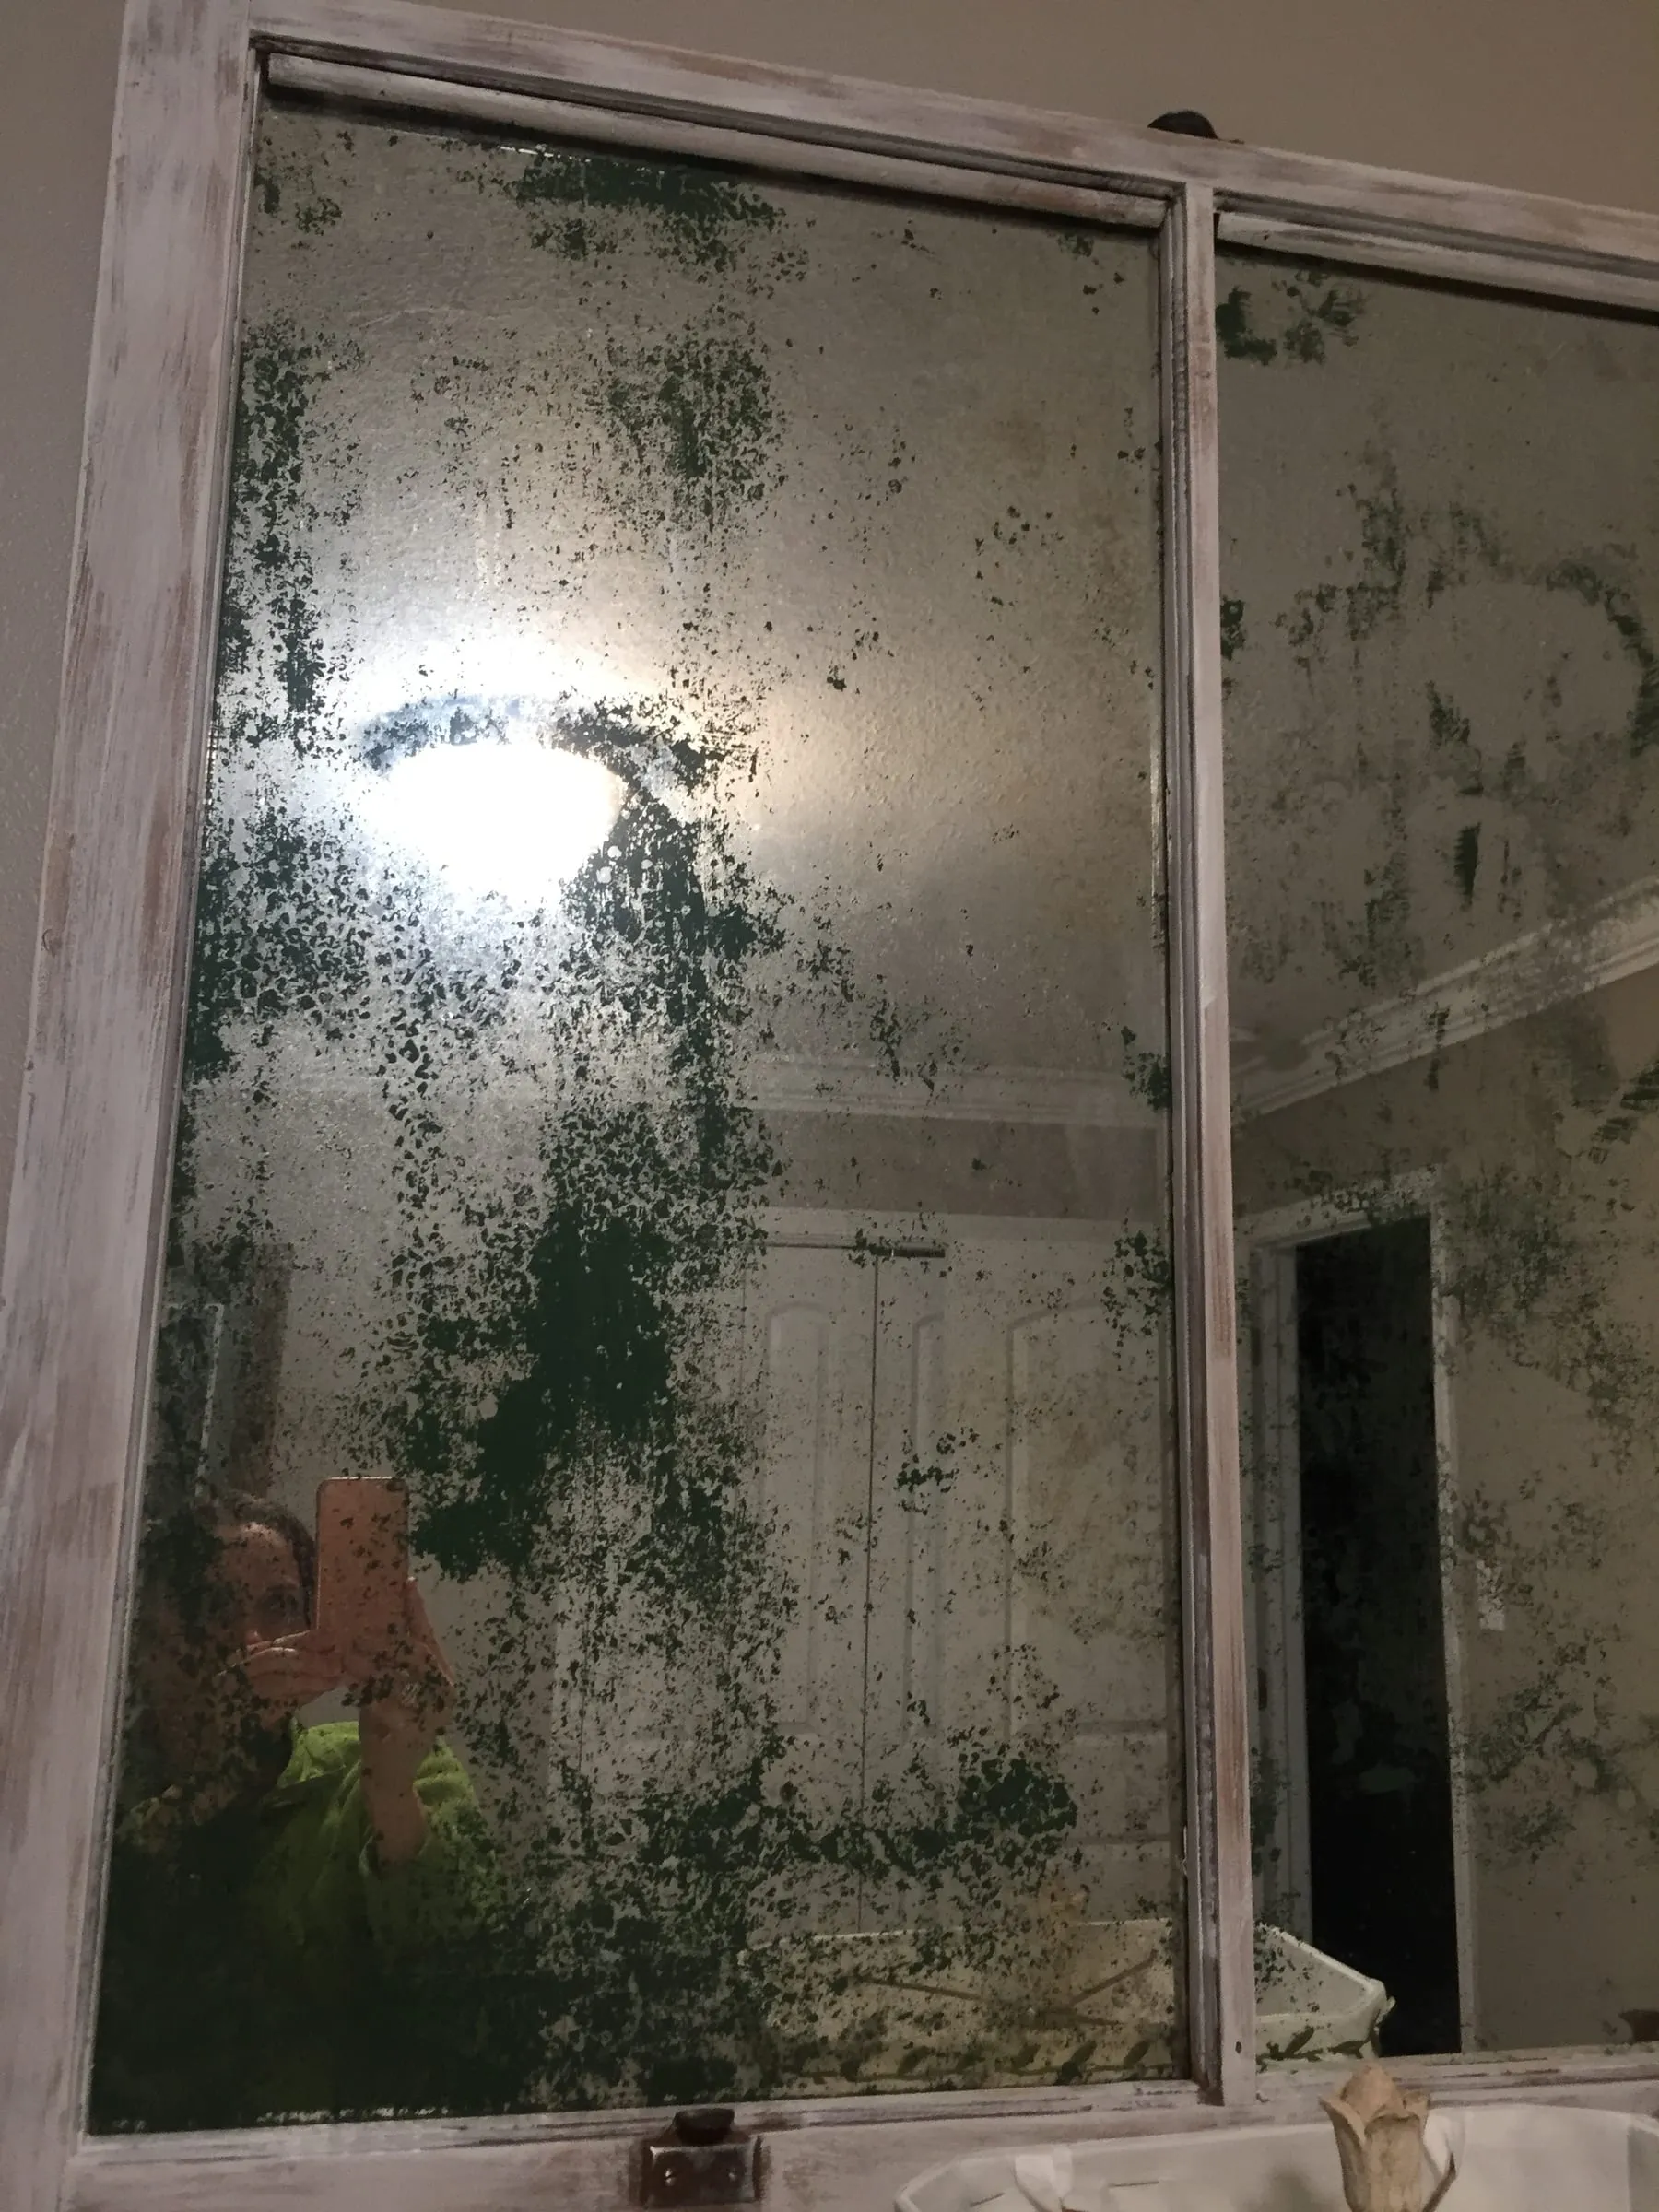
Finally, the piece was ready to adorn a wall in the guest room! Due to the weight of the piece, we decided to use D-Ring hangers to hang it. Each hanger can handle up to 75 pounds in weight. This bedroom is 11x11 and I had two twin beds placed along the back wall. A matching nightstand was centered between the two beds. The mirror was hung above this piece and created an elegant air to the design elements of the room. The color washed mirror tied in perfectly with the rest of the dark green accents, giving the room a homey and relaxing feel. Now you’ve got a designer mirror in a custom color, without the hefty price tag!
If you’ve tried this project, I’d love to see your results!
Shop the look
What I Used
Everything I used to turn an antique window frame into a color washed mirror, split between the mirror and the frame.
For the Mirror
- Paint Stripper
- Citristrip (Home Depot)
- Muriatic Acid
- Muriatic Acid (Home Depot)
- Spray Paint
- Krylon Fusion All-In-One Matte Spray Paint and Primer in Spanish Moss (Lowe’s)
For the Frame
- Milk Paint
- Rust-Oleum Milk Paint in Classic White (Home Depot)
- Paintbrush
- Wooster Shortcut 2″ Polyester Angled Paintbrush (Home Depot)
- Sander
- Black and Decker Mouse Sander (Home Depot)
- Hanging Hardware
- Glazier Points (Home Depot)
- D-Ring Hangers (Home Depot)
Save it for later